120
Appendix F: DDNS Setup (Advanced)
3
Turn the power switch to
I
to power the DVR back on.
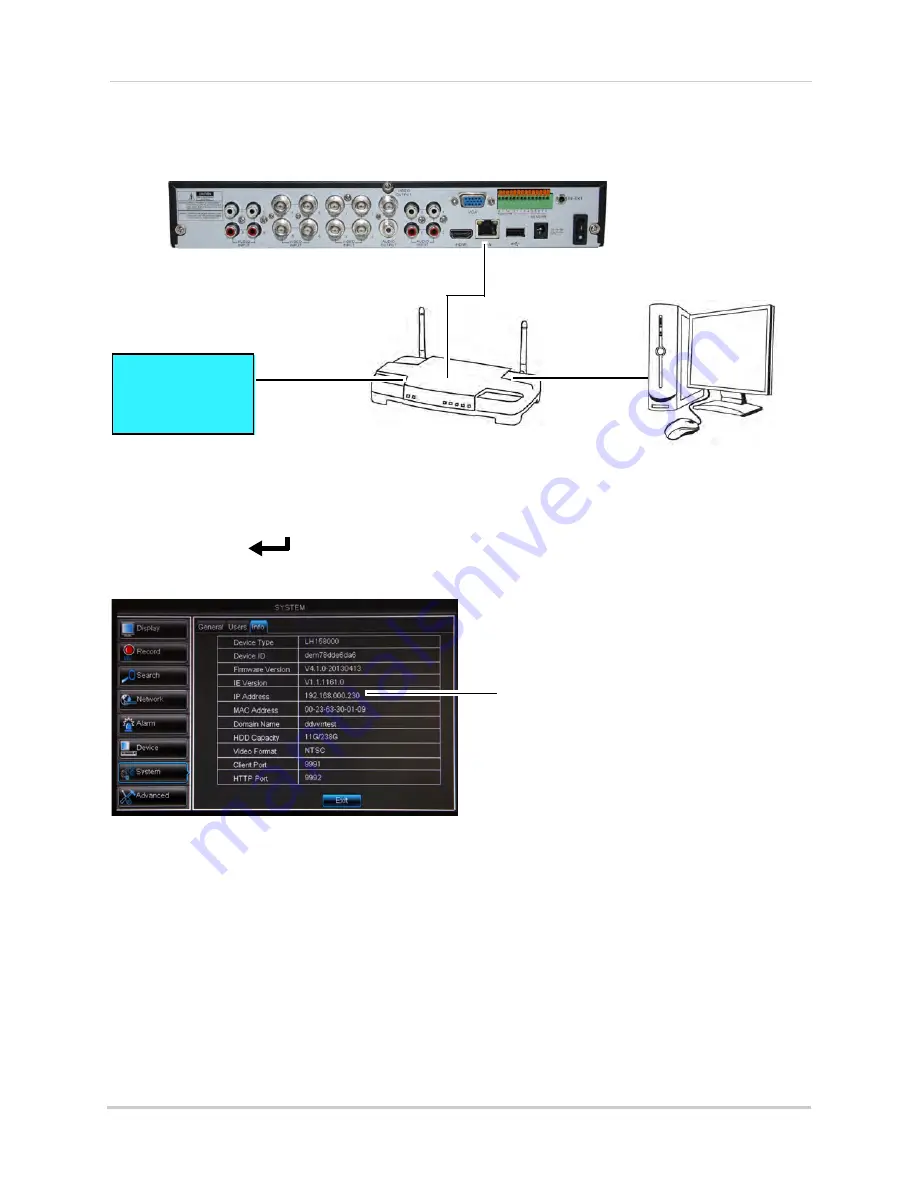
Step 2 of 3: Obtain the DVR’s Local IP Address
1
Press the
PTZ/
button on the front panel of the DVR to open the System Information
window.
If prompted, enter the system user name (default:
admin
) and password (default:
000000
).
2
Write down the
IP Address
number of the DVR.
• A local IP looks something like this: 192.168.5.118. Note that single digit numbers appear as
three digits. For example, "005" is the same as "5".
Step 3 of 3: Connect to the DVR’s Local IP Address
Follow the steps below to confirm connectivity over a local network on a PC or Mac.
To connect using the DVR’s local IP address on a PC:
1
Insert the software CD that comes included with the system. Open the CD and click
DVR
Software>Lorex Client Software - PC
. Follow the on-screen instructions to install.
•
OR
, download the
Client Software for PC
from
www.lorextechnology.com
.
ROUTER
(Not Included)
COMPUTER
(Not Included)
(not required for
local viewing)
INTERNET
Ethernet Cable (included)
8-channel model shown
DVR IP address
Содержание LH150
Страница 16: ...xiv...


