


127
Appendix F: DDNS Setup (Advanced)
•
URL Request:
Enter the web site address that will be used to connect to your Lorex product.
For example, if you enter
tomsmith
, the address to access your video will be
http://tomsmith.lorexddns.net
9
Click
Save
to register your product for DDNS. A confirmation email will be sent to the email
address used to register for My Lorex.
You will need this information to enable remote access to your system.
Record your
information below:
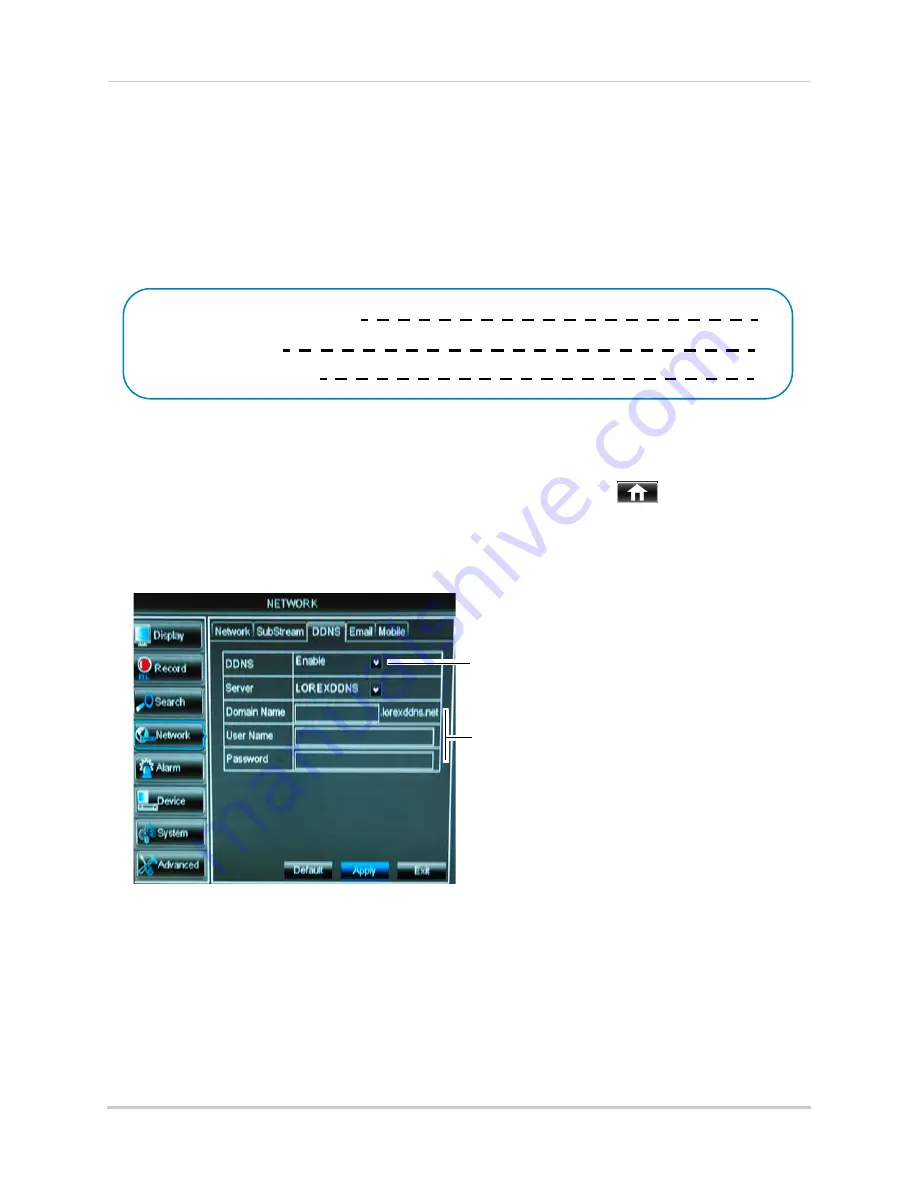
Step 3 of 4: Enable DDNS on the DVR
To enable DDNS in your DVR:
1
Right-click to open the Menu Bar and click the Main Menu button (
). Enter the system
password if prompted.
2
Click
Network
and select the
DDNS
tab
.
3
In the
DDNS
drop-down menu, select
Enable
.
4
Beside
Server
, select
LOREXDDNS
(default).
5
Under
Domain Name
, enter your
Domain name/URL Request
from the confirmation email
that was sent after you created your DDNS account.
6
Under
User Name
, enter your
DDNS User Name
that was emailed to you after DDNS
registration.
Domain name/URL Request:
DDNS User Name:
Device DDNS password:
Select
Enable
Domain Name
: Enter Domain name/URL Request
User Name
: Enter DDNS User Name
Password
: Enter DDNS Device password
tomsmith
tsmith01
******
Example of entering DDNS information in the
DDNS setup menu
Содержание LH150
Страница 16: ...xiv...