


67
User Manual
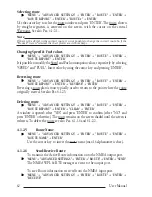
Note
FOR COLOR CHARTPLOTTER
If Color field is selected press 'ENTER': a window with 8 different colors appears, use the cursor
key to select the desired color and press 'ENTER'.
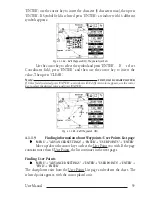
4.2.2.5
Finding information about Events: User Points List page
'MENU' + "ADVANCED SETTINGS" + 'ENTER' + "USER POINTS" + 'ENTER'
A full window is opened showing information about all stored User Points
(Marks, Events and Waypoints). Move up/down the cursor key to select the User Point
you wish. If the page contains more than 8 User Points, the list continues in the next
pages. See Par. 4.1.1.9.
4.2.2.6
Add to Route
Place cursor on Event
Press 'ENTER'. Select "ADD TO ROUTE" and press 'ENTER': the se-
lected Event is connected to the current route. The same Event can be added in
many routes.
Note
An existing Event can be connected to the current route in another mode too. Place cursor on
Event, the information window related to the Event appears, press 'CLEAR' to close the window
and then press 'ENTER', select the Waypoint option and press 'ENTER'. The Event is connected
to the current route.
4.3 MORE ABOUT A-B-C-D FUNCTION
The A-B-C-D function, explained in the previous paragraph 3.3, if Advanced
Mode is selected, allows you not only to create the A, B, C, D points and to delete
them, but also to modify and move them.
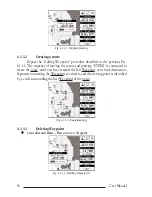
4.3.1 INSERTING THE A-B-C-D POINTS
Place the cursor on the desired position and press 'ENTER'. On the screen
the Create window appears, by using the cursor key select "A-B-C-D" and press
'ENTER': the A point and an information window on A appear. Move the cursor,
press 'ENTER', select "A-B-C-D" and press 'ENTER' again: the B point appears,
connected to A with a straight segment; an information window on A-B segment
(distance (DST), bearing (BRG) and total distance from the first point) appears. Moving
the cursor, pressing 'ENTER', selecting "A-B-C-D" and pressing 'ENTER' places
the C and D points (see previous Fig. 3.3.1).
Содержание Compact 7 Plus
Страница 14: ...16 User Manual...
Страница 19: ...21 User Manual Fig 2 5 1 GPS Connection on Port 3...
Страница 50: ...52 User Manual...
Страница 87: ...89 User Manual 6 For the Technician 6 1 DIMENSIONS Fig 6 1 EXCALIBUR models Dimensions...
Страница 92: ...94 User Manual Fig 6 4a GPS Connection on Port 3 for chartplotter with external GPS receiver...
Страница 98: ...100 User Manual...


