24
User Manual
3. Set the C-COM for Port 1 as follows:
'MENU' + "BASIC SETTINGS" + 'ENTER' + "INPUT/OUTPUT" + 'ENTER' +
"PORT 1 INPUT" + 'ENTER' + "C-COM" + 'ENTER'
The C-COM can be connected also to the Port 2 and 3, in this case select the
format on the used port.
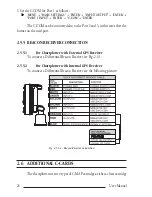
2.5.5 BEACON RECEIVER CONNECTION
2.5.5.1
For Chartplotter with External GPS Receiver
To connect a Differential Beacon Receiver see Fig. 2.5.1.
2.5.5.2
For Chartplotter with Internal GPS Receiver
To connect a Differential Beacon Receiver see the following picture:
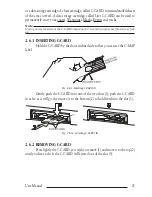
Fig. 2.5.5.2 - Beacon Receiver Connection
2.6 ADDITIONAL C-CARDS
The chartplotter uses two types of C-MAP cartridges: either a chart cartridge
Содержание Compact 7 Plus
Страница 14: ...16 User Manual...
Страница 19: ...21 User Manual Fig 2 5 1 GPS Connection on Port 3...
Страница 50: ...52 User Manual...
Страница 87: ...89 User Manual 6 For the Technician 6 1 DIMENSIONS Fig 6 1 EXCALIBUR models Dimensions...
Страница 92: ...94 User Manual Fig 6 4a GPS Connection on Port 3 for chartplotter with external GPS receiver...
Страница 98: ...100 User Manual...

