40
Caution:
Do not touch the calibration mirror surface.
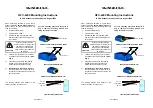
The three calibration samples (number 1 in the figure below) must be on the right-hand side of the calibration
mirror when looking from the front.
If you have LCI1600 or LCI1620, add a paper (such as a Post-it Note) to hide the left side of the groove
specimen, as seen in the picture below:
Figure 42. Paper on the groove specimen
2.
Select
Calibration
in the header.
3.
If the calibration block is certified, enter the specified groove heights in the
Certified Groove Height 30
and
Certified Groove Height 1000
edit boxes. If the calibrated depth is not known, use values 30 and 1000.
4.
Select
Z-Calibration
.
Figure 41 Calibration Mirror
Содержание FocalSpec
Страница 1: ...FocalSpec 3D Line Confocal Scanner UULA...
Страница 58: ...58 Figure 58 Output Settings 1 Figure 590 Output Settings 2...
Страница 64: ...64 Figure 65 Banding 2 Zooming You can zoom in to view more details Figure 66 Banding Period 300 m...
Страница 67: ...67 Figure 68 Rotating a Picture To open the 3D view select Studies View group 3D View Figure 69 Rotated Picture...
Страница 73: ...73 Figure 77 Rotating a Picture To open the 3D view select Studies View group 3D View Figure 78 Rotated Picture...
Страница 82: ...82 2 11 Declaration of Conformity Figure 92 Declaration of Conformity...


