April 27, 2004 Manual Version 1.01
4.21
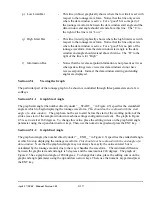
and down arrow keys to place the editing cursor (not the measuring cursor) on the parameter to change.
Assuming the operator has access (via RUN/PROG key or access code), the numeric keypad can be used
to key in a new value or the decrement (m) and increment (l) keys can be used to decrement or increment
the value. The graph will immediately reflect the changes made. Note that by holding down the
decrement and increment keys the operator can effectively “drag” the setpoint graphically to where it
needs to be. The key thing to remember is that the increment and decrement keys apply to the value the
editing cursor is currently on.
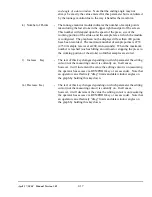
An additional editing method is provided for setting the data window start and end angles. When a data
window is selected and the editing cursor is on the start angle parameter in the information box, a
softkey with the legend “SET DW START ANG AT CURSOR” will appear. Pressing this key will set
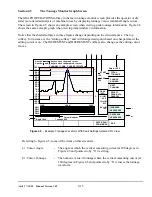
the data window start angle where the measuring cursor ( “h” in Figure 4.5), not the editing cursor, is
positioned at. If the angle read out (“a” in Figure 4.5) indicates 167.0 degrees and the SET DW START
ANG AT CURSOR softkey is pressed, the system will attempt to set the start angle for the currently
selected data window (as shown by the highlighted data window name - see “o” in Figure 4.6) to 167.0
degrees. Note that this will fail if for some reason the angle would be invalid - such as a start angle
larger than an end angle. The same procedure can be used for the data window end angle, with the
softkey reading instead: “SET DW END ANG AT CURSOR”. Note that data windows can overlap, but
the settings for the first (lower numbered) data window will take precedence. For example, if data
window 2 and data window 4 overlap, the settings for data window 2 will be used in the overlapped
portion of the stroke.
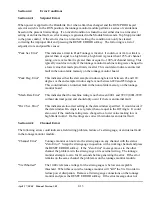
Section 4.5.3
N/A
Section 4.5.3.1
N/A
Section 4.5.3.2
N/A
Содержание OmniLink II
Страница 5: ...April 27 2004 Manual Version 1 01 iv ...
Страница 7: ...April 27 2004 Manual Version 1 01 1 2 ...
Страница 21: ...April 27 2004 Manual Version 1 01 3 8 ...
Страница 43: ...April 27 2004 Manual Version 1 01 4 22 Section 4 5 3 3 N A Section 4 5 3 4 N A Section 4 5 3 5 N A ...
Страница 44: ...April 27 2004 Manual Version 1 01 4 23 Section 4 5 4 N A ...
Страница 45: ...April 27 2004 Manual Version 1 01 4 24 ...
Страница 69: ...April 27 2004 Manual Version 1 01 7 14 ...
Страница 77: ...April 27 2004 Manual Version 1 01 8 8 ...
Страница 79: ...April 27 2004 Manual Version 1 01 9 2 ...
Страница 81: ...April 27 2004 Manual Version 1 01 10 2 ...

