April 27, 2004 Manual Version 1.01
4.8
Section 4.2.2.5
Turning Low Limits ON or OFF
Pressing the LOW LIMITS ON/OFF softkey will toggle all low limits (including those in all data
windows) ON or OFF. This key is only available when viewing forward tonnage (as in Figure 4.2 and
Figure 4.3). Like changing setpoints, this is a restricted operation. The operator must have access to this
operation via RUN/PROG Key or access code depending on how the system has been configured (See
Section 2 for access configuration details). When low limits are turned off, “Low Lims OFF” will be
displayed with a yellow background just below the tonnage reading on each channel. Note that
Individual low limits can be effectively turned OFF by setting the limit to zero.
Section 4.2.2.6
Turning Reverse Limits ON or OFF
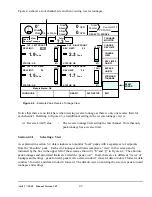
Pressing the REV LIMITS ON/OFF softkey will toggle all reverse limits ON or OFF. This key is only
available when viewing reverse tonnages (as in Figure 4.4). Like changing setpoints, this is a restricted
operation. The operator must have access to this operation via RUN/PROG Key or access code
depending on how the system has been configured (See Section 2 for access configuration details).
When reverse limits are turned off, “Rev Lims OFF” will be displayed with a yellow background just
below the tonnage reading on each channel. Note that individual reverse limits can be effectively turned
OFF by setting the limit to a large negative number (up to 100% of channel rating).
Section 4.2.3
Setting Additional Data Window Parameters
In addition to high and low setpoints, data windows have three other parameters associated with them.
Section 4.2.3.1
Turning Data Windows ON or OFF
Each data window can individually be turned ON or OFF. When OFF, the limits associated with the
data window are NOT enforced. To set the data window ON/OFF state, change the view to the data
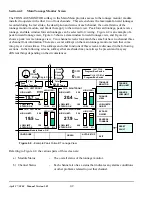
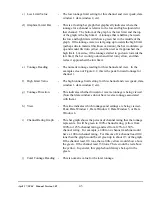
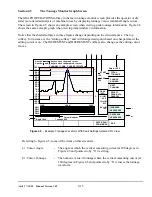
window desired. The screen should look something like Figure 4.3. Place the data entry cursor on the
ON/OFF parameter in the View box as pointed to by “k” in Figure 4.3. Softkey 1 (The uppermost
vertical softkey) should read “DATA WIN ON/OFF”. This softkey toggle the data window setting
between ON and OFF when pressed.
Section 4.2.3.2
Setting the Data Window “Start Angle”
The “Start Angle” for data window is the crankshaft angle at which the setpoints associated with the
window start to be enforced. To change the start angle, change the view to the data window desired.
The screen should look something like Figure 4.3. Place the data entry cursor on the “Start Ang”
parameter (“l” in Figure 4.3). Softkey 1 (The uppermost vertical softkey) should read “CHANGE
START ANGLE”. Press this softkey to enter numeric entry mode. Enter the new value with the
numeric keypad and press the ENT key to set the angle. The start angles can be entered with a resolution
of .5 degrees and MUST be less than the end angle for that data window!
Section 4.2.3.3
Setting the Data Window “End Angle”
The “End Angle” for data window is the crankshaft angle at which the setpoints associated with the
window start to be enforced. To change the end angle, change the view to the data window desired. The
screen should look something like Figure 4.3. Place the data entry cursor on the “End Ang” parameter
Содержание OmniLink II
Страница 5: ...April 27 2004 Manual Version 1 01 iv ...
Страница 7: ...April 27 2004 Manual Version 1 01 1 2 ...
Страница 21: ...April 27 2004 Manual Version 1 01 3 8 ...
Страница 43: ...April 27 2004 Manual Version 1 01 4 22 Section 4 5 3 3 N A Section 4 5 3 4 N A Section 4 5 3 5 N A ...
Страница 44: ...April 27 2004 Manual Version 1 01 4 23 Section 4 5 4 N A ...
Страница 45: ...April 27 2004 Manual Version 1 01 4 24 ...
Страница 69: ...April 27 2004 Manual Version 1 01 7 14 ...
Страница 77: ...April 27 2004 Manual Version 1 01 8 8 ...
Страница 79: ...April 27 2004 Manual Version 1 01 9 2 ...
Страница 81: ...April 27 2004 Manual Version 1 01 10 2 ...

