• From the Chart application, go to the following
menu:
Menu > My Data > Tracks
, and select
the required track.
• From the Homescreen, select:
My Data >
Tracks
and select the required track.
You can then proceed and review or edit the required
track using the options available.
Renaming a track
You can change the name of a saved track.
With the track list displayed.
1. Select the track you want to edit.
The track options page is displayed.
2. Select
Edit Name
.
The on-screen keyboard is displayed.
3. Use the on-screen keyboard to change the track
name.
4. When finished Select
SAVE
.
You can also edit track details by selecting
Edit
Track
from the track context menu.
Changing the color of a track
You can change the color of a saved track.
With the track list displayed.
1. Select the track you want to edit.
The track options page is displayed.
2. Select
Edit Colour
.
A list of colors is displayed.
3. Select the color you want to use.
You can also edit track details by selecting
Edit
Track
from the track context menu.
Erasing tracks
Erasing a track
From the My Data menu:
1. Select
Tracks
.
The track list is displayed.
2. Select the track you want to erase.
3. Select
Erase Track
.
The erase track pop up message is displayed.
4. Select
Yes
to confirm, or
No
to cancel the action.
Erasing all tracks
From the Homescreen:
1. Select
My Data
.
2. Select
Import/Export
.
3. Select
Erase from System
.
4. Select
Erase Tracks from System
.
The tracks list is displayed.
5. Select
Erase All
.
The confirm delete dialog is displayed.
6. Select
Yes
to confirm, or
No
to cancel the action.
Track context menu
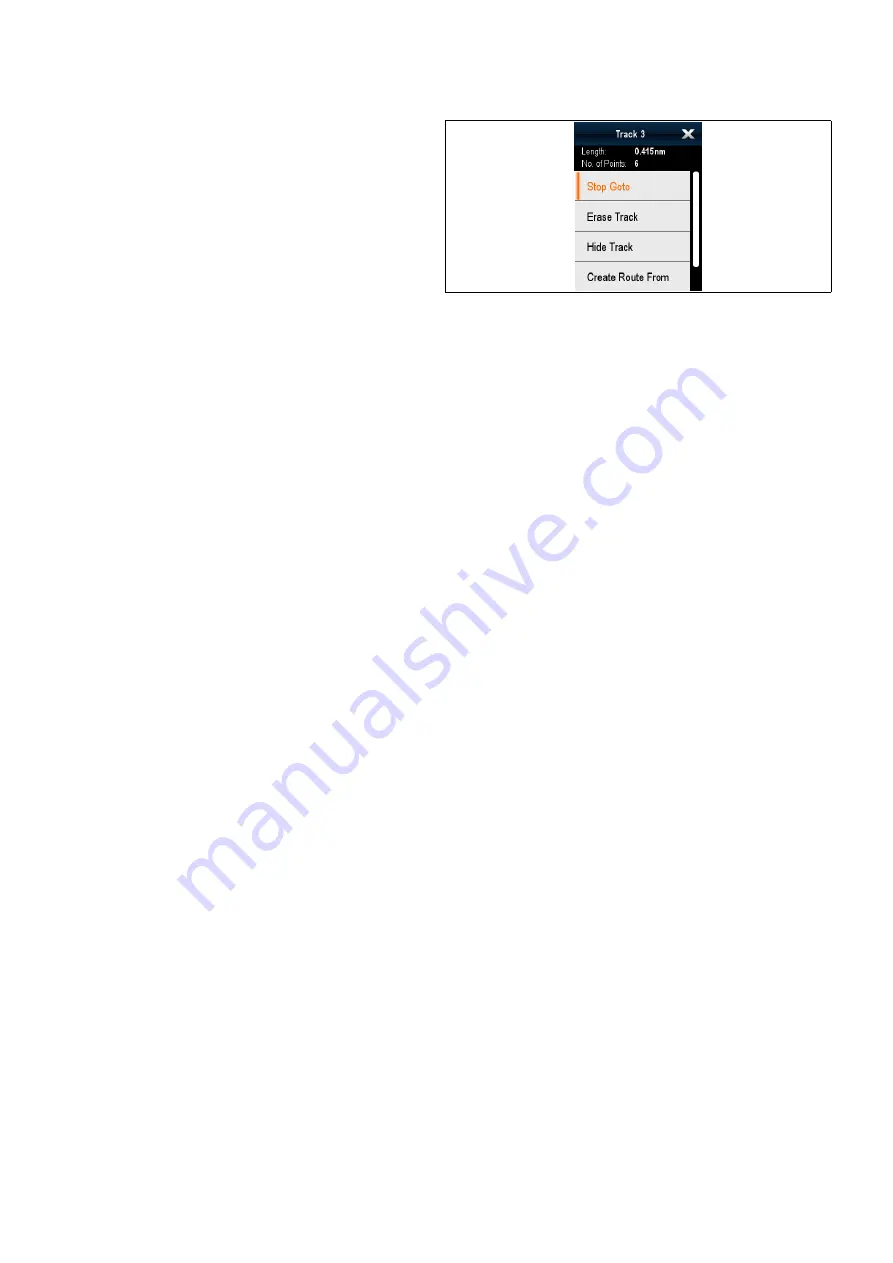
Selecting a track in the chart application displays a
context menu showing the track length, number of
points and menu items.
The context menu provides the following menu items:
•
Stop Goto
(only available during active
navigation.)
•
Erase Track
•
Hide Track
•
Create Route From
•
Rename
•
Edit Color
•
Acquire Target
(only available if Radar overlay is
switched on.)
When creating a track the context menu options
change to:
•
Stop Goto
(only available during active
navigation.)
•
Stop Track
•
Erase Route
— Disabled
•
Create Route From
•
Rename
•
Edit Color
•
Acquire Target
(only available if Radar overlay is
switched on.)
Accessing the context menu
You can access the context menu by following the
steps below.
1. Non-touchscreen and HybridTouch displays:
i.
Selecting a location, object or target on-screen
and pressing the
Ok
button.
2. HybridTouch and Touch only displays:
i.
Selecting an object or target on-screen.
ii. Selecting and holding on a location on-screen.
228
a Series / c Series / e Series
Содержание a125
Страница 2: ......
Страница 6: ......
Страница 16: ...16 a Series c Series e Series ...
Страница 43: ...13 GPS receiver 14 Thermal camera 15 Wireless connection Planning the installation 43 ...
Страница 50: ...50 a Series c Series e Series ...
Страница 82: ...82 a Series c Series e Series ...
Страница 114: ...114 a Series c Series e Series ...
Страница 120: ...120 a Series c Series e Series ...
Страница 186: ...186 a Series c Series e Series ...
Страница 187: ...Chapter 13 Man Overboard MOB Chapter contents 13 1 Man overboard on page 188 Man Overboard MOB 187 ...
Страница 190: ...190 a Series c Series e Series ...
Страница 193: ...Chapter 15 Fuel manager Chapter contents 15 1 Fuel manager overview on page 194 Fuel manager 193 ...
Страница 208: ...208 a Series c Series e Series ...
Страница 230: ...230 a Series c Series e Series ...
Страница 320: ...320 a Series c Series e Series ...
Страница 340: ...340 a Series c Series e Series ...
Страница 364: ...364 a Series c Series e Series ...
Страница 420: ...420 a Series c Series e Series ...
Страница 424: ...424 a Series c Series e Series ...
Страница 434: ...434 a Series c Series e Series ...
Страница 459: ......
Страница 460: ...www raymarine com ...


