Installation
Installation Manual
19
ENGLISH
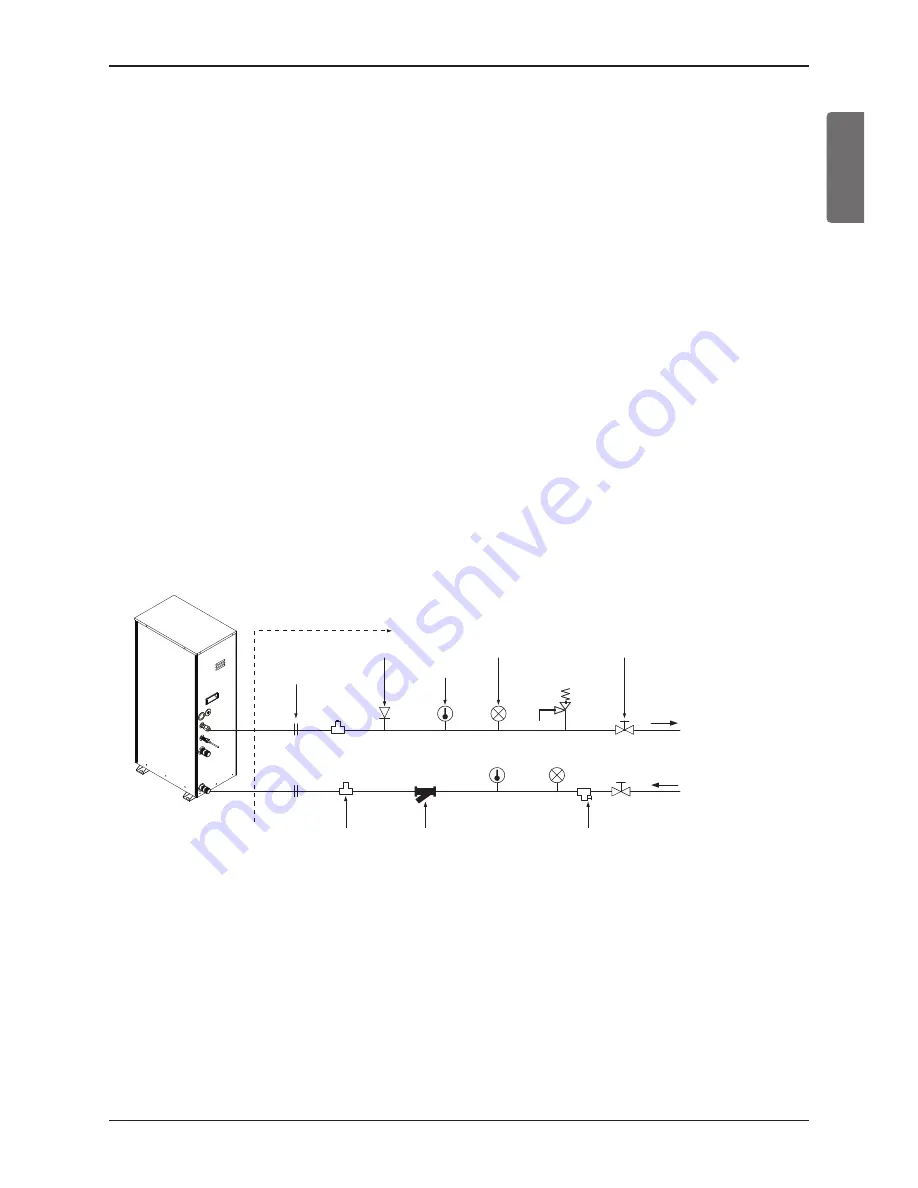
On-site installation (1)
Union joint (2)
Thermometer (6)
Excessive pressure
safety valve(10)
Pressure gauge(7)
Shut-off valve (9)
Drain valve(8)
Strainer(4)
P/T Service port(3)
Air vent (5)
[Install water tank]
[Install floor heating]
Outlet Water
or
Inlet water
Water cycle
* For the water pipe system, use the closed loop type.
1. For the parts of the water pipe system, use the parts above the design water pressure.
2. For the water pipe, do not use steel pipe.
3. To replace the connected device easily, install the union joint (2).
4. Install the service port (3) to clean the heat exchanger at each inlet and outlet of the water pipe.
5. Always install a strainer (4) at the inlet of the water pipe.
- For the strainer, use one with 50 mesh or above with measurement diameter of 0.4mm or
less. (Exclude other net)
- Always install the strainer on the horizontal pipe.
(When dirt, trash, rusted pieces get into the water pipe system, it can cause problems to the
product by corroding the metallic material.)
6. Install the air vent (5) at the top of the water pipe.
7. Install a thermometer (6) and pressure gauge (7) at the inlet and outlet of the water pipe.
8. Install the drain valve (8) that can be used for draining the water inside when replacing the part
or providing service.
9. Install the shut-off valve (9) to block the water by closing the valve when replacing the part or
cleaning.
10. Apply insulated treatment on the exterior of the water pipe so that water drops do not form.
11. Install excessive pressure safety valve (10) that meets the design water pressure to prevent
unit or water pipe damage at the pressure increase inside the water pipe system.
12. There is a drain hole at the bottom of prevent risk of electric shock caused by leakage of
water.
Содержание AHNW166T0
Страница 73: ......


