background image


LIP-8002/8002A


iPECS

  Installer 

Guide


20


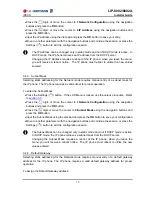
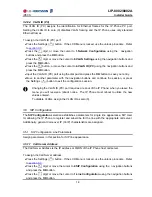
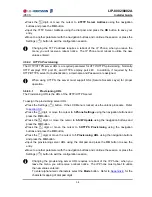
 Press  the 

 digit, or move the cursor to 

1.Line Configuration 

using the navigation buttons 

and press the 

OK

 button. 

 Press  the 

 digit, or move the cursor to 

3.Display Name 

using the navigation buttons and 

press the 

OK

 button. 

 Input the Display Name using the dial pad and press the 

OK

 button to save your entry. 

 Move to another parameter with the navigation buttons and continue the session or press the 

Settings (

) button to exit the configuration session. 


To enter alphanumeric characters select the 

Mode

 button.  Refer to 

Appendix E

 for the 

character mapping of dial pad digits. 


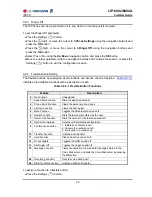
3.5.1.4  Name 

The Name is used in SIP headers as the SIP user id or account assigned in the call server.  A 
name is required for proper operation and must match the user id or account assigned in the 
call server. 
 
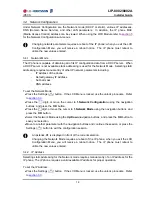
To enter the Name: 

 Press the Settings (

) button.  If the LCD Menu is locked, use the unlock procedure.  Refer 

to 

section 3.3

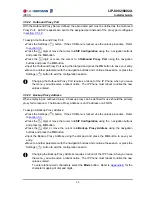
 Press  the 

 digit, or move the cursor to 

2.SIP Configuration

 using the 


 navigation buttons 

and press the 

OK

 button.  

 Press  the 

 digit, or move the cursor to 

1.Line Configuration 

using the navigation buttons 

and press the 

OK

 button. 

 Press  the 

 digit, or move the cursor to 

4.Name 

using the navigation buttons and press the 

OK

 button. 

 Input the Name using the dial pad and press the 

OK

 button to save your entry. 

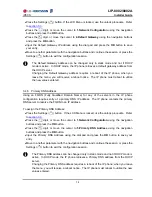
 Move to another parameter with the navigation buttons and continue the session or press the 

Settings (

) button to exit the configuration session. 


Changing the Name requires a reboot of the IP Phone; when you leave the menu, you 
will receive a reboot notice.  The IP Phone must reboot to utilize the new values 
entered. 


To enter alphanumeric characters select the 

Mode

 button.  Refer to 

Appendix E

 for the 

character mapping of dial pad digits. 


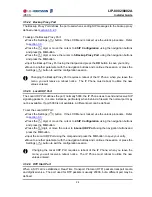
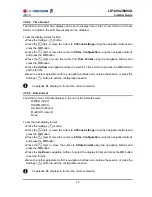
3.5.1.5  Authentication User Name 

Authentication of the line appearance with the SIP call server uses the Authentication User 
Name. 
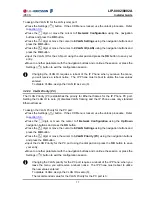
To assign the Authentication User Name: 

 Press the Settings (

) button.  If the LCD Menu is locked, use the unlock procedure.  Refer 

to 

section 3.3

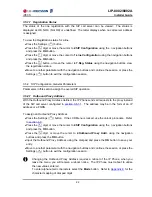
 Press  the 

 digit, or move the cursor to 

2.SIP Configuration

 using the 


 navigation buttons 

and press the 

OK

 button.  

Содержание LIP-8002

Страница 1: ...IP Phone Installer Guide LIP 8002 8002A SIP Session Initiation Protocol iPECS Please read this manual carefully before installation Retain it for future reference ...

Страница 2: ...ich the receiver is connected If problems persist consult the dealer or an experienced radio TV technician for help Canadian Compliance statement This Class B digital apparatus complies with Canadian ICES 003 Cet appareil numérique de la classe B est conforme à la norme NMB 003 du Canada This device complies with Class B Limits of Industry Canada Operation is subject to the following two condition...

Страница 3: ...oot traffic or heavy objects Also do not locate cables between the desktop and walls where they may be crushed damaging the insulation Check the cables regularly and if damage is noted disconnect your phone Contact your local representative for a replacement Should liquid spill on the phone disconnect the unit from power and the network Do not use during lightning storms Lightning presents a poten...

Страница 4: ...Address 15 3 4 8 VLAN Settings 16 3 4 8 1 VLAN Priority LAN 16 3 4 8 2 VLAN ID LAN 16 3 4 8 3 VLAN Priority PC 17 3 4 8 4 VLAN ID PC 18 3 5 SIP Configuration 18 3 5 1 SIP Configuration Line Parameters 18 3 5 1 1 Call Server Address 18 3 5 1 2 Proxy Port 19 3 5 1 3 Display Name 19 3 5 1 4 Name 20 3 5 1 5 Authentication User Name 20 3 5 1 6 Authentication Password 21 3 5 1 7 Registration Status 22 3...

Страница 5: ...36 3 6 6 5 Config Download Flag 37 3 6 6 6 DHCP Option 37 3 6 7 Lock Outgoing Call 38 3 6 8 Speed Number 39 3 6 9 Key Tone 39 3 6 10 Language 39 3 7 Call Preferences 40 3 7 1 Do Not Disturb 40 3 7 2 Call Waiting 40 3 7 3 Call Waiting Tone 41 3 7 4 Call Hold Ringback 41 3 7 5 Message Waiting Tone 42 3 7 6 Auto Answer 42 3 7 7 Caller ID Blocking 43 3 7 8 Anonymous Call Block 43 3 8 Phone Book 43 3 8...

Страница 6: ...n 69 4 14 Load Default 71 4 15 Reboot 72 5 TroubleShooting 73 5 1 Information 73 5 2 Troubleshooting Guide 74 Appendix A Factory Default Configuration 75 Appendix B LIP 8002 8002A Specification 79 Appendix C Download LCD Messages 80 Appendix D Using the Configuration File 81 Appendix E Dial Pad Mode 98 Appendix F Auto Provisioning Routine 99 ...

Страница 7: ... network Features available to the IP Phone when used with SIP call servers are similar to those of a conventional business telephone Features available for a given phone depend on the configuration of the call server as well as configuration of the IP phone and include Anonymous call blocking Auto answer Call forward Busy No answer Immediate Call hold Call hold ringback Call logs Missed Incoming ...

Страница 8: ...Volume control handset speakerphone and ring 3 Way conference For ease of use the LIP 8002 8002A is equipped with fixed buttons flexible programmable buttons an LCD display menu navigation buttons and a dial pad Figure 1 1 1illustrates these elements of the LIP 8002 8002A Figure 1 1 1 LIP 8002 8002A Handset LCD 128x32 MWI LED Speaker Microphone 9 10 11 1 2 3 4 5 6 7 8 ...

Страница 9: ...d party On and Off 6 Volume control button Use to adjust Ring Handset and Speaker volume 7 Speakerphone button Toggle the IP phone speakerphone On and Off 8 Mode button In Editing State Use to switch the input mode can accept an alphanumeric entry Forward button In Idle State Use to set the call forwarding configuration Transfer button In Call State Use to transfer the current active call 9 Delete...

Страница 10: ...PoE and can use only the supplied adaptor When connected to a PoE complaint LAN port the IP Phone derives power from the port If the LAN port does not support PoE use the AC DC adaptor available separately for connection to power The handset connects to the base with the supplied standard handset coiled cord Use the chart below to make connections to the IP Phone Figure 2 1 1 IP Phone Connections ...

Страница 11: ...ional 48V or GND Pin 5 No connection Pin 6 RX Pin 6 TX Pin 7 optional GND or 48V Pin 7 No connection Pin 8 optional GND or 48V Pin 8 No connection Figure 2 1 2 RJ 45 Terminations 2 2 Wall Mounting The LIP 8002 8002A incorporates wall mounting in the base of the phone housing Using the instructions below and Figure 2 2 1 wall mount the LIP 8002 8002A phone Mark and drill two 7 mm holes for plastic ...

Страница 12: ...on for the provisioning server where configuration and software files are maintained The IP phone downloads the configuration and if required software files from the provisioning server When complete the IP phone automatically registers and subscribes for SIP call services using the information from the configuration files Refer to Appendix D for more details LIP 8002 8002A incorporates means for ...

Страница 13: ... see section 3 The second method employs the LIP 8002 8002A Web Manager which allows access to the IP phone configuration using a Web browser see section 4 Manual configuration permits assignment of all parameters required to gain full operation of the IP phone However manual configuration is time consuming and is intended only to augment the automated process and to allow customizing user prefere...

Страница 14: ... displayed in front of the item or Navigate with navigation buttons to highlight the item and select with the OK button Configuration Menu 1 Network Configuration 2 SIP Configuration 3 Phone Settings 4 Call Preferences 5 Directory 6 Set to Default 7 Lock Unlock Config 8 Information 9 Reboot Figure 3 1 LCD Configuration Main Menu When the desired parameter is reached enter data with the dial pad or...

Страница 15: ... Address 4 Call Preferences 1 Do Not Disturb 7 Caller ID Blocking 8 Anonymous Call Block 3 Call Waiting Tone 4 Call Hold Ringback 5 Msg Waiting Tone 6 Auto Answer 3 DST Auto Adjustment 5 Directory 1 LCD Contrast 2 Ring Setting 3 Ringer Off 4 Flexible Key Setting 5 Time Configuration 6 S W Update 3 Phone Settings Configuration Menu 2 Call Waiting 7 Reg Status 2 Proxy Port 3 Outbound Proxy Port 5 Ba...

Страница 16: ...he upper right corner as for numeric for upper case characters and for lower case characters Appendix E defines the relationship between the dial pad digits and characters To enter characters with the dial pad use the digit with the desired character Press the same digit repeatedly until the desired character appears in the LCD After entering a character pause to allow the cursor to move to next c...

Страница 17: ...ew password using the dial pad and press the OK button A password is composed of four 4 to eight 8 digits To confirm your password input the new password again and press the OK button to save your entry Move to another parameter with the navigation buttons and continue the session or press the Settings button to exit the configuration session which will lock the LCD Menu automatically if a passwor...

Страница 18: ... Press the Settings button If the LCD Menu is locked use the unlock procedure Refer to section 3 3 Press the digit or move the cursor to 1 Network Configuration using the navigation buttons and press the OK button Press the digit or move the cursor to 1 Network Mode using the navigation buttons and press the OK button Select the Network Mode using the Up Down navigation buttons and press the OK bu...

Страница 19: ... proper operation To enter the Subnet Mask Press the Settings button If the LCD Menu is locked use the unlock procedure Refer to section 3 3 Press the digit or move the cursor to 1 Network Configuration using the navigation buttons and press the OK button Press the digit or move the cursor to 3 Subnet Mask using the navigation buttons and press the OK button Input the Subnet Mask using the dial pa...

Страница 20: ...ry DNS Address Using an FQDN Fully Qualified Domain Name for any of the servers in the IP phone configuration requires entry of a primary DNS IP address The IP phone contacts the primary DNS server to resolve the FQDN to an IP address To assign the Primary DNS Address Press the Settings button If the LCD Menu is locked use the unlock procedure Refer to section 3 3 Press the digit or move the curso...

Страница 21: ... and continue the session or press the Settings button to exit the configuration session The Secondary DNS address can be changed only in static mode and not if DHCP mode is active In DHCP mode the IP phone retrieves a Secondary DNS address from the DHCP server Changing the Secondary DNS Address requires a reboot of the IP phone when you leave the menu you will receive a reboot notice The IP phone...

Страница 22: ...y for the LAN voice port Press the Settings button If the LCD Menu is locked use the unlock procedure Refer to section 3 3 Press the digit or move the cursor to 1 Network Configuration using the navigation buttons and press the OK button Press the digit or move the cursor to 8 VLAN Settings using the navigation buttons and press the OK button Press the digit or move the cursor to 1 VLAN Priority L...

Страница 23: ...y PC establishes the priority for Ethernet frames for the IP Phone PC port Setting the VLAN ID to zero 0 disables VLAN framing and the IP Phone uses only standard Ethernet frames To assign the VLAN Priority for the PC port Press the Settings button If the LCD Menu is locked use the unlock procedure Refer to section 3 3 Press the digit or move the cursor to 1 Network Configuration using the Up Down...

Страница 24: ... to exit the configuration session Changing the VLAN ID PC port requires a reboot of the IP Phone when you leave the menu you will receive a reboot notice The IP Phone must reboot to utilize the new values entered To disable VLANs assign the VLAN ID as zero 0 3 5 SIP Configuration The SIP Configuration selection establishes parameters for single line appearance SIP User Id allowing the IP Phone to...

Страница 25: ... is locked use the unlock procedure Refer to section 3 3 Press the digit or move the cursor to 2 SIP Configuration using the navigation buttons and press the OK button Press the digit or move the cursor to 1 Line Configuration using the navigation buttons and press the OK button Press the digit or move the cursor to 2 Proxy Port using the navigation buttons and press the OK button Input the Proxy ...

Страница 26: ... 2 SIP Configuration using the navigation buttons and press the OK button Press the digit or move the cursor to 1 Line Configuration using the navigation buttons and press the OK button Press the digit or move the cursor to 4 Name using the navigation buttons and press the OK button Input the Name using the dial pad and press the OK button to save your entry Move to another parameter with the navi...

Страница 27: ...call server uses the Authentication Password in conjunction with the user name To assign the Authentication Password Press the Settings button If the LCD Menu is locked use the unlock procedure Refer to section 3 3 Press the digit or move the cursor to 2 SIP Configuration using the navigation buttons and press the OK button Press the digit or move the cursor to 1 Line Configuration using the navig...

Страница 28: ...d Proxy Address With the Outbound Proxy Address defined the IP Phone sends all requests to the proxy instead of the SIP call server configured in section 3 5 1 1 The address may be in the form of an IP address or a FQDN To assign an Outbound Proxy Address Press the Settings button If the LCD Menu is locked use the unlock procedure Refer to section 3 3 Press the digit or move the cursor to 2 SIP Co...

Страница 29: ...eive a reboot notice The IP Phone must reboot to utilize the new values entered 3 5 2 3 Backup Proxy Address When employing an outbound proxy a backup proxy can be defined for use should the primary proxy fail to respond The Backup Proxy Address is an IP address or a FQDN To assign a Backup Proxy Address Press the Settings button If the LCD Menu is locked use the unlock procedure Refer to section ...

Страница 30: ...s the port normally 5060 the IP Phone uses to send and receive SIP signaling packets In some instances particularly when behind a firewall the normal port may not be available If port 5060 is not available a different port can be defined To set the Local UDP Port Press the Settings button If the LCD Menu is locked use the unlock procedure Refer to section 3 3 Press the digit or move the cursor to ...

Страница 31: ...ction 3 5 2 8 To enable Proxy Registration Press the Settings button If the LCD Menu is locked use the unlock procedure Refer to section 3 3 Press the digit or move the cursor to 2 SIP Configuration using the navigation buttons and press the OK button Press the button or move the cursor to 8 Proxy Registration using the navigation buttons and press the OK button To change select Yes or No using th...

Страница 32: ...ess the digit or move the cursor to 2 SIP Configuration using the navigation buttons and press the OK button Press the digits or move the cursor to 10 VMS Address using the navigation buttons and press the OK button to save your entry Input the VMS Address using the dial pad and press the OK button to save your entry Move to another parameter with the navigation buttons and continue the session or...

Страница 33: ...n S W Update Outgoing Call Lock Speed Number Dialing Key Tone Language With the exception of S W Update and Outgoing Call Lock these settings are not password protected The user may access these parameters even if the LCD Configuration Menu is locked 3 6 1 LCD Contrast The contrast of the LCD is adjustable for best viewing angle To adjust the LCD contrast Press the Settings button Press the digit ...

Страница 34: ...ession or press the Settings button to exit the configuration session The LIP 8002 8002A uses one of 4 ring types The Phone Book entry may use a different type 3 6 2 2 Trunk Ring Type To select the Trunk ring type for the IP Phone Press the Settings button Press the digit or move the cursor to 3 Phone Settings using the navigation buttons and press the OK button Press the digit or move the cursor ...

Страница 35: ...eature Description 0 No Function Unassigned 1 Speed Dial Function Dials the assigned number 2 Phone Book Function Views the personal phone book 3 Call Log Function Views the call log list 4 Mute Function Toggles the Mute feature on and off 6 Redial Function Dials the last number dialed by the user 7 Return Call Function Dials the number of the last answered call 8 Set Call Forwarding Sets the call...

Страница 36: ...gits 3 6 5 Time Configuration Within the Time Configuration menu the IP Address or FQDN of the desired Simple Network Time Protocol SNTP server and the local time zone are defined In addition Daylight Savings Time DST is disabled The following SNTP server addresses or other private SNTP server addresses may be used for Time Configuration clock via net ntp nasa gov tick ucla edu 3 6 5 1 SNTP Server...

Страница 37: ...ired using the Up Down navigation buttons and press the OK button to save the entry Move to another parameter with the navigation buttons and continue the session or press the Settings button to exit the configuration session An asterisk displays in front of the current selection 3 6 5 3 DST Auto Adjustment The IP Phone automatically adjusts for DST when enabled To enable disable automatic day lig...

Страница 38: ...ue the session or press the Settings button to exit the configuration session An asterisk displays in front of the current selection 3 6 5 5 Date Format The format of the LCD date displays in the one of the formats below MM DD 01 22 DD MM 22 01 DD Month 22 Jan Month DD Jan 22 None To set the date display format Press the Settings button Press the digit or move the cursor to 3 Phone Settings using ...

Страница 39: ...Press the digit or move the cursor to 1 Provisioning Type using the navigation buttons and press the OK button Select the Provisioning Type TFTP or HTTPS using the the Up Down navigation buttons and press the OK button to save your entry Move to another parameter with the navigation buttons and continue the session or press the Settings button to exit the configuration session 3 6 6 2 TFTP Server ...

Страница 40: ...oning URL is the URL of the HTTP HTTPS server To assign the provisioning server URL Press the Settings button If the LCD Menu is locked use the unlock procedure Refer to section 3 3 Press the digit or move the cursor to 3 Phone Settings using the navigation buttons and press the OK button Press the digit or move the cursor to 6 S W Update using the navigation buttons and press the OK button Press ...

Страница 41: ...uires a reboot of the IP Phone when you leave the menu you will receive a reboot notice The IP Phone must reboot to utilize the new values entered To enter alphanumeric characters select the Mode button Refer to Appendix E for the character mapping of dial pad digits 3 6 6 3 3 Password In some cases the HTTP HTTPS server requires a Username Id and Password for authentication prior to allowing file...

Страница 42: ...git or move the cursor to 4 DHCP Option Number using the navigation buttons and press the OK button Input the DHCP option 1 to 255 using the dial pad and press the OK button to save your entry Move to another parameter with the navigation buttons and continue the session or press the Settings button to exit the configuration session Changing the DHCP option requires a reboot of the IP Phone when y...

Страница 43: ... Flag function is enabled using the Web Manager see section 4 7 or the configuration file see Appendix D To set the Config Download Flag Press the Settings button If the LCD Menu is locked use the unlock procedure Refer to section 3 3 Press the digit or move the cursor to 3 Phone Settings using the navigation buttons and press the OK button Press the digit or move the cursor to 6 S W Update using ...

Страница 44: ...reboot notice The IP Phone must reboot to utilize the new values entered An asterisk displays in front of the current selection 3 6 7 Lock Outgoing Call The IP Phone can be configured to allow outgoing calls only if a password is entered When enabled the LCD screen will display the password request as shown and the password must be entered prior to connecting for outgoing call To activate this fea...

Страница 45: ...mber terminates the call and the empty status of the Speed Number displays for approximately 2 seconds 3 6 9 Key Tone Normally when a button on the phone is pressed a tone is generated to confirm to the user that the phone has recognized the key depression If desired this tone can be disabled To enable disable the Key Tone Press the Settings button Press the digit or move the cursor to 3 Phone Set...

Страница 46: ...rver configuration determines routing of the incoming call while your phone is in DND To activate DND DND must be enabled To enable the DND operation Press the Settings button If the LCD Menu is locked use the unlock procedure Refer to section 3 3 Press the digit or move the cursor to 4 Call Preferences using the navigation buttons and press the OK button Press the digit or move the cursor to 1 Do...

Страница 47: ...ing To receive the tone Call Waiting must also be enabled Refer to section 3 7 2 To enable disable Call Waiting Tone Press the Settings button If the LCD Menu is locked use the unlock procedure Refer to section 3 3 Press the digit or move the cursor to 4 Call Preferences using the navigation buttons and press the OK button Press the digit or move the cursor to 3 Call Waiting Tone using the navigat...

Страница 48: ...ns and press the OK button Press the digit or move the cursor to 5 Msg Waiting Tone using the navigation buttons and press the OK button Select On to enable the stutter dial tone or select Off to disable the stutter dial tone using the Up Down navigation buttons and press the OK button Move to another parameter with the navigation buttons and continue the session or press the Settings button to ex...

Страница 49: ...ess the Settings button If the LCD Menu is locked use the unlock procedure Refer to section 3 3 Press the digit or move the cursor to 4 Call Preferences using the navigation buttons and press the OK button Press the digit or move the cursor to 8 Anonymous Call Block using the navigation buttons and press the OK button Select On to enable Anonymous Call Blocking or select Off to disable Anonymous C...

Страница 50: ...move the cursor to 6 Default using the navigation buttons and press the OK button Press the OK button to set default Move to another parameter with the navigation buttons and continue the session or press the Settings button to exit the configuration session Returning the configuration to default requires a reboot of the IP Phone when you leave the menu you will receive a reboot notice The IP Phon...

Страница 51: ...the OK button Press the OK button to reboot If you press Left navigation button in the above step move to another parameter with the navigation buttons and continue the session or press the Settings button to exit the configuration session without activating the changes Any parameter changes will update during the next reboot ...

Страница 52: ...ng your Web browser at the IP Phone IP address and port number 8000 will access Web Manager Thus an IP address in the IP Phone is necessary prior to attempting access to Web Manager In addition the IP address must be available to the Web browser host The IP address of the LIP 8002 8002A is available through the LCD see section 5 1 Section 4 1 below describes the login procedure and site map struct...

Страница 53: ... Password to display the Web Manager Site map shown in Figure 4 1 The default User name is private and the Password is lip Figure 4 1 1 Site Map On the left is the Web Manager page link window and in the main screen is a more detailed site map Select the desired page from either the page link or the site map window ...

Страница 54: ...LIP 8002 8002A iPECS Installer Guide 48 4 2 VoIP Configuration Figure 4 2 1 VoIP Configuration ...

Страница 55: ...und Proxy Port is the port of the outbound proxy server o Backup Proxy Address is the IP address or FQDN of the backup proxy server used when the connection with the primary proxy times out o Backup Proxy Port is the port of the backup proxy server o Domain is the domain for SIP service when the service provider desires to use a specific SIP domain o VMS Address is the address IP or phone number o...

Страница 56: ...suite o Codec priority selects the priority for audio codecs To modify a parameter Select the parameter and modify the value Select the button Changing the configurations except the display name delayed ring and VMS address requires a reboot of the IP Phone When you leave the menu you will receive a reboot notice The IP Phone must reboot to utilize the new values entered ...

Страница 57: ...ddress Lease Time value included in DHCP packet made from IP Phone in DHCP mode o IP address is the IP Phone IP address o Subnet Mask is the IP Phone subnet mask o Default Gateway is the IP Phone default gateway IP address o Mac Address is the MAC address of the IP Phone view only o Primary DNS is the IP address of DNS server o Secondary DNS is the IP address of an auxiliary DNS server o Domain Na...

Страница 58: ...hen complete select the button to load new values to the IP Phone memory The MAC address is fixed and cannot be modified The IP address subnet mask etc can only be changed if the static Network Mode is assigned Changing any value in the LAN screen requires a reboot of the IP Phone When you leave the menu you will receive a Reboot notice The IP Phone must reboot to utilize the new values entered ...

Страница 59: ...s The IP Phone supports various user preferences as listed below Call Preferences o Caller ID Blocking enables and disables blocking the outgoing caller id When enabled the IP Phone sends the anonymous id o Anonymous Call Block when enabled blocks incoming calls with an anonymous caller id ...

Страница 60: ...te the speakerphone automatically if an incoming call is received Call Forwarding o Conditions define the condition for Call Forward Busy No Answer unconditional or not used o Address to Forward defines the destination to receive forwarded calls Direct Call Hotline Warm Line o Direct Call when enabled places a call to a predefined destination automatically when the phone goes off hook o Direct Cal...

Страница 61: ...digits special characters may be entered as follows An x matches any single digit 0 to 9 A T inserts a timed pause for additional digits A matches any number of occurrences of a digit including zero occurrences and includes special character matches A matches any number of occurrences of the previous match including special characters The matches a digit from a group of digits This character combi...

Страница 62: ...al extension number starting with 3 4 or 5 a seven digit local number prefixed by an 8 two digit number preceded by star a ten digit long distance number prefixed by 91 or an international number starting with 9011 is dialed Digit map routing entry The dial plan for this is 0T 00T 3 5 xxx 8xxxxxxx xx 91xxxxxxxxxx 9011x T 2nd Dial Tone A second 512 character string map is employed to provide 2nd Di...

Страница 63: ...d the phone name In addition it is possible to change the Web Manager password through this screen To change the phone name Enter the desired name When complete select the button to load new values to the IP Phone memory To change the password Enter the existing password Enter the new password and confirm When complete select the button to load new values to the IP Phone memory ...

Страница 64: ... 7 1 Phone Settings In the Phone Settings screen the following parameters may be modified Phone Settings o Frame Duration sets the interval to send receive RTP packets in milli seconds o DTMF Relay selects the method for DTMF signaling in band out of band or negotiate ...

Страница 65: ...y selecting call on LCD using the navigation button when there are multi calls Disabling One touch Pickup causes the IP Phone to display the call status when a call is selected the call does not connect to the speakerphone or handset unless the OK button is pressed a second time This may be useful when the user cannot distinguish LED colors Ring Settings o Ringer Type sets the default ring type se...

Страница 66: ...o a contact are made using the Speed number 00 99 The contact number or SIP user id is maintained in the Phone Book In the Phone Book menu records may be added edited deleted or searched To add a Phone Book entry Click the button and enter the new values in the Phone Book Entry screen The Address field is the contact s phone number or SIP user id ...

Страница 67: ...e modified record To place a call using the Phone Book Click the button for the desired contact To delete specific entries from the Phone Book Click the Clear box for the desired records and select the button to delete checked records To delete all entries from Phone Book Select the button The Phone Book can be downloaded or uploaded to and from a csv formatted file To Upload download Click and lo...

Страница 68: ...sulting file are shown below Phone Book Speed Number Name Phone Number Information 1 Lee Myunghee 1000 lmh abc com 2 baragirl 2000 3 lmh 3000 korea sample csv file SpeedNumber Name PhoneNumber Information 1 Lee Myunghee 1000 lmh abc com 2 baragirl 2000 3 lmh 3000 korea ...

Страница 69: ...ions Refer to Table 3 6 5 1 for available functions To change button functions Select the function from the drop down menu next to button For a Speed dial button enter the contact number or user id Click the button to store changes To delete the function assigned to all flexible buttons Select the button Caution selecting Clear All will delete all flexible button assignments ...

Страница 70: ...formation time and duration of the call and state of the call From the Call log the user can call a contact or store a call log record directly to the Phone Book To add a number from the Call Log to the Phone Book list Select the button To delete all Call logs Select the button Caution selecting the button will delete all records in the Call Log To call a party from the Call Log Click the button a...

Страница 71: ...LIP 8002 8002A iPECS Installer Guide 65 4 11 Network Time Configuration Figure 4 11 1 Network Time Configuration ...

Страница 72: ...r Date Format sets the format of the LCD date display using radial button selection In addition the format of the date display can be customized using the Format text box by entering the desired format with the characters shown below the text box DST Configuration The DST configuration sets the format for daylight savings time The start and end for DST can be configured in the North American stand...

Страница 73: ...cent download attempt are displayed at the top of the screen Upgrade result messages are defined in Appendix C A log displays any error conditions for the configuration file download In addition the following parameters can be modified Upgrade Configuration o TFTP HTTPS sets the protocol of the server where configuration and software files are stored ...

Страница 74: ...rade enables periodic checks for new software on the provisioning server Two methods of smart upgrade are available one checks the server at the interval in hours the second checks daily at the time specified in a 24 hour clock format Check the Use Smart Upgrade box select the method with the radial button and enter the interval or time as appropriate If the IP Phone finds a new version of softwar...

Страница 75: ...S Configuration Figure 4 13 1 QoS Configuration Diffserv Configuration On the QoS screen the DiffServ Code Point DSCP and VLAN parameters are defined DSCP or ToS establishes the priority of voice packets Compatible routers apply the DSCP for packet ...

Страница 76: ...r buffer stores incoming packets to allow for re sequencing out of order packets The Jitter Buffer configuration controls the size of the buffer used The minimum normal and maximum delays expected can be changed Using larger values produce less packet loss as the IP Phone waits longer to receive packets before processing Note that large values may delay voice packet processing and smaller values m...

Страница 77: ...Load Default The Load Default page permits the IP Phone configuration to be returned to factory default values Refer to Appendix A for details To set the IP Phone memory to the default configuration Select and confirm The IP Phone loads the default configuration and reboots ...

Страница 78: ...eboot Figure 4 15 1 Reboot The Reboot screen is used to reboot the IP Phone manually To reboot the IP Phone Select the button The IP Phone saves and loads any changes in the configuration to active memory and reboots using the updated configuration ...

Страница 79: ...ll server TFTP server and SNTP server and results of the last file download attempt Press the Settings button Press the digit or move cursor to 8 Information using the navigation buttons and press the OK button Press the Down navigation button to view the next information The download information displays results of the most recent download attempt see Appendix C for a list of the messages Press t...

Страница 80: ... ports routers or switches are working Make sure your network supports DHCP 2 Network Mode Static Make sure Network Mode is static If you entered the IP Address through a phone make sure you reset your IP Phone When I attempt to make a call I can t hear 1 Check all cables and connections 2 Make sure the call server IP Address is correct When I attempted to reboot or change software the IP Phone lo...

Страница 81: ... 0 PC port VLAN priority 3 PC port VLAN id 0 LAN port VLAN priority 5 LAN LAN port VLAN id 0 Call server address line 1 0 0 0 0 Proxy port line 1 5060 Display name line 1 Not assigned Name line 1 Not assigned Auth user name line 1 Not assigned Auth password line 1 Not assigned Delayed ring for line 1 0 seconds Outbound proxy address Not assigned Outbound proxy port 5060 Backup proxy address Not as...

Страница 82: ... 4000 0 0 0 0 External call cadence 1 800 400 800 4000 0 0 Group call cadence 2 400 200 400 200 800 4000 Internal call cadence 3 300 200 1000 200 300 4000 ACD call cadence 4 500 0 0 0 0 0 Priority call cadence 5 1500 4500 0 0 0 0 0 0 Emergency call cadence 6 1500 500 1500 2500 0 0 0 0 Community 1 call cadence 7 1500 500 500 3500 0 0 Community 2 call cadence 8 1500 500 500 500 500 2500 0 0 Communit...

Страница 83: ...at 24 hour NETTIME Date format DD Mon 21 Feb Provisioning type TFTP DHCP option 66 150 enabled HTTPS URL Not assigned HTTPS URL DHCP option 160 Use TFTP DHCP option enabled Use HTTP S DHCP option enabled ID Not assigned Password Not assigned Phone specific file name MAC Smart upgrade Upgrade at midnight S W download flag enabled Config download flag enabled PROVISION Dhcp lease duration 3600 sec P...

Страница 84: ...2A iPECS Installer Guide 78 NOTE Parameters marked with an asterisk cannot be modified via the LCD Configuration Menu Parameters mark with double asterisk can only be modified using the configuration file download ...

Страница 85: ...C Workstation Interface RJ 45 IEEE 802 3 Ethernet Fast Ethernet switch port Power 802 3af or AC DC Power Adapter LED Indicators Message Indicator LCD 128 x 32 dot graphic Physical Size H x W x D 19 5cm x 19 5cm x 11 2cm Weight 0 64 kg AC DC Adaptor Output 48VDC 0 3A max Input 100 240 VAC 50 60 Hz Operation Temperature 0 50o C Storage Temperature 20 60o C Operation Humidity 0 85 RH non condensing A...

Страница 86: ...e is 0 or larger than maximum size INVALID ID OR PW The current Id or password for authentication is invalid NEW VERSION LOADED S W was successfully loaded UPDATE NOT NEEDED The current version is the latest Message Description LOAD FLAG OFF Config file load is disabled section 4 12 NO SERVER ADDR TFTP WEB server address is 0 0 0 0 CFG XFER ERR Downloading the configuration file has failed check t...

Страница 87: ...f the configuration file see Table D 1 By assigning values after the field name the IP Phone configuration parameters are established A field listed in the configuration file with no value will return the value of the associated parameter to default If a value is changed for a field marked with an asterisk in Table D 1 the reboot flag will be enabled and the IP Phone will reboot after initializati...

Страница 88: ... The phone s default gateway Valid value is an IP address Default is 192 168 1 254 subnetMask The phone s subnet mask Valid value is a subnet mask Default is 255 255 255 0 dns1_address IP address of the primary DNS server used to resolve names to IP addresses Valid value is an IP address Default is blank dns2_address Optional IP address for a secondary DNS server used if the primary DNS server is ...

Страница 89: ...YY 2 digit year m month abbreviation d day of week Default is DD m 21 Feb dst_auto_adjust Enables automatic daylight savings time DST adjustment by the phone Valid values are 0 disabled or 1 enabled Default is 0 dst_start_month Sets month DST starts Valid values are 1 to 12 with 1 being January and 12 being December Default is 3 in the United States dst_start_day_of_week Sets day of the week DST b...

Страница 90: ...lid values are 1024 to 32000 Default is 5060 message_url Defines the voice mail address IP address or phone number format The valid value is an IP address or telephone number Default is blank SIP_service_domain Specifies the SIP service domain The valid value is an IP address or FQDN The default is blank preferred_codec Defines the order of priority of codecs for negotiation Valid values are g729 ...

Страница 91: ...128_HMAC_SHA1_80 srtp_crypto Defines the order of srtp crypto suite Valid values are AES_CM_128_HMAC_SHA1_80 AES_CM_128_HMAC_SHA1_32 AES_F8_128_HMAC_SHA1_80 ARIA_CM_128_HMAC_SHA1_80 ARIA_CM_192_HMAC_SHA1_80 Default order is AES_CM_128_HMAC_SHA1_80 ARIA_CM_128_HMAC_SHA1_80 ARIA_CM_192_HMAC_SHA1_80 srtp_use Enables use of the SRTP Valid values are disable and enable Default is disable timer_register...

Страница 92: ...the proxy server challenges the line registration It is required only if a proxy server requires authentication Valid value is up to 50 characters The default is blank line1_password Specifies the password for authentication if the proxy server challenges the line registration Valid value is up to 50 characters The default is blank line1_delayed_ring Specifies a delay in the audible ring for the l...

Страница 93: ... 400 800 4000 0 0 cadence2 Sets the ring cadence for calls with Group call in Alert Info header The valid value is a six value time array on off on off on off The valid range is 0 to 30000 milliseconds total time The default is 400 200 400 200 800 4000 cadence3 Sets the ring cadence for calls with Internal call in Alert Info header The valid value is a six value time array on off on off on off The...

Страница 94: ... on off on off on off on off The valid range is 0 to 30000 milliseconds total time The default is 500 500 500 500 500 500 500 2500 cadence11 Sets the ring cadence for calls with auto answer call in Alert Info header The valid value is an eight value time array on off on off on off on off The valid range is 0 to 30000 milliseconds total time The default is 500 500 500 500 2500 3500 0 0 frame_durati...

Страница 95: ...s busy 4 Forward all calls The default is 0 not defined by configuration file FWRD forwarding_address Sets the address to receive forwarded calls The valid value is a maximum of 60 characters The default is blank dial_mode Sets the default dial mode Valid values are number digits IP address or URL The default is number pause_timer Specifies the pause timer in seconds for the dial plan Valid values...

Страница 96: ...old 12 DND 13 Ringer Off 14 Message 46 Voice Record 48 Blind Transfer The default is blank add num Specifies the number for a Speed dial button The default is blank prog Specifies the flexible button number being assigned Valid values are 1 to 4 The default is blank PROG label string Specifies the label for flexible buttons The maximum length is 15 characters The default is blank callnum_in_line D...

Страница 97: ..._direct_timer Sets the delay for Warm Line operation After the timer expires the direct call is made Set to zero 0 for Hotline Valid values are 0 to 10 seconds delay Default is 5 phone_name Assigns a name to the phone for idle mode display Valid value is a string of up to 15 characters The default is blank lang Specifies the language displayed in the LCD Support for a given language is limited by ...

Страница 98: ...ng server Valid values are 0 for TFTP or 1 for HTTPS Default is 0 TFTP cfg_downlaod Enables download of configuration file from the provisioning server Valid values are enable or disable Default is enable sw_downlaod Enables download of firmware from the provisioning server Valid values are enable or disable Default is enable dhcp_get_tftp Enables use of DHCP options 66 or 150 for definition of th...

Страница 99: ...fines the timing of Smart Upgrade as an interval or time of day Valid values are 1 for interval or 2 for daily Default is 2 smartup_interval Specifies the interval in seconds between firmware checks Valid values are 0 to 86400 seconds Default is 3600 smartup_time Specifies the time of the day for daily firmware checks Valid values are 0 to 23 o clock Default is 00 00 smartup_confirm Enables user c...

Страница 100: ...ue and the start of any comments comments start with and end with carriage return LAN Lan configuration network_mode ipAddress defaultGateway subnetMask dns1_address dns2_address domain_name tftp_server_address tos pc_802_priority phone_802_priority pc_vlan_id phone_vlan_id NETTIME SNTP Timezone and DST Configurations sntp_server_address interval timezone time_format date_format dst_auto_adjust ds...

Страница 101: ...ter_expires timer_session timer_t1 timer_t2 de_register line1_proxy_address line1_proxy_port line1_displayname line1_name line1_authname line1_password line1_delayed_ring DSP DSP configurations handsfree handset ring lcd ringer_off VAD ring_type alert_ring_type external dtmf_payload dtmf_duration cadence0 cadence1 cadence2 cadence3 cadence4 cadence5 cadence6 cadence7 cadence8 cadence9 cadence10 ca...

Страница 102: ... no function 1 for Speed Dial 2 for Phone Book 3 for Call Log 4 for Mute 6 for Redial 7 for Return 8 for FWRD 9 for CONF 10 for TRNS 11 for Hold 12 for DND 13 Ringer Off 14 Message 46 Voice Record 48 Blind Transfer num phone number when a func is PhoneNum max 50 length string label prog name prog 1 4 name phone label CALL Call Preference Configurations call_num_in_line caller_id_blk anonymous_call...

Страница 103: ...elnet_server function download_flag function onetouch_pickup function dnd llo_use llo_time phone_password PROVISION Provisioning Configurations type cfg_download sw_download dhcp_get_tftp dhcp_get_http https_url https_opt https_id https_password https_macform smartup_use smartup_type smartup_interval smartup_time smartup_confirm dhcp_lease_duration ...

Страница 104: ...ers for specified entries such as hostname Table E 1 provides the input information for dial pad mode Table E 1 Alphanumeric Character Set Dial Pad Mode Digit Upper Case A Lower Case a Symbols S 1 2 A B C a b c 3 D E F d e f _ 4 G H I g h i 5 J K L j k l 6 M N O m n o 7 P Q R S p q r s 8 T U V t u v 9 W X Y Z w x y z 0 Space Space ...

Страница 105: ...requested options DHCP Option 1 Subnet Mask DHCP Option 2 Time offset in seconds of the local time zone from GMT DHCP Option 3 Default Gateway router IP Address DHCP Option 6 DNS Server IP Address DHCP Option 42 SNTP Server IP Address DHCP Option 50 IP address of the phone DHCP Option 66 TFTP Server Name DHCP Option 150 TFTP Server IP Address has priority over Option 66 when set DHCP Option 160 de...

Страница 106: ...he certificate has not expired The latter is verifiable only if an SNTP server provides time to the IP Phone Each of these three verifications is enabled by default but can be disabled using the configuration file or manual configuration The IP Phone supports several standard CAs including Verisign In addition a CA may be copied to the phone using the Web Manager If the HTTP HTTPS server requires ...

Страница 107: ...th the version file are available from LG Ericsson If desired comments may be added to the version file using as the leading character of the comment line If the software download is required after completion of the download cycle the IP Phone reboots SIP Server Check in Request Upon receipt of a SIP check in or resync request from the SIP server Notify check sync event message the IP Phone initia...

Страница 108: ...LIP 8002 8002A iPECS Installer Guide Dec 08 ...

Отзывы: