


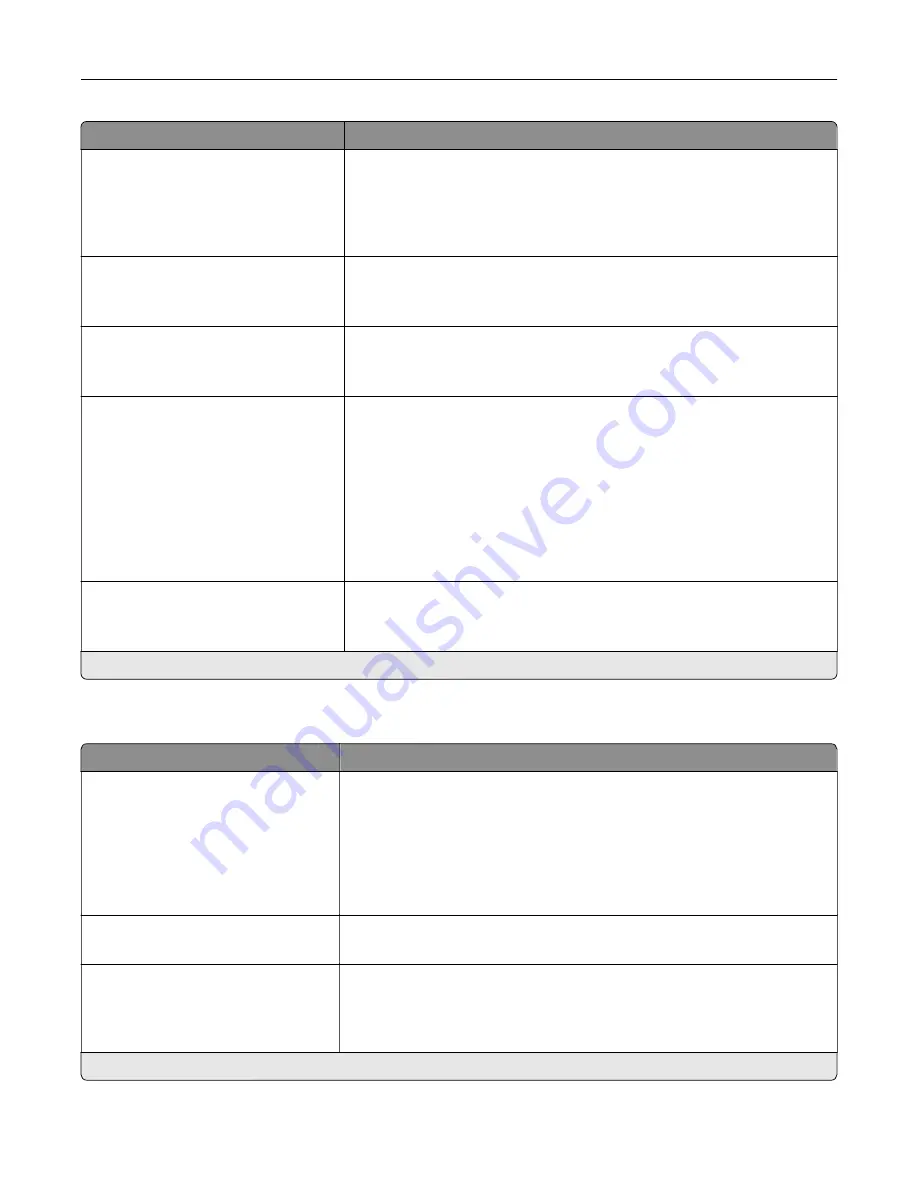
Menu item
Description
Minimum Line Width
1–30 (2*)
Set the minimum stroke width.
Notes:
•
Jobs printed in 1200 dpi use the value directly.
•
Jobs printed in 4800 CQ use half the value.
Lock PS Startup Mode
Off
On*
Disable the SysStart file.
Image Smoothing
Off*
On
Enhance the contrast and sharpness of low
‑
resolution images.
Note:
This setting has no effect on images with a resolution of 300 dpi or
higher.
Font Priority
Resident*
Flash/Disk
Establish the font search order.
Notes:
•
Resident sets the printer to search its memory for the requested font
before searching the flash memory or printer hard disk.
•
Flash/Disk sets the printer to search the flash memory or printer hard
disk for the requested font before searching the printer memory.
•
This menu item appears only when a flash memory or hard disk is
installed.
Wait Timeout
Off
On* (40 seconds)
Enable the printer to wait for more data before canceling a print job.
Note:
An asterisk (*) next to a value indicates the factory default setting.
PCL
Menu item
Description
Font Source
Resident*
Disk
Flash
All
Choose the source which contains the default font selection.
Notes:
•
Flash and Disk appear only when a flash memory or hard disk is
installed.
•
For Flash and Disk to appear, make sure that they are not read
‑
or
write
‑
protected.
Font Name
Courier*
Select a font from the specified font source.
Symbol Set
10U PC
‑
8*
Specify the symbol set for each font name.
Note:
A symbol set is a set of alphabetic and numeric characters,
punctuation, and special symbols. Symbol sets support the different
languages or specific programs such as math symbols for scientific text.
Note:
An asterisk (*) next to a value indicates the factory default setting.
Understanding the printer menus
90
Содержание XC8155
Страница 66: ...5 Touch Scan Here If necessary change the scan settings 6 Scan the document Scanning 66 ...
Страница 159: ... Scanner glass pad 3 Close the scanner cover Emptying the hole punch box 1 Open door J Maintaining the printer 159 ...
Страница 160: ...2 Remove and empty the hole punch box 3 Insert the hole punch box 4 Close door J Maintaining the printer 160 ...
Страница 170: ...2 Remove the waste toner bottle 3 Remove the imaging unit 4 Remove the photoconductor unit Maintaining the printer 170 ...
Страница 172: ...Replacing an imaging unit 1 Open door A 2 Remove the waste toner bottle Maintaining the printer 172 ...
Страница 176: ...3 Remove the pick roller 4 Unpack the new pick roller Maintaining the printer 176 ...
Страница 186: ...4 Insert the new transfer roller 5 Remove the white packing material 6 Close door B Maintaining the printer 186 ...
Страница 193: ...2 Open door G 3 Remove the staple cartridge 4 Unpack the new staple cartridge Maintaining the printer 193 ...
Страница 195: ...2 Open door G 3 Pull out the staple cartridge holder Maintaining the printer 195 ...
Страница 218: ...2 Open door G 3 Pull out the staple cartridge holder Clearing jams 218 ...
Страница 222: ... Area J1 Areas J3 and J4 Areas J5 and J6 3 Close door J Clearing jams 222 ...
Страница 227: ...5 Insert the staple cartridge holder 6 Close door J Clearing jams 227 ...
Страница 284: ...Installing the staple finisher 1 Turn off the printer 2 Open door C 3 Remove the paper bail Upgrading and migrating 284 ...
Страница 287: ...4 Open the covers at the side of the caster base 5 Open door C Upgrading and migrating 287 ...