


Menu item
Description
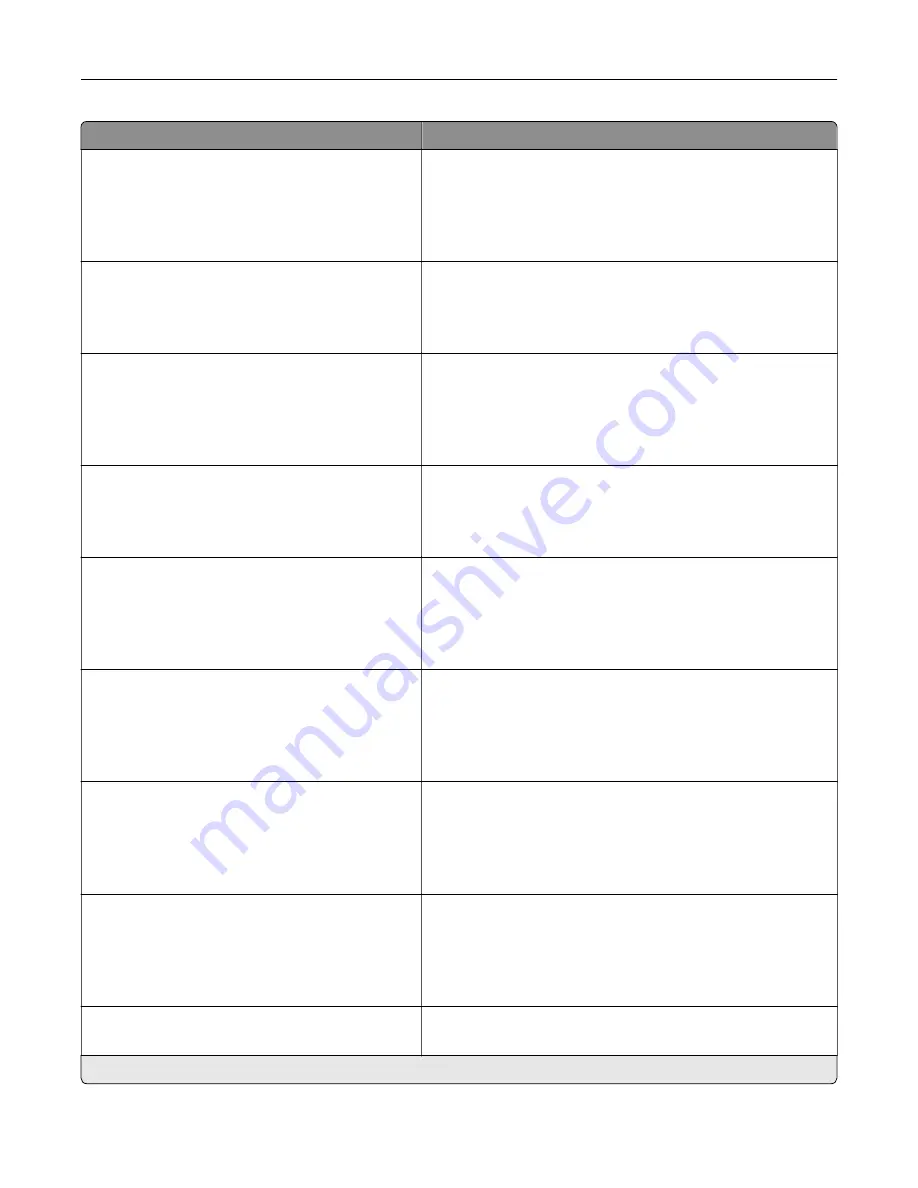
Tray Configuration
Size Sensing
Tray [x] Sensing
Off
On*
Set the tray to sense automatically the paper size loaded into
it.
Tray Configuration
Tray Linking
Automatic*
Off
Set the printer to link the trays that have the same paper type
and paper size settings.
Tray Configuration
Show Tray Insert Message
Off
Only for unknown sizes*
Always
Display a message that lets the user change the paper size and
paper type settings after inserting the tray.
Tray Configuration
A5 Loading
Short Edge
Long Edge*
Determine the default loading orientation for the A5 size paper
in all paper sources.
Tray Configuration
Paper Prompts
Auto*
Multipurpose Feeder
Manual Paper
Set the paper source that the user fills when a prompt to load
paper appears.
Note:
For Multipurpose Feeder to appear, in the Paper menu,
set Configure MP to Cassette.
Tray Configuration
Envelope Prompts
Auto*
Multipurpose Feeder
Manual Envelope
Set the paper source that the user fills when a prompt to load
envelope appears.
Note:
For Multipurpose Feeder to appear, in the Paper menu,
set Configure MP to Cassette.
Tray Configuration
Action for Prompts
Prompt user*
Continue
Use current
Set the printer to resolve paper- or envelope-related change
prompts.
Reports
Menu Settings Page
Event Log
Event Log Summary
HealthCheck Statistics
Print reports about printer menu settings, status, and event
logs.
Supply Usage And Counters
Clear Supply Usage History
Reset the supply usage history, such as number of pages and
days remaining, to the factory shipped level.
Note:
An asterisk (*) next to a value indicates the factory default setting.
Understanding the printer menus
77
Содержание XC8155
Страница 66: ...5 Touch Scan Here If necessary change the scan settings 6 Scan the document Scanning 66 ...
Страница 159: ... Scanner glass pad 3 Close the scanner cover Emptying the hole punch box 1 Open door J Maintaining the printer 159 ...
Страница 160: ...2 Remove and empty the hole punch box 3 Insert the hole punch box 4 Close door J Maintaining the printer 160 ...
Страница 170: ...2 Remove the waste toner bottle 3 Remove the imaging unit 4 Remove the photoconductor unit Maintaining the printer 170 ...
Страница 172: ...Replacing an imaging unit 1 Open door A 2 Remove the waste toner bottle Maintaining the printer 172 ...
Страница 176: ...3 Remove the pick roller 4 Unpack the new pick roller Maintaining the printer 176 ...
Страница 186: ...4 Insert the new transfer roller 5 Remove the white packing material 6 Close door B Maintaining the printer 186 ...
Страница 193: ...2 Open door G 3 Remove the staple cartridge 4 Unpack the new staple cartridge Maintaining the printer 193 ...
Страница 195: ...2 Open door G 3 Pull out the staple cartridge holder Maintaining the printer 195 ...
Страница 218: ...2 Open door G 3 Pull out the staple cartridge holder Clearing jams 218 ...
Страница 222: ... Area J1 Areas J3 and J4 Areas J5 and J6 3 Close door J Clearing jams 222 ...
Страница 227: ...5 Insert the staple cartridge holder 6 Close door J Clearing jams 227 ...
Страница 284: ...Installing the staple finisher 1 Turn off the printer 2 Open door C 3 Remove the paper bail Upgrading and migrating 284 ...
Страница 287: ...4 Open the covers at the side of the caster base 5 Open door C Upgrading and migrating 287 ...