Scan
Using the automatic document feeder and scanner glass
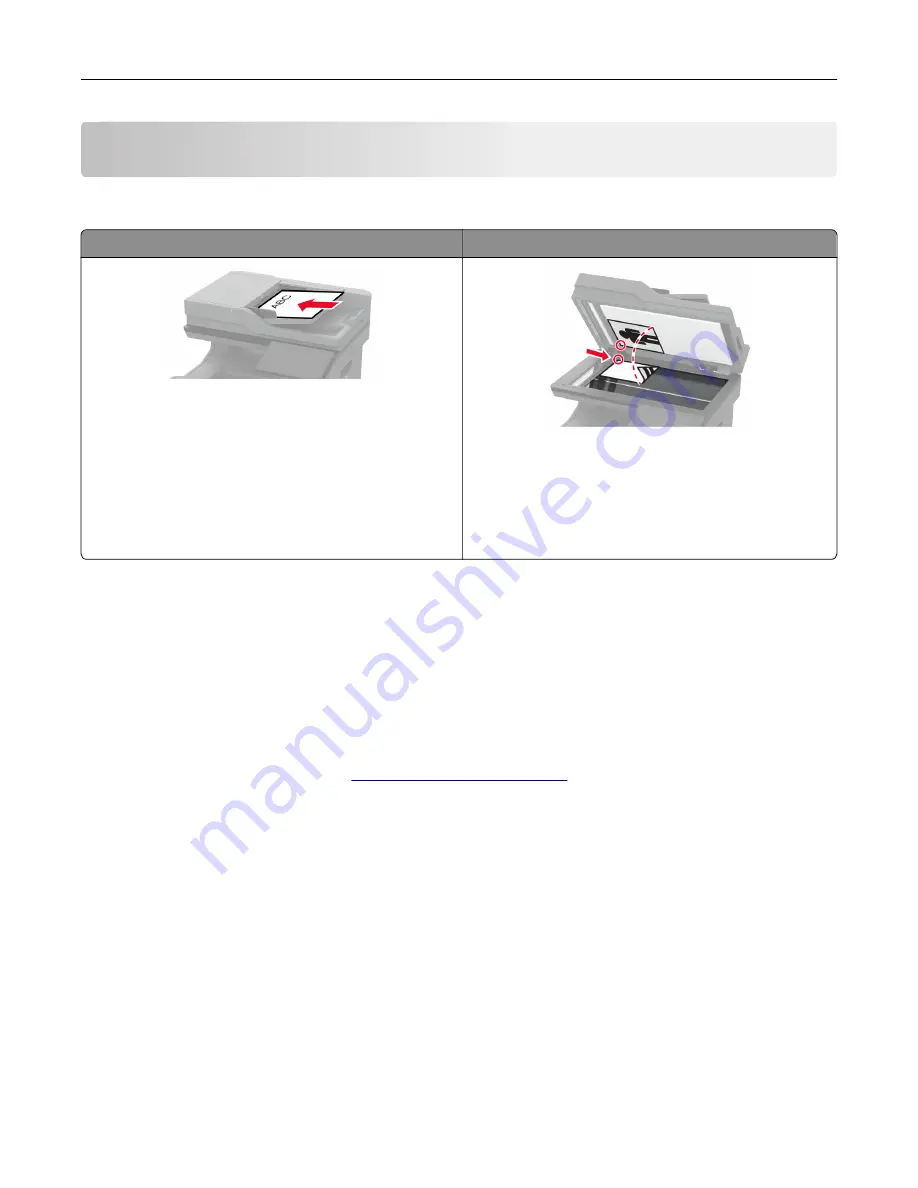
Automatic document feeder (ADF)
Scanner glass
•
Use the ADF for multiple
‑
page or two-sided
documents.
•
Load an original document faceup. For multiple
‑
page
documents, make sure to align the leading edge
before loading.
•
Make sure to adjust the ADF guides to match the width
of the paper that you are loading.
•
Use the scanner glass for single
‑
page documents,
book pages, small items (such as postcards or
photos), transparencies, photo paper, or thin media
(such as magazine clippings).
•
Place the document facedown in the corner with the
arrow.
Scanning to a computer
Before you begin, make sure that the computer and the printer are connected to the same network.
For Windows users
Using Lexmark ScanBack Utility
1
From the computer, run Lexmark ScanBack Utility, and then click
Next
.
Note:
To download the utility, go to
.
2
Click
Setup
, and then add the printer IP address.
Note:
View the printer IP address on the printer home screen. The IP address appears as four sets of
numbers separated by periods, such as 123.123.123.123.
3
Click
Close
>
Next
.
4
Select the size of the original document, and then click
Next
.
5
Select a file format and scan resolution, and then click
Next
.
6
Type a unique scan profile name, and then click
Next
.
7
Browse to the location you want to save the scanned document, create a file name, and then click
Next
.
Note:
To reuse the scan profile, enable
Create Shortcut
, and then create a unique shortcut name.
8
Click
Finish
.
Scan
112
Содержание XC4342
Страница 58: ...4 Locate the ISD connector 5 Insert the card to the ISD connector Set up install and configure 58 ...
Страница 64: ...3 Remove the fax cover 4 Remove the fax bracket Set up install and configure 64 ...
Страница 65: ...5 Install the fax card to the bracket Set up install and configure 65 ...
Страница 66: ...6 Install the fax card and attach the connector to the controller board Set up install and configure 66 ...
Страница 70: ...4 Install the ISP into its housing Set up install and configure 70 ...
Страница 71: ...5 Attach the housing to the controller board shield Set up install and configure 71 ...
Страница 72: ...6 Connect the ISP extended cable to the ISP connector in the controller board Set up install and configure 72 ...
Страница 76: ...Set up install and configure 76 ...
Страница 79: ...4 Attach the cover of the power supply until it clicks into place Set up install and configure 79 ...
Страница 81: ...7 Insert the power supply through the printer 8 Install the convenience stapler Set up install and configure 81 ...
Страница 84: ...Set up install and configure 84 ...
Страница 85: ...3 Install the wireless module into its housing Set up install and configure 85 ...
Страница 86: ...4 Attach the wireless module to the controller board shield Set up install and configure 86 ...
Страница 87: ...5 Connect the wireless assembly to the ISP connector in the controller board Set up install and configure 87 ...
Страница 88: ...6 Attach the controller board shield Set up install and configure 88 ...
Страница 204: ...Replacing parts and supplies Replacing a toner cartridge 1 Open door B Maintain the printer 204 ...
Страница 205: ...2 Remove the used toner cartridge 3 Unpack the new toner cartridge Maintain the printer 205 ...
Страница 206: ...4 Insert the new toner cartridge 5 Close door B Maintain the printer 206 ...
Страница 207: ...Replacing the black imaging unit 1 Open door B Maintain the printer 207 ...
Страница 209: ...3 Remove the toner cartridges Maintain the printer 209 ...
Страница 210: ...4 Disconnect the imaging kit cable Maintain the printer 210 ...
Страница 214: ...9 Insert the imaging kit Maintain the printer 214 ...
Страница 216: ...Replacing the color imaging kit 1 Open door B Maintain the printer 216 ...
Страница 218: ...3 Remove the toner cartridges Maintain the printer 218 ...
Страница 219: ...4 Disconnect the imaging kit cable Maintain the printer 219 ...
Страница 220: ...5 Remove the used imaging kit Maintain the printer 220 ...
Страница 222: ...8 Insert the black imaging unit into the new imaging kit Maintain the printer 222 ...
Страница 223: ...9 Insert the new imaging kit Maintain the printer 223 ...
Страница 225: ...Replacing the waste toner bottle 1 Open door B Maintain the printer 225 ...
Страница 234: ...2 Remove the used separator bracket 3 Unpack the new separator bracket Maintain the printer 234 ...
Страница 238: ...2 Remove the used ADF pick roller Maintain the printer 238 ...
Страница 240: ...5 Insert the new ADF separator roller until it clicks into place Maintain the printer 240 ...
Страница 250: ...2 Remove the ADF pick roller Maintain the printer 250 ...
Страница 252: ...5 Insert the ADF separator roller until it clicks into place Maintain the printer 252 ...
Страница 253: ...6 Insert the ADF pick roller until it clicks into place 7 Close door C Maintain the printer 253 ...
Страница 294: ...Jam locations 1 ADF 2 Standard bin 3 Door A 4 Multipurpose feeder 5 Trays Troubleshoot a problem 294 ...
Страница 298: ...2 Remove the jammed paper Note Make sure that all paper fragments are removed 3 Open door A1 Troubleshoot a problem 298 ...


