25
ENGLISH
SETTINGS MENU
In record mode, press the Up, Down, Left, Right and OK keys to access the settings menus.
Please note, there is no menu for the audio record mode.
Video and capture mode
1. In video record or capture mode, press the Menu key to display
the menu. Use the Up and Down keys to select the sub-menus, and
the OK or Right key to confirm.
2. Use the Up and Down keys to choose an item on the sub-menu,
and press OK to confirm.
3. Press the Menu key to close.
Video menu
• Movie size: select this option to choose file sizes – set small file sizes to record for longer.
Three sizes are available: 1280x720, 720x480 and 640x480.
• Frame rate: choose High or Low. Select Low to record for longer.
• Metering: select this option to change the brightness of the picture.
- Center: the exposure is calculated on the light in the middle of the image. Suitable for general use.
- Multi: exposure calculated on the average light.
- Spot: only the spot in the center of the LCD screen is metered for light.
• White balance: select this option to suit the light source – Auto, Daylight, Cloudy, Fluorescent
and Tungsten.
Capture menu
• Resolution: select this option to set the resolution of your photograph. Choose from (high to
low) 4000x3000, 2048x1536, 1280x960 or 640x480.
• Quality: select a lower image quality to reduce the file size and take more photographs.
Choose from Super Fine, Fine and Normal.
• Metering: see above.
• White balance: see above.
• Exposure: select this option to set the exposure manually in unusual lighting conditions such
as indirect indoor lighting, dark backgrounds or strong backlight. Settings from –2.0 to 2.0.
• Driver mode: select this option to turn on the self-timer and burst snapshot functions. Choose
a two-second or 10-second self-timer delay, or a three-shot burst.
• Effect: select this option to choose a special-effect tone for the photograph. Choose from
normal, B&W (black & white), sepia, negative, red, green or blue.
• Date stamp: select this option to add a date or a date and a time to your pictures.
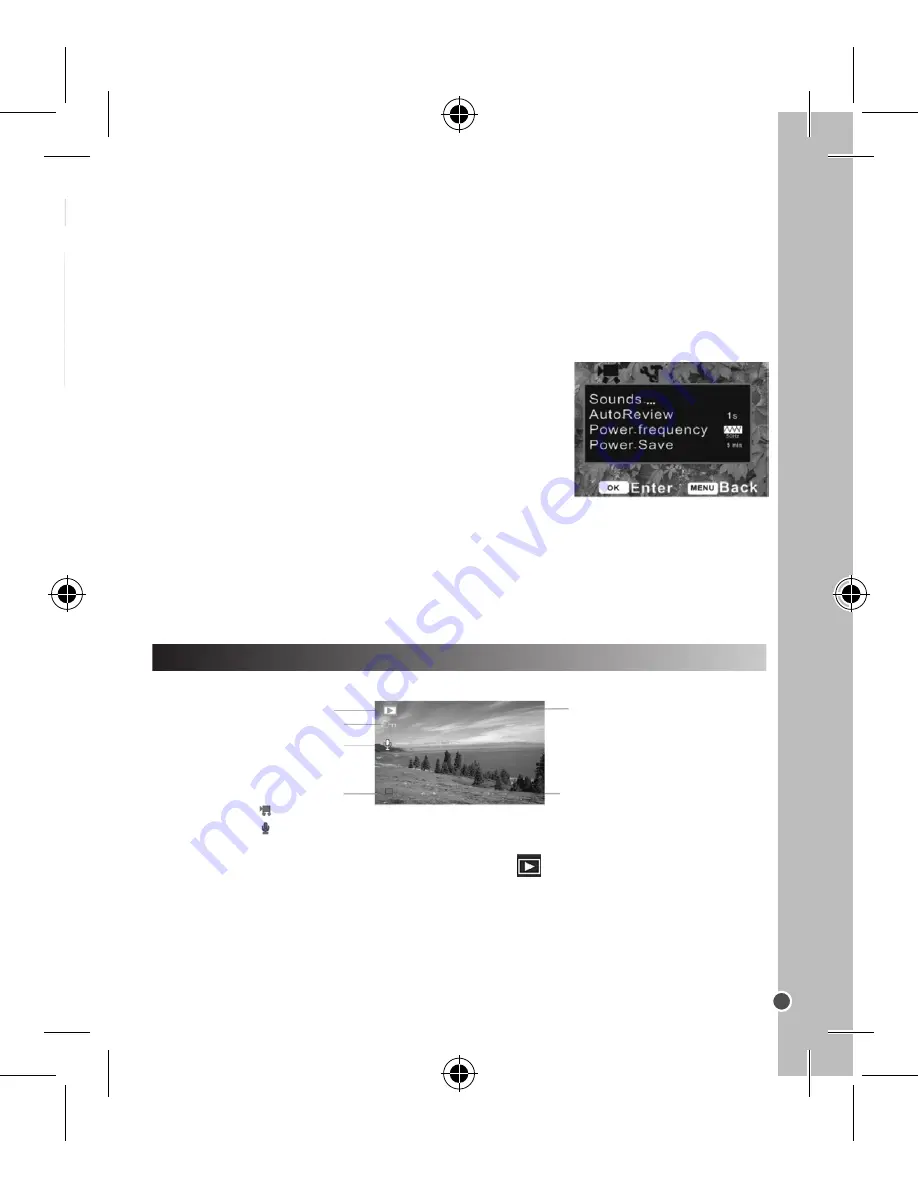
Setup menu
1. Power on, press the Menu key then the Right key to select the Setup menu
.
2. Use the Up and Down keys to choose a sub-menu, then press OK to enter.
Screen in playback mode:
Viewing photographs
1. Turn the video camera on and press the Playback key
. The latest recorded file appears
on the screen. If there are no images stored a “No File” message appears.
2. Use the Left and Right keys to preview (next/previous image).
Viewing videos and audio files
1. Use the Left and Right keys to select the video clip or audio file you wish to play
2. Press the Shutter button to start playing, and the Menu key to end. To pause, press the Up
key; press the Up key again to continue.
PLAYBACK MODE
3. Use the Up and Down keys to choose an item on the sub-menu and press OK to confirm.
4. Press the Menu key to close.
• Sounds: using the Right key, choose the sounds for the Shutter and Start-up functions. Beep
sets the operation sound and Volume adjusts the sound level.
• Auto review: select this option to choose how long to review a picture for on the screen
immediately after shooting. Choose one second, three seconds, or switch the function off.
• Power frequency: select this option to set the right frequency for your region – 60Hz or 50Hz.
• Power save: select this option to choose the time period before the video camera powers
off – one minute, three minutes, five minutes or Off to switch the
function off..
• Date & Time: see page 16.
• Language: see page 15.
• TV out: select the right video setting for your region, NTSC
or PAL.
• USB: select MSDC to use this camera as a removable disk, or
PC CAM to use as a webcam.
• Start-up image: select this option to set your favorite picture as a start-up image by choosing
“My Image”. Choose “System” for the default image, or turn the function off.
• Format: see page 15.
• Reset all: select this option to reset the entire menu and button operations to the original
factory settings.
Protecting indicator
Voice memo indicator
The format of the file
Movie clips
Audio files
The sequence of current file/
The total number of recorded file
Date and time stamp
(Only still image)
Playback mode
Содержание DJ290SW
Страница 1: ...DJ290SW Caméscope Numérique Digital Video Camera MODE D EMPLOI INSTRUCTION MANUAL ...
Страница 2: ......
Страница 3: ......
Страница 103: ...DJ290SW SWIM1295 n het als dit de eer Video senger ...
Страница 104: ......


