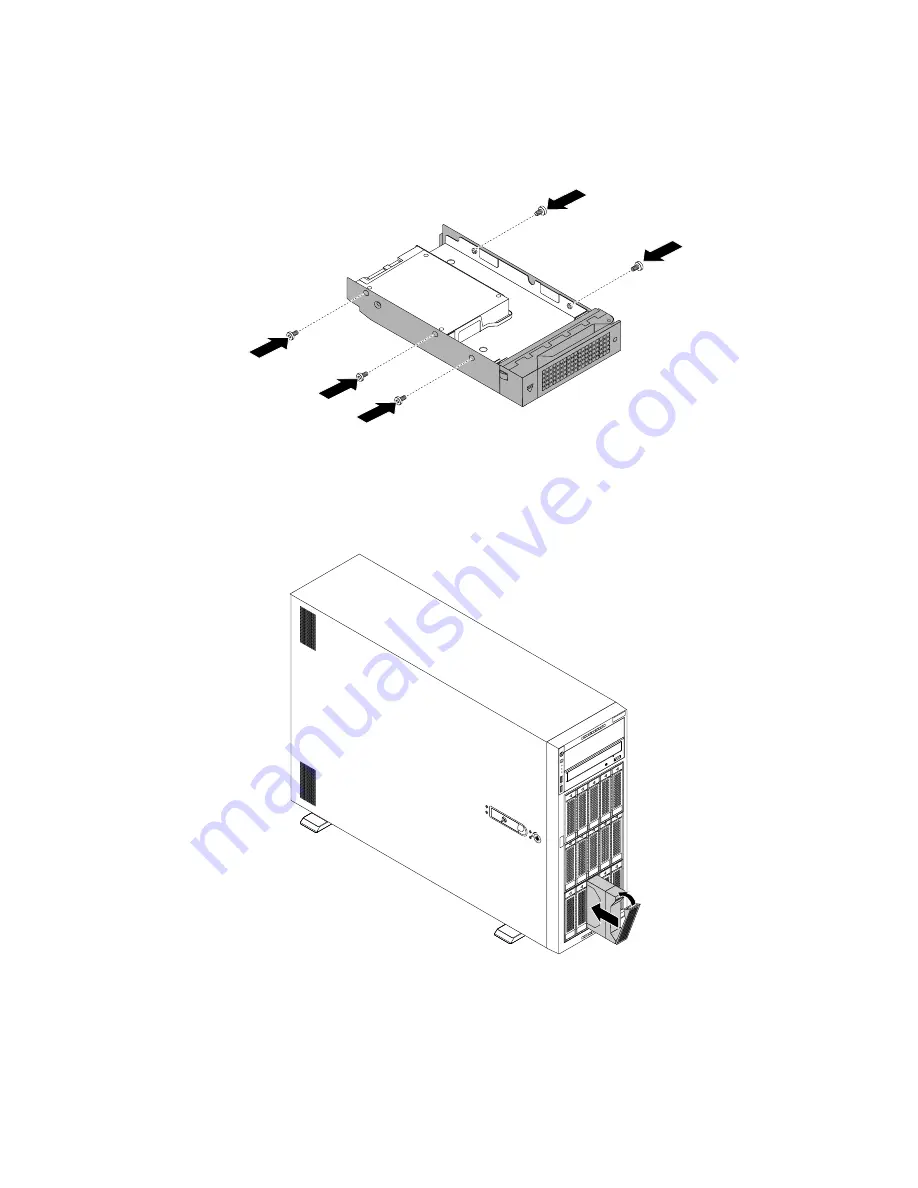
7. Position the drive adapter and the 2.5-inch drive into the 3.5-inch drive bracket. Align the screw holes in
the drive adapter and the 2.5-inch drive with the corresponding holes in the bracket. Then, install the
five screws to secure the drive adapter and the 2.5-inch drive into the bracket.
Figure 114. Installing the screws to secure the drive adapter and the 2.5-inch drive to the bracket
8. Slide the 2.5-inch drive into the drive bay from the front until it snaps into position, and then completely
close the handle.
Figure 115. Installing the 2.5-inch drive
9. Check the hot-swap-drive status LEDs to ensure that the 2.5-inch drive is operating correctly. You might
have to restart the server for the newly installed 2.5-inch drive to be recognized. See “Hot-swap-drive
LEDs” on page 31. If the 2.5-inch drive is faulty, reinstall or replace it until it is operating correctly.
10. Close the front door (if available).
150
ThinkServer TD350 User Guide and Hardware Maintenance Manual
Содержание ThinkServer TD350 70DG
Страница 14: ...xii ThinkServer TD350 User Guide and Hardware Maintenance Manual ...
Страница 18: ...4 ThinkServer TD350 User Guide and Hardware Maintenance Manual ...
Страница 20: ...6 ThinkServer TD350 User Guide and Hardware Maintenance Manual ...
Страница 66: ...52 ThinkServer TD350 User Guide and Hardware Maintenance Manual ...
Страница 192: ...178 ThinkServer TD350 User Guide and Hardware Maintenance Manual ...
Страница 202: ...188 ThinkServer TD350 User Guide and Hardware Maintenance Manual ...
Страница 217: ...guidelines 69 Copyright Lenovo 2014 2015 203 ...
Страница 218: ...204 ThinkServer TD350 User Guide and Hardware Maintenance Manual ...
Страница 219: ......
Страница 220: ......


