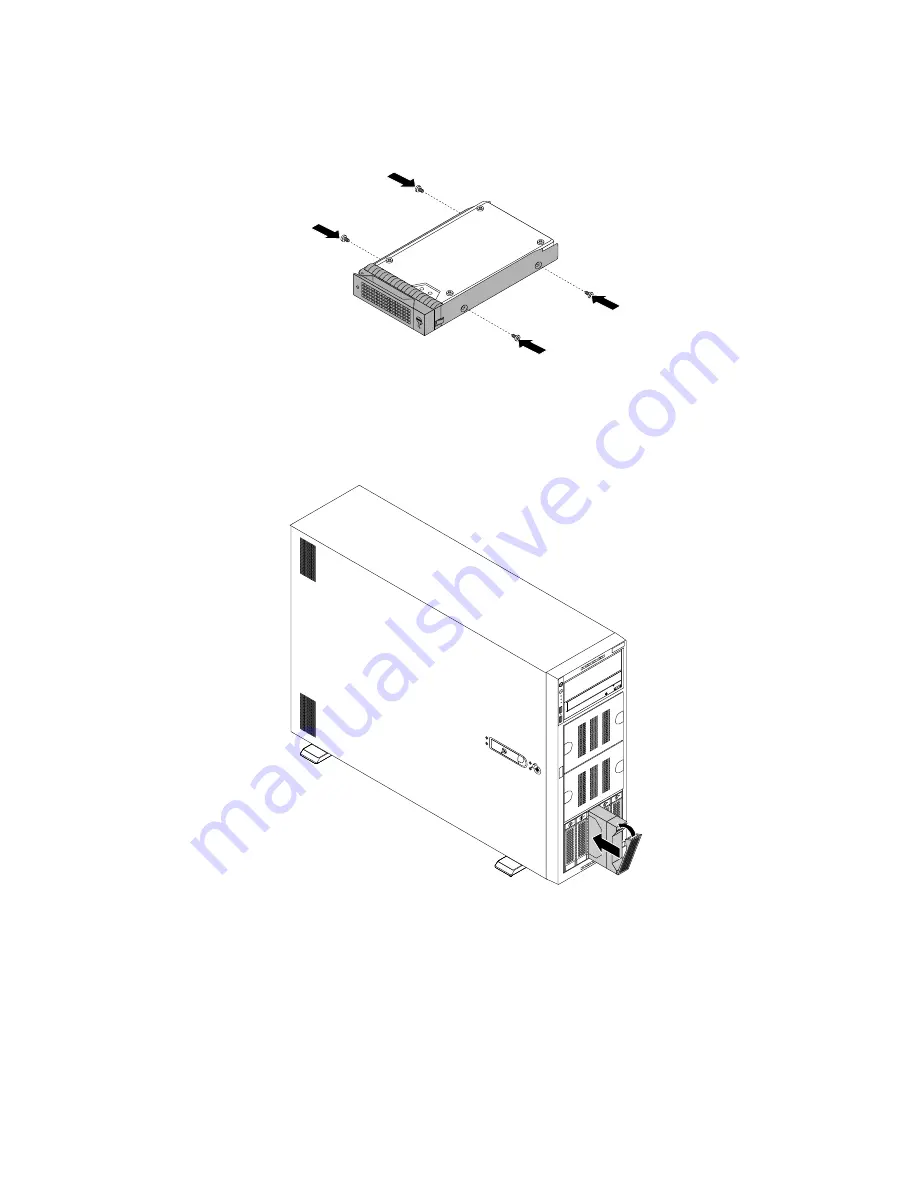
9. Align the holes in the drive tray with the corresponding ones on the new easy-swap drive. Then, install
the four screws to secure the drive to the drive tray.
Figure 88. Installing the drive to the drive tray
10. Slide the new easy-swap drive into the drive bay from the front until it snaps into position, and then
close the handle.
Figure 89. Installing the easy-swap drive
11. Close the front door (if available).
12. Do one of the following:
• If you are installing an easy-swap drive, save the removed dummy tray in case that you later remove
the easy-swap drive and need a dummy tray to cover the drive bay.
• If you are replacing an easy-swap drive and are instructed to return the old easy-swap drive, follow all
packaging instructions and use any packaging materials that are supplied to you for shipping.
132
ThinkServer TD350 User Guide and Hardware Maintenance Manual
Содержание ThinkServer TD350 70DG
Страница 14: ...xii ThinkServer TD350 User Guide and Hardware Maintenance Manual ...
Страница 18: ...4 ThinkServer TD350 User Guide and Hardware Maintenance Manual ...
Страница 20: ...6 ThinkServer TD350 User Guide and Hardware Maintenance Manual ...
Страница 66: ...52 ThinkServer TD350 User Guide and Hardware Maintenance Manual ...
Страница 192: ...178 ThinkServer TD350 User Guide and Hardware Maintenance Manual ...
Страница 202: ...188 ThinkServer TD350 User Guide and Hardware Maintenance Manual ...
Страница 217: ...guidelines 69 Copyright Lenovo 2014 2015 203 ...
Страница 218: ...204 ThinkServer TD350 User Guide and Hardware Maintenance Manual ...
Страница 219: ......
Страница 220: ......


