background image

User Guide

ThinkPad T440

Содержание Thinkpad T440

Страница 1: ...User Guide ThinkPad T440 ...

Страница 2: ...163 The latest Safety Warranty and Setup Guide and the Regulatory Notice are available on the Lenovo Support Web site at http www lenovo com UserManual Third Edition January 2014 Copyright Lenovo 2013 2014 LIMITED AND RESTRICTED RIGHTS NOTICE If data or software is delivered pursuant a General Services Administration GSA contract use reproduction or disclosure is subject to restrictions set forth ...

Страница 3: ...ing to the network 33 Ethernet connections 34 Wireless connections 34 Presentations and multimedia 38 Changing display settings 38 Connecting a projector or an external monitor 38 Setting up a presentation 41 Using dual displays 41 Using audio features 42 Using the camera 42 Using a flash media card or a smart card 43 Chapter 3 You and your computer 45 Accessibility and comfort 45 Ergonomic inform...

Страница 4: ...s for preventing problems 123 Making sure device drivers are current 124 Taking care of your computer 125 Cleaning the cover of your computer 126 Chapter 10 Troubleshooting computer problems 129 Diagnosing problems 129 Troubleshooting 129 Computer stops responding 129 Spills on the keyboard 130 Error messages 130 Errors without messages 131 Beep errors 133 Memory module problems 133 Networking pro...

Страница 5: ...56 Battery recycling information for Taiwan 156 Battery recycling information for the European Union 157 Battery recycling information for the United States and Canada 157 Appendix C Restriction of Hazardous Substances Directive RoHS 159 European Union RoHS 159 China RoHS 159 India RoHS 159 Turkish RoHS 159 Ukraine RoHS 160 Appendix D ENERGY STAR model information 161 Appendix E Notices 163 Tradem...

Страница 6: ...iv User Guide ...

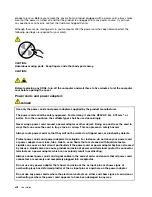
Страница 7: ...yboard by lifting your hands from the palm rest Protect yourself from the heat generated by the ac power adapter When the ac power adapter is connected to an electrical outlet and your computer it generates heat Extended contact with your body even through clothing may cause a skin burn Do not place the ac power adapter in contact with any part of your body while it is in use Never use it to warm ...

Страница 8: ...the Lenovo Limited Warranty For more information see Warranty Information in the Safety Warranty and Setup Guide that comes with your computer Customer safety is important Our products are developed to be safe and effective However personal computers are electronic devices Power cords power adapters and other features can create potential safety risks that can result in physical injury or property...

Страница 9: ...e protectors or power supplies that are cracked broken or damaged Signs of overheating smoke sparks or fire Damage to a battery such as cracks dents or creases discharge from a battery or a buildup of foreign substances on the battery A cracking hissing or popping sound or strong odor that comes from the product Signs that liquid has been spilled or an object has fallen onto the computer product t...

Страница 10: ...s the cord in ways that can cause the cord to fray crack or crimp This can present a safety hazard Always route power cords so that they will not be walked on tripped over or pinched by objects Protect power cords and power adapters from liquids For instance do not leave your power cord or power adapter near sinks tubs toilets or on floors that are cleaned with liquid cleansers Liquids can cause a...

Страница 11: ...ectricity otherwise unstable voltage might damage your computer data or attached devices Some products are equipped with a three pronged plug This plug fits only into a grounded electrical outlet This is a safety feature Do not defeat this safety feature by trying to insert it into a non grounded outlet If you cannot insert the plug into the outlet contact an electrician for an approved outlet ada...

Страница 12: ... the battery to water or other liquids Only recharge the battery pack strictly according to instructions included in the product documentation Battery abuse or mishandling can cause the battery to overheat which can cause gasses or flame to vent from the battery pack or coin cell battery If your battery is damaged or if you notice any discharge from your battery or the buildup of foreign materials...

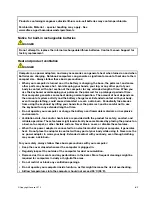
Страница 13: ...burn Periodically take breaks from using the keyboard by lifting your hands from the palm rest and be careful not to use the keyboard for any extended length of time Do not operate your computer or charge the battery near flammable materials or in explosive environments Ventilation slots fans and or heat sinks are provided with the product for safety comfort and reliable operation These features m...

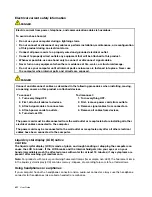
Страница 14: ...ctors 4 Attach power cords to outlets 5 Turn devices ON To disconnect 1 Turn everything OFF 2 First remove power cords from outlets 3 Remove signal cables from connectors 4 Remove all cables from devices The power cord must be disconnected from the wall outlet or receptacle before installing all other electrical cables connected to the computer The power cord may be reconnected to the wall outlet ...

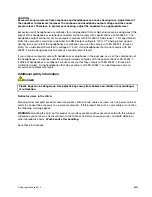
Страница 15: ...els If your Lenovo computer came with headphones or earphones in the package as a set the combination of the headphones or earphones and the computer already complies with the specifications of EN 50332 1 If different headphones or earphones are used ensure that they comply with EN 50332 1 Clause 6 5 Limitation Values Using headphones that do not comply with EN 50332 1 can be dangerous due to exce...

Страница 16: ...xiv User Guide ...

Страница 17: ...Lenovo programs on page 14 Locating computer controls connectors and indicators This section introduces the computer hardware features to give you the basic information you will need to start using the computer Front view Figure 1 Front view 1 Camera on some models 5 TrackPoint pointing stick 2 Microphones 6 NFC logo on some models 3 Power button 7 ThinkPad trackpad 4 Fingerprint reader on some mo...

Страница 18: ... the Power Plan tab For instructions on how to start the Power Manager program see Accessing Lenovo programs on the Windows 7 operating system on page 14 For Windows 8 and Windows 8 1 Go to the desktop Click the battery status icon in the windows notification area and click More power options Then click Choose what the power button does 4 Fingerprint reader on some models Fingerprint authenticatio...

Страница 19: ...microphones on the computer will be enabled instead The audio connector does not support a conventional microphone For more information see Using audio features on page 42 2 SIM card tray on some models If your computer has a wireless Wide Area Network wireless WAN feature a Subscriber Identification Module SIM card might be required to establish wireless WAN connections Depending on the country o...

Страница 20: ...er right indicator blinks yellow it indicates that data is being transmitted Note If you attach the computer to a docking station use the Ethernet connector on the docking station to connect to a LAN not the one on the computer 6 Video graphics array VGA connector Use the VGA connector to connect the computer to a VGA compatible video device such as a VGA monitor Note If you attach the computer to...

Страница 21: ...computer to a compatible projector external monitor or high definition television For more information see Using the mini DisplayPort connector on page 41 4 Always on USB connector By default the Always on USB connector enables you to charge some mobile digital devices and smartphones in the following situations When your computer is on or in sleep mode When your computer is in hibernation mode or...

Страница 22: ...ck 4 Keyboard drainage holes 2 Docking station connector 5 Emergency reset hole 3 Speakers 1 External battery pack Use the computer with the battery power whenever ac power is unavailable You can use the Power Manager program to adjust your power settings as needed For detailed information see the help information system of the Power Manager program 2 Docking station connector Depending on the mod...

Страница 23: ...ccidentally spill water or drink over the keyboard 5 Emergency reset hole If the computer stops responding and you cannot turn it off by pressing the power button remove the ac power adapter and insert a straightened paper clip into the emergency reset hole to reset the computer Chapter 1 Product overview 7 ...

Страница 24: ...cator shows the status of Fn Lock function For more information see Special keys on page 26 2 Speaker mute indicator When the speaker mute indicator is on the speakers are muted 3 Microphone mute indicator When the microphone mute indicator is on the microphones are muted 4 Camera status indicator When the camera status indicator is on the camera is in use 5 6 System status indicators 8 User Guide...

Страница 25: ...soft label Machine type and model information The machine type and model label identifies your computer When you contact Lenovo for help the machine type and model information helps support technicians to identify your computer and provide faster service The following figure shows the location of the machine type and model of your computer FCC ID and IC Certification information There is no FCC ID...

Страница 26: ...eless communication card that is not approved for use in your computer an error message will be displayed and the computer will beep when you turn on the computer Certificate of Authenticity information The Certificate of Authenticity label is provided on models that are licensed to use a Windows 7 operatingsystem Thelicensed Windows versionand product key associated with the computer are printed ...

Страница 27: ...ith a Windows 8 or Windows 8 1 operating system are shipped with the corresponding license key digitally encoded into the computer hardware Depending on the computer model the Genuine Microsoft label can be on the computer cover under the battery or on the power adapter For more information about the Genuine Microsoft label go to http www microsoft com en us howtotell Hardware aspx The following f...

Страница 28: ... Integrated microphones Multi touch technology on some models Keyboard 6 row keyboard backlight function on some models Fn key function TrackPoint pointing device and trackpad Interface 4 in 1 digital media card reader Combo audio connector Docking station connector External monitor connectors VGA and Mini DisplayPort One Always on USB 3 0 connector USB 3 0 connector RJ45 Ethernet connector Smart ...

Страница 29: ...emperature when operating under the unpressurized condition 31 3 C 88 F Note When you charge the battery its temperature must be at least 10 C 50 F Relative humidity Operating 8 to 95 at wet bulb 23 73 Storage 5 to 95 at wet bulb 27 81 If possible place your computer in a well ventilated and dry area without direct exposure to sunshine Attention Keep electrical appliances such as an electric fan r...

Страница 30: ...e screen When the installation process completes the program icon will be activated The following table lists the programs and the corresponding icon names on the navigation window of the Lenovo ThinkVantage Tools program Note Depending on your computer model some of the programs might not be available Table 1 Programs in the Lenovo ThinkVantage Tools program Program Icon name Access Connections I...

Страница 31: ...ions Utility Hardware and Sound Lenovo Web Conferencing Fingerprint Manager Pro System and Security Hardware and Sound Lenovo Fingerprint Manager Pro or Lenovo Notebook Fingerprint Reader Lenovo Solution Center System and Security Lenovo System Health and Diagnostics Message Center Plus Programs Messages from Lenovo Mobile Broadband Connect Network and Internet Lenovo 3G Mobile Broadband Password ...

Страница 32: ...ching between location profiles as you move your computer from place to place you can quickly and easily connect to a network with no need to manually reconfigure your settings and restart the computer each time Client Security Solution Windows 7 The Client Security Solution program protects your computer by securing client data and deflecting security breach attempts It also can help manage your ...

Страница 33: ...hance your computing experience by turning your computer into a portable hotspot configuring camera and audio settings optimizing your power settings and creating and managing multiple network profiles Lenovo Support Windows 8 and Windows 8 1 The Lenovo Support program enables you to register your computer with Lenovo check the computer health condition and battery status download and view user ma...

Страница 34: ...ot and resolve computer problems It combines diagnostic tests system information collection security status and support information along with hints and tips for optimal system performance Password Manager Windows 7 Windows 8 and Windows 8 1 The Password Manager program automatically captures and fills in authentication information for Windows programs and Web sites System Update Windows 7 Windows...

Страница 35: ...o for help Automatic notification of free software and special promotional offers To register your computer with Lenovo do one of the following Go to http www lenovo com register and follow the instructions on the screen to register your computer Connect your computer to the Internet and register your computer through a preinstalled registration program For Windows 7 The preinstalled Lenovo Produc...

Страница 36: ...ake advantage of the networking features provided by the Access Connections program on the Windows 7 operating system or Location Awareness in the Lenovo Settings program on the Windows 8 and Windows 8 1 operating systems To learn more about using the wireless features of your computer refer to Wireless connections on page 34 To travel more confidently be sure to check the tips in Traveling with y...

Страница 37: ...ary Installing a new operating system on page 105 Computer stops responding on page 129 Power problems on page 140 Using the multi touch screen This topic provides instructions on how to use the multi touch screen that is available on some models Common touch gestures and mouse actions The following table lists some common touch gestures and the corresponding mouse actions that is applicable to th...

Страница 38: ...otate an item Put two or more fingers on an item and then rotate your fingers supported only on some models If the application supports rotation click the rotation icon To open a menu with multiple options Tap and hold Double click Touch gestures and mouse actions for Windows 8 and Windows 8 1 operating systems The following table lists some touch gestures and the corresponding mouse actions suppo...

Страница 39: ...applications or select an active application from the list Swipe in and out on the left edge Move the pointer to the top left corner of the screen and then move the pointer downward along the left edge To make a selection click the desired application To view all applications on the Start screen Windows 8 1 Swipe up to the top edge Tap the downward arrow located near the bottom left corner of the ...

Страница 40: ...con To view the application commands on an open application such as Copy Save and Delete depending on the application Swipe in from the top or bottom edge Right click an open application To close the current application Swipe in from the top edge to the bottom Move the pointer to the top edge of the screen click and hold the left button on your mouse then move the pointer to the bottom of the scre...

Страница 41: ...repancy Tips on cleaning the multi touch screen Turn off the computer before cleaning the multi touch screen Use a dry soft and lint free cloth or a piece of absorbent cotton to remove fingerprints or dust from the multi touch screen Do not apply solvents to the cloth Gently wipe the screen using a top down motion Do not apply any pressure on the screen Chapter 2 Using your computer 25 ...

Страница 42: ... is on To input F1 F12 press the function keys directly To initiate the special function of each key press Fn and the corresponding function key Mutes or unmutes the speakers When the speakers are muted the indicator on the F1 key is on If you mute the sound and turn off your computer the sound will remain muted when you turn on your computer again To turn on the sound press F1 F2 or F3 Decreases ...

Страница 43: ...n the conventional keyboard Fn 4 Put your computer into sleep mode To return to normal operation press the Fn key only Windows key On the Windows 7 operating system press the Windows key 1 to open the Start menu On the Windows 8 and Windows 8 1 operating systems press the Windows key to switch between the current workspace and the Start screen You also can use the Windows key together with another...

Страница 44: ...sing the multi touch trackpad The ThinkPad trackpad of your computer supports multi touch with which you can zoom in zoom out or scroll on the screen while browsing the Internet or reading or editing a document Customizing the ThinkPad pointing device You can customize the ThinkPad pointing device to achieve the extended functions of the ThinkPad pointing device To customize the ThinkPad pointing ...

Страница 45: ... ThinkPad batteries you will be able to work longer without being tied to an electrical outlet Checking the battery status The battery status icon in the Windows notification area displays the percentage of battery power remaining The rate at which you use battery power determines how long you can use the battery of your computer between charges Because of different user habits and needs it is dif...

Страница 46: ...er cord that plugs into the ac outlet and into the transformer pack Attention Using an improper power cord might cause severe damage to your computer Connecting the ac power adapter To connect the ac power adapter do the following Note Ensure that you perform the actions in the order in which they are listed 1 Plug the ac power adapter into an electrical outlet 2 Connect the power cord to the tran...

Страница 47: ...ification area and click Power Options Then click Change plan settings next to your power plan For more information refer to the help information system of the program Power saving modes There are several modes that you can use at any time to conserve power This section introduces each mode and gives tips on the effective use of battery power Screen blank mode for Windows 7 only The computer displ...

Страница 48: ... change your power plan settings by doing the following For Windows 7 Start the Power Manager program and then click the Power Plan tab Then follow the instructions on the screen For instructions on how to start the Power Manager program see Lenovo programs on page 14 For Windows 8 and Windows 8 1 Go to the desktop Right click the battery status icon in the windows notification area and click Powe...

Страница 49: ...ny discharge from your battery or the buildup of foreign materials on the battery leads stop using the battery and obtain a replacement from the battery manufacturer DANGER Only recharge the battery pack strictly according to instructions included in the product documentation DANGER Do not put the battery pack in trash that is disposed of in landfills When disposing of the battery comply with loca...

Страница 50: ... a relatively small geographic area such as an office building or a house Devices based on the 802 11 standards can connect to this type of network Your computer comes with a built in wireless network card and a configuration utility to help you establish wireless connections and monitor the connection status This enables you to stay connected to your network while you are at the office in a meeti...

Страница 51: ...ck the wireless LAN connection status through the wireless network connection status icon in the Windows notification area The more bars encompassed the better the signal is For the Windows 7 operating system you also can check the Access Connections gauge the Access Connections status icon or the Access Connections wireless status icon in the Windows notification area Access Connections gauge sta...

Страница 52: ... using the wireless WAN feature To achieve the best connection use the following guidelines Keep your computer away from your body Place your computer on a flat surface and open your computer lid to an angle of slightly more than 90 degrees Place your computer away from concrete or brick walls that might dampen cellular signals Best reception will be available near windows and other locations wher...

Страница 53: ...a that you want to send 2 Select Send To Bluetooth Devices 3 Select a Bluetooth device and then follow the instructions on the screen For more information refer to the Windows help information system and the Bluetooth help information system Using the NFC connection NFC is a high frequency and short range wireless communications technology Depending on the model your computer comes with an NFC car...

Страница 54: ...ace cable with a ferrite core is required Your computer can support a maximum video resolution of up to 2048x1536 with an external monitor connected to the VGA connector or up to 2560x1600 with an external monitor connected to the mini DisplayPort connector provided that the external monitor also supports that resolution For more information about the external monitor refer to the manuals provided...

Страница 55: ...e Driver 11 Click Browse my computer for driver software and then click Let me pick from a list of device drivers on my computer 12 Clear the Show compatible hardware check box 13 Select the correct manufacturer and model for the external monitor If you cannot find your monitor on the list stop the installation of this driver and use the driver shipped with your monitor 14 After updating the drive...

Страница 56: ...pear on the DVI monitor do the following For Windows 7 1 Press Ctrl Alt F12 The Intel Graphics and Media Control Panel window opens 2 Select Advanced Mode and click OK 3 Select Multiple Displays 4 In the Operating Mode field select one of the following options depending on your needs and follow the instructions on the screen to complete other configurations Single Display Depending on your configu...

Страница 57: ...d an external monitor Using the Duplicate or Extend desktop function With the Duplicate desktop function you can display the same output on both the computer display and an external display You also can display different desktop images on each monitor with the Extend desktop function You can use the Duplicate or Extend desktop function without changing any settings If the function does not work re...

Страница 58: ... Waveform Audio File Format WAV files Recording from various sound sources such as a headset attached Note The combo audio connector does not support a conventional microphone The following table shows which functions of the audio devices are supported Table 3 Audio feature list Connector Headset with a 3 5 mm 0 14 inch 4 pole plug Conventional headphone Conventional microphone Combo audio connect...

Страница 59: ...media card reader slot or a smart card reader slot If your computer has a media card reader slot it supports the following cards MultiMediaCard MMC Secure Digital eXtended Capacity SDXC card Secure Digital SD card Secure Digital High Capacity SDHC card Note Your computer does not support the CPRM feature for the SD card Attention While transferring data to or from a flash media card such as an SD ...

Страница 60: ...ing 1 Click the triangular icon in the Windows notification area to show hidden icons Then right click the Safely Remove Hardware and Eject Media icon 2 Select the item you want to remove to stop the card 3 Press the card to eject it from your computer 4 Remove the card and store it safely for future use Note If you do not remove the card from your computer after you eject the card from the Window...

Страница 61: ...st information and technology to our customers with disabilities Refer to our accessibility information which outlines our efforts in this area See Accessibility information on page 46 Ergonomic information Working in the virtual office might mean adapting to frequent changes in your environment For example adapting to the surrounding light sources proper seating and the placement of your computer...

Страница 62: ... on the eyes Of course any concentrated and sustained visual activity can be tiring If you have questions on eye fatigue or visual discomfort consult a vision care specialist for advice Comfort Observe the following guidelines to achieve greater comfort and improve performance Active sitting and rest breaks The longer you sit and work with your computer the more important it is to observe your wor...

Страница 63: ...erted to HTML or plain text in many languages One conversion option converts PDF documents on the Internet A second option enables users to submit the URL of an Adobe PDF file through e mail to convert it to HTML or ASCII text Adobe PDF files on a local hard disk drive local CD ROM or LAN also can be converted by attaching the Adobe PDF file to an e mail message Traveling with your computer This t...

Страница 64: ...net cable A quality carrying case that provides adequate cushion and protection External storage device If you are traveling to another country you might want to consider an ac power adapter for the country to which you are traveling To purchase travel accessories go to http www lenovo com accessories 48 User Guide ...

Страница 65: ...sleep mode Note If a Windows password has been set you will be prompted to enter it Typing passwords When this icon is displayed type a power on password or a supervisor password When this icon is displayed type a user hard disk password To type a master hard disk password press F1 When the icon changes to type the master hard disk password Note To return to the icon press F1 again Power on passwo...

Страница 66: ...ve the password canceled Supervisor password The supervisor password protects the system information stored in the ThinkPad Setup program If you have set a supervisor password no one can change the configuration of the computer without the password It provides the following security features If only a supervisor password is set a password prompt is displayed when you try to start the ThinkPad Setu...

Страница 67: ...owing a In the Enter Current Password field type the current supervisor password and press Enter b In the Enter New Password field type the new supervisor password and press Enter then retype the password in the Confirm New Password field and press Enter To remove a password do the following a In the Enter Current Password field type the current supervisor password and press Enter b Leave the Ente...

Страница 68: ...ord in the Enter New Password field and press Enter b In the Confirm New Password field retype the password you just entered and press Enter If you select User Master do the following a First set a user hard disk password When a message window prompts you to set the user hard disk password press Enter to continue Type your new user hard disk password in the Enter New Password field and press Enter...

Страница 69: ...imum length of a hard disk password through the Security menu If you set a hard disk password of over seven characters the hard disk drive can be used only with a computer that can recognize a hard disk password of over seven characters If you then install the hard disk drive in a computer that cannot recognize a hard disk password that contains more than seven characters you cannot access the dri...

Страница 70: ...em and Security BitLocker Drive Encryption For more information about Windows BitLocker Drive Encryption see the help information system of the Windows operating system or search for Microsoft Windows BitLocker Drive Encryption Step by Step Guide on the Microsoft Web site Disk Encryption hard disk drive and Encryption solid state drive Some models contain the Disk Encryption hard disk drive or Enc...

Страница 71: ...our beeps each or you will see error message 0176 or 0192 If the security chip is inactive or disabled the Clear Security Chip option will not be displayed When you clear the security chip turn off your computer and then turn it on again after you set the security chip to Active Otherwise the Clear Security Chip option is not displayed Using the fingerprint reader Depending on the model your compu...

Страница 72: ...r finger over the fingerprint reader do the following 1 Place the top joint of your finger on the sensor 2 Apply light pressure and swipe your finger toward you across the reader in one smooth motion Do not lift your finger when you are swiping it 56 User Guide ...

Страница 73: ...safe place If you forget your power on password you must take your computer to a Lenovo authorized servicer or a marketing representative to have the password canceled If you forget your hard disk password Lenovo cannot reset your password or recover data from the hard disk drive You must take your computer to a Lenovo authorized servicer or a marketing representative to have the hard disk drive r...

Страница 74: ...ght not be able to register or authenticate it Your finger is wrinkled Your finger is rough dry or injured Your finger is stained with dirt mud or oil The surface of your finger is different from when you enrolled your fingerprint Your finger is wet A finger is used that has not been enrolled To improve the situation try the following Clean or wipe your hands to remove any excess dirt or moisture ...

Страница 75: ... tool For disposing of data on the hard disk drive Lenovo provides the Secure Data DisposalTM tool Go to http www lenovo com support to download these tools If an Encryption solid state drive or a Disk Encryption hard disk drive is supported and installed in your computer you can logically dispose of all the data on the drive in a short time by erasing the cryptographic key The data encrypted with...

Страница 76: ...60 User Guide ...

Страница 77: ... or later Paragon Backup Recovery 10 Suite or later Paragon Backup Recovery 10 Home or later Creating and using recovery media You can use recovery media to restore the hard disk drive to the factory default settings Recovery media are useful if you transfer the computer to another area sell the computer recycle the computer or put the computer in an operational state after all other methods of re...

Страница 78: ... discs are provided only with computers preinstalled with Microsoft Office Performing backup and recovery operations The Rescue and Recovery program enables you to back up all your hard disk drive contents including the operating system data files software programs and personal settings You can designate where the Rescue and Recovery program stores the backup In a protected area of your hard disk ...

Страница 79: ...rive from a Rescue and Recovery backup even if you cannot start the Windows operating system Restore your hard disk drive to the factory default settings The Rescue and Recovery workspace enables you to restore the complete contents of your hard disk drive to the factory default settings If you have multiple partitions on your hard disk drive you have the option to restore the factory default sett...

Страница 80: ...in window click the Launch advanced Rescue and Recovery arrow 3 Click the Create Rescue Media icon The Create Rescue and Recovery Media window opens 4 In the Rescue Media area select the type of the rescue medium you want to create You can create a rescue medium using a disc a USB hard disk drive or a secondary internal hard disk drive 5 Click OK and follow the instructions on the screen to create...

Страница 81: ... various devices installed in your computer for example AUDIO and VIDEO 4 Open the subfolder for the device 5 Reinstall the device driver by one of the following methods In the subfolder for the device look for a text file a file with the extension txt The text file contains information on how to reinstall that device driver If the subfolder for the device contains a file of setup information a fi...

Страница 82: ...the Windows recovery image With the recovery media you can troubleshoot and fix the problems on your computer even if you cannot start the Windows 8 or Windows 8 1 operating system It is recommended that you create recovery media as early as possible For more information see Creating and using recovery media on page 68 Refreshing your computer If your computer does not perform well and the problem...

Страница 83: ...are settings of the computer change the startup settings of the Windows operating system start the computer from an external device or restore the Windows operating system from a system image To use the advanced startup options do the following 1 Depending on the operating system do one of the following For Windows 8 Move your pointer to the top right or bottom right corner of the screen to displa...

Страница 84: ...ive 3 Click Yes in the User Account Control window to allow the Recovery Media Creator program to start 4 Ensure that you select the Copy the recovery partition from the PC to the recovery drive option Then click Next Important If you clear the Copy the recovery partition from the PC to the recovery drive option you will create recovery media without the recovery partition content You still can st...

Страница 85: ...then select a preferred keyboard layout 4 Click Troubleshoot to display the optional recovery solutions 5 Select a corresponding recovery solution according to your situation For example select Reset your PC if you want to reset your computer to the factory default settings For more information about the recovery solutions provided by the Windows 8 and Windows 8 1 operating systems go to http go m...

Страница 86: ...70 User Guide ...

Страница 87: ...movement Movement can cause static electricity to build up around you Always handle components carefully Handle adapters memory modules and other circuit boards by the edges Never touch exposed circuitry Prevent others from touching components When you install a static sensitive option or CRU touch the static protective package that contains the part to a metal expansion slot cover or other unpain...

Страница 88: ... be displayed The battery installed is not supported by this system and will not charge Please replace the battery with the correct Lenovo battery for this system Prerequisites for the procedure DANGER If the rechargeable battery pack is incorrectly replaced there is danger of an explosion The battery pack contains a small amount of harmful substances To avoid possible injury Replace only with a b...

Страница 89: ...rcuit IC chip mounted on one side of the card If your computer supports wireless WAN connections your computer might require a SIM card to establish wireless WAN connections Depending on the country or region of delivery you might need to purchase a SIM card or a SIM card might already be installed in your computer or is part of the shipping contents that come with your computer To install or repl...

Страница 90: ... computer 4 Insert a straightened paper clip into the hole in the SIM card tray 1 The SIM card tray ejects 2 Then slide the SIM card tray out of the computer 5 Gently take the SIM card out of the tray 6 Install a new SIM card into the tray 74 User Guide ...

Страница 91: ...e illustrations in this topic To replace the base cover assembly do the following 1 Disable the built in battery See Disabling the built in battery on page 71 2 Close the computer display and turn the computer over 3 Remove the external battery pack See Replacing the external battery pack on page 72 4 Loosen the screws that secure the base cover assembly in ascending alphabetical order a to h as i...

Страница 92: ...ter over again Connect the ac power adapter and all cables Note If you remove the base cover assembly when your computer has the battery pack installed or is connected to ac power there might be a risk of short circuits Besides the computer will not start after you reinstall the base cover assembly To start the computer disconnect the ac power adapter and then reconnect it to the computer Replacin...

Страница 93: ...d state drive Do not touch the connector Before removing the hard disk drive or solid state drive make a backup copy of all the information on it and then turn off the computer Never remove the hard disk drive or solid state drive while the computer is operating in sleep mode or in hibernation mode To replace the hard disk drive or solid state drive do the following 1 Disable the built in battery ...

Страница 94: ... or solid state drive Then attach the bracket to the new hard disk drive or solid state drive 8 Install the new hard disk drive or solid state drive with bracket 9 Install the screw to secure the hard disk drive or solid state drive 78 User Guide ...

Страница 95: ...guration In some conditions the memory module in your computer might not be able to operate at the maximum speed Attention Before you start installing a memory module touch a metal table or a grounded metal object This action reduces any static electricity from your body Static electricity could damage the memory module To replace a memory module do the following 1 Disable the built in battery See...

Страница 96: ...hat the memory module is firmly installed in the slot and cannot be moved easily Attention Do not touch the contact edge of the memory module Otherwise the memory module might be damaged 7 Reinstall the base cover assembly See Replacing the base cover assembly on page 75 8 Reinstall the external battery pack 9 Turn the computer over again Connect the ac power adapter and all cables Replacing an M ...

Страница 97: ... in battery See Disabling the built in battery on page 71 2 Close the computer display and turn the computer over 3 Remove the external battery pack See Replacing the external battery pack on page 72 4 Remove the base cover assembly See Replacing the base cover assembly on page 75 5 If a tool is provided with the new card to help you disconnect cables use the tool to disconnect the cables from the...

Страница 98: ... the slot 8 Align the notched edge of the new wireless LAN card with the key in the slot Then carefully insert the card into the slot 9 Pivot the new wireless LAN card downward 1 and then install the screw to secure the card in place 2 82 User Guide ...

Страница 99: ...ic current from power telephone and communication cables is hazardous To avoid shock hazard disconnect the cables before opening the cover of this slot Attention Before you start installing an M 2 wireless WAN card touch a metal table or a grounded metal object This action reduces any static electricity from your body Static electricity could damage the card Some computers might come with an M 2 w...

Страница 100: ... cables from the old card If no such a tool is provided hold the cable connector with your fingers and gently disconnect each cable from the old card 6 Remove the screw The card is released from the secured position and pivots upward 7 Carefully remove the wireless WAN card out of the slot 84 User Guide ...

Страница 101: ... 1 and then install the screw to secure the card in place 2 10 Connect the antenna cables to the new wireless WAN card Ensure that you connect the orange cable to the main connector on the card and the blue cable to the auxiliary connector on the card 11 Reinstall the base cover assembly See Replacing the base cover assembly on page 75 Chapter 6 Replacing devices 85 ...

Страница 102: ...Electric current from power telephone and communication cables is hazardous To avoid shock hazard disconnect the cables before opening the cover of this slot To remove the keyboard do the following 1 Disable the built in battery See Disabling the built in battery on page 71 2 Remove the external battery pack See Replacing the external battery pack on page 72 3 Find the keyboard multi tool in the s...

Страница 103: ...Note Do not press and hold the keys while sliding the keyboard frame otherwise the keyboard frame cannot be moved 5 Use the cross end of the multi tool to loosen the screws 6 Pivot the keyboard slightly upward as shown by the arrow 1 until you can see the connectors on the bottom side of the keyboard Then turn over the keyboard as shown by the arrow 2 Chapter 6 Replacing devices 87 ...

Страница 104: ...7 Put the keyboard on the palm rest and detach the connectors Then remove the keyboard To install the new keyboard do the following 88 User Guide ...

Страница 105: ... connectors and then turn over the keyboard 2 Insert the keyboard into the keyboard bezel as shown Ensure that the front edge of the keyboard is under the frame of the keyboard bezel Chapter 6 Replacing devices 89 ...

Страница 106: ...3 Ensure that the screw heads are exposed completely Otherwise reveal the screw heads by sliding the keyboard frame forward with the flat end of the keyboard multi tool 90 User Guide ...

Страница 107: ...ezel Note Do not press and hold the keys while sliding the keyboard frame otherwise the keyboard frame cannot be moved 6 Insert the flat end of the keyboard multi tool into the sides of the keyboard as shown to push the keyboard frame backward Ensure that there is no gap between the keyboard frame and keyboard bezel Note Do not press and hold the keys while sliding the keyboard frame otherwise the...

Страница 108: ...expose it to water or rain Do not short circuit it Do not drop crush puncture or subject to strong forces Battery abuse or mishandling can cause the battery to overheat which can cause gasses or flame to vent from the battery pack or coin cell battery To replace the coin cell battery do the following 1 Disable the built in battery See Disabling the built in battery on page 71 2 Close the computer ...

Страница 109: ...ch the connector 2 7 Reinstall the base cover assembly See Replacing the base cover assembly on page 75 8 Reinstall the external battery pack 9 Turn the computer over again Connect the ac power adapter and all cables Chapter 6 Replacing devices 93 ...

Страница 110: ...94 User Guide ...

Страница 111: ...4 hours a day 7 days a week directly over the World Wide Web All you need is an Internet connection and a credit card To shop at Lenovo go to http www lenovo com essentials ThinkPad docking stations You can attach your computer to a supported docking station to expand working capability Depending on the model your computer might support the following docking stations ThinkPad Basic Dock ThinkPad P...

Страница 112: ...ector on your computer when you attach the docking station 4 Docking station connector Used to attach your computer Rear view 1 Always on USB connector Used to connect devices that are compatible with USB 2 0 or charge some mobile digital devices and smartphones when your computer is in sleep or hibernation mode 2 USB 2 0 connectors Used to connect devices that are compatible with USB 2 0 3 USB 3 ...

Страница 113: ...ton to turn on or turn off the computer 2 Key lock indicator This indicator turns on when the system lock key is in the locked position 3 Docking status indicator This indicator turns on when your computer is docked 4 Eject button Press the eject button to release the computer from the docking station 5 Sliding adjuster Use the sliding adjuster as a guide to align the docking station connector on ...

Страница 114: ...ct the ac power adapter 6 DisplayPort connector Used to attach a high performance monitor a direct drive monitor or other devices that use a DisplayPort connector 7 DVI connector Used to connect a monitor that supports Digital Visual Interface DVI connection Note The DVI connector provides a digital interface only This connector can only be used with a computer that supports DVI connection 8 VGA c...

Страница 115: ... button to release the computer from the docking station 5 Sliding adjuster Use the sliding adjuster as a guide to align the docking station connector on your computer when you attach the docking station 6 Docking station connector Used to attach your computer 7 System lock Use the system lock key to lock the eject button When the system lock key is in the locked position the eject button of the d...

Страница 116: ...ect a high definition television 8 DVI connector Used to connect a monitor that supports Digital Visual Interface DVI connection Note The DVI connector provides a digital interface only This connector can only be used with a computer that supports DVI connection 9 VGA connector Used to connect the computer to a VGA compatible video device such as a VGA monitor 10 Audio connector Used to connect he...

Страница 117: ... the docking station Check the ac power adapter of the docking station or disconnect and reattach the ac power adapter Note The computer will be in battery mode if you attach it to a docking station that is not connected to ac power Detaching a ThinkPad docking station To detach your computer from a ThinkPad docking station do the following Note The ThinkPad Basic Dock does not have the system loc...

Страница 118: ...lays to a docking station For the ThinkPad Pro Dock if you connect two external displays to the DisplayPort connector and the DVI connector the DVI connector is inactive For the ThinkPad Ultra Dock if you connect two external displays to the DisplayPort connector and the DVI connector the DVI connector is inactive 102 User Guide ...

Страница 119: ...is in different positions When the key is in position 1 the eject button of the docking station is locked and you cannot remove your computer The key lock indicator is on when the eject button is locked The security cable is locked When the key is in position 2 the eject button of the docking station is unlocked and you can remove your computer The key lock indicator is off when the eject button i...

Страница 120: ...104 User Guide ...

Страница 121: ... the C SWTOOLS OSFIXES directory The device drivers are in the C SWTOOLS DRIVERS directory The preinstalled programs are in the C SWTOOLS APPS directory 2 Start the ThinkPad Setup program See Using the ThinkPad Setup program on page 107 3 Select Startup UEFI Legacy Boot Then do one of the following To install the Windows 7 32 bit operating system select Legacy Only or Both To install the Windows 7...

Страница 122: ...tup program See Using the ThinkPad Setup program on page 107 2 Select Startup Boot to display the Boot Priority Order submenu 3 Select the drive that contains the Windows 8 or Windows 8 1 operating system installation program for example USB HDD 4 Press F10 A Setup Confirmation window is displayed Click Yes to save the configuration and exit the ThinkPad Setup program 5 Connect the drive that cont...

Страница 123: ...he device drivers in the C SWTOOLS DRIVERS directory on your hard disk drive or solid state drive For more information see Reinstalling preinstalled programs and device drivers on page 65 Using the ThinkPad Setup program The ThinkPad Setup program enables you to select various setup configurations for your computer through configuring the BIOS To configure the BIOS of your computer do the followin...

Страница 124: ...ine Type Model System unit serial number System board serial number Asset Tag CPU Type CPU Speed Installed memory UUID MAC Address Internal LAN Preinstalled operating system license UEFI Secure Boot Config menu To change the configuration of your computer select the Config tab from the ThinkPad Setup menu The following table lists the Config menu items Default values are in boldface Attention The ...

Страница 125: ...led Enabled Enable or disable Internet Protocol Version 6 IPv6 network stack for UEFI environment UEFI PXE Boot Priority for Both with UEFI first boot mode and IPv6 and IPv4 stacks are both enabled IPv6 First IPv4 First Select network stack priority for UEFI PXE boot USB UEFI BIOS Support Disabled Enabled Enable or disable boot support for USB storage devices Always On USB Disabled Enabled If you ...

Страница 126: ...bled Trackpad Disabled Enabled Enable or disable the built in trackpad Note If you want to use an external mouse select Disabled Keyboard Mouse Fn and Ctrl Key swap Disabled Enabled If you select Enabled the Fn key works as the Ctrl key and the Ctrl key works as the Fn key Note Even when Enabled is selected you need to press Fn to resume the computer from sleep mode to normal operation Display Boo...

Страница 127: ...aximize Performance Reduce microprocessor throttling Balanced Balance sound temperature and performance Note Each scheme affects fan sound temperature and performance CPU Power Management Disabled Enabled Enable or disable the power saving feature that stops the microprocessor clock automatically when there are no system activities Normally it is not necessary to change the setting Power On with A...

Страница 128: ...enabled when the ac power adapter is reconnected to the computer Password Beep Disabled Enabled Enable this option to have a beep sound when the system is waiting for a power on hard disk or supervisor password Different beeps will sound when the entered password matches or does not match the configured password Beep and Alarm Keyboard Beep Enabled Disabled Enable or disable keyboard beep when unm...

Страница 129: ...b from the ThinkPad Setup menu Then do the following 1 Use the cursor keys to select System Date or System Time 2 Type a date or time Security menu To change the security settings of your computer select the Security tab from the ThinkPad Setup menu The following table lists the Security menu items Default values are in boldface Attention The default configurations are already optimized for you Im...

Страница 130: ...visor password and specify a minimum length for passwords no one but you can change the length Power On Password Disabled Enabled For more information see Power on password on page 49 Hard Disk x Password Disabled Enabled For more information see Hard disk passwords on page 51 Note Hard Disk 1 means the hard disk drive is built into your computer Predesktop Authentication Disabled Enabled Enable o...

Страница 131: ...rting Windows 8 anD Windows 8 1 BIOS text string CMOS Reporting CMOS data NVRAM Reporting Security data stored in the Asset ID SMBIOS Reporting SMBIOS data Clear Security Chip Enter Clear the encryption key Note This item is displayed only if you have selected Active for the Security Chip option Intel TXT Feature Disabled Enabled Enable or disable the Intel Trusted Execution Technology Note This i...

Страница 132: ...led you can use the Wireless LAN connection Wireless WAN Disabled Enabled If you select Enabled you can use the wireless WAN device Bluetooth Disabled Enabled If you select Enabled you can use Bluetooth devices USB Port Disabled Enabled If you select Enabled you can use the USB connectors Memory Card Slot Disabled Enabled If you select Enabled you can use the memory card slots Smart Card Slot Disa...

Страница 133: ...nauthorized operating systems from running at boot time Select Disabled to allow any operating systems to run at boot time Platform Mode Setup Mode User Mode Specify the system operating mode Secure Boot Mode Standard Mode Custom Mode Specify the Secure Boot mode Reset to Setup Mode This option is used to clear the current platform key and put the system into Setup Mode You can install your own pl...

Страница 134: ...oot Select the boot device when you press the power button to turn on the computer Network Boot Select the boot device when the system wakes from LAN If Wake On LAN is enabled the network administrator can turn on all of the computers in a LAN remotely by use of network management software UEFI Legacy Boot Both UEFI Legacy Boot Priority UEFI First Legacy First UEFI Only Legacy Only CSM Support for...

Страница 135: ...scard the changes and restart the computer Load Setup Defaults Restore to the factory default settings Note Enable OS Optimized Defaults to meet the Windows 8 or Windows 8 1 certification requirements When you change this setting some other settings are changed automatically such as CSM Support UEFI Legacy Boot Secure Boot and Secure RollBack Prevention Discard Changes Discard the changes Save Cha...

Страница 136: ...quires For example with the appropriate LAN card your computer can be started from the PXE server Note The Remote Initial Program Load RIPL or RPL function cannot be used with your computer Wake on LAN The network administrator can turn on a computer from a management console by using the Wake on LAN feature When the Wake on LAN feature is enabled many operations such as data transfer software upd...

Страница 137: ...pecified on the Network Boot menu and then follow the boot order list on the Boot menu To define a Network Boot sequence do the following 1 Start the ThinkPad Setup program See Using the ThinkPad Setup program on page 107 2 Select Startup Network Boot The boot device list is displayed 3 Select a boot device to make it as the top boot priority 4 Press F10 A Setup Confirmation window is displayed Cl...

Страница 138: ...122 User Guide ...

Страница 139: ... free up disk space uninstall unused programs Note You also might want to look for program duplication or overlapping versions Clean out your Inbox Sent and Trash folders from your e mail client program Back up your data at least once a week If critical data is present it is a good idea to perform a daily backup operation Lenovo has many backup options available for your computer Rewritable optica...

Страница 140: ...river for a component if you notice poor performance from that component or if you added a new component This might eliminate the driver as the potential cause of a problem Getting the latest drivers from the Web site You can download and install updated device drivers from the Lenovo Web site by doing the following 1 Go to http www lenovo com ThinkPadDrivers 2 Select the entry for your computer a...

Страница 141: ...c charge An electrostatic charge above a certain limit however can increase the risk of ESD Therefore when using the computer close to an appliance that can produce negative ions give special attention to the following Avoid directly exposing your computer to the air from an appliance that can produce negative ions Keep your computer and peripherals as far as possible from such an appliance Wherev...

Страница 142: ...ollowing conditions gently clean the surface of the fingerprint reader with a dry soft lint free cloth The surface of the fingerprint reader is dirty or stained The surface of the fingerprint reader is wet The fingerprint reader often fails to enroll or authenticate your fingerprint Register your computer Register your ThinkPad computer with Lenovo at http www lenovo com register For more informat...

Страница 143: ... Cleaning your computer display To clean the computer display do the following 1 Gently wipe the display with a dry soft lint free cloth If you see a scratchlike mark on your display it might be a stain transferred from the keyboard or the TrackPoint pointing stick when the cover was pressed from the outside 2 Wipe or dust the stain gently with a soft dry cloth 3 If the stain remains moisten a sof...

Страница 144: ...128 User Guide ...

Страница 145: ...an use to restore the hard disk drive to the factory default state For more information see Performing backup and recovery operations on page 62 To run the Lenovo Solution Center program see Lenovo programs on page 14 For additional information refer to the Lenovo Solution Center help system Note If you are unable to isolate and repair the problem yourself after running Lenovo Solution Center prog...

Страница 146: ...t liquids conduct electricity liquid spilled on the keyboard could create numerous short circuits potentially causing irreparable damage to your computer If you spill something on your computer Attention Be sure that no liquid creates a short circuit between you and the ac power adapter if in use Although you might lose some data or work by turning off the computer immediately leaving the computer...

Страница 147: ... readers are attached Solution Power off and remove all but the reader that you set up within your main operating system Message 2100 Detection error on HDD0 Main HDD Solution The hard disk is not working Have the hard disk serviced Message 2101 Detection error on SSD1 M 2 Solution The M 2 SSD device is not working Have the M 2 SSD device serviced Message 2102 Detection error on SSD2 M 2 Solution ...

Страница 148: ...el of the screen is appropriately set If a power on password is set press any key to display the prompt for the power on password and then type the correct password and press Enter If these items are correctly set and the screen remains blank have the computer serviced Problem When I turn on the computer only a white pointer is displayed on a blank screen Solution If you have modified a partition ...

Страница 149: ...est UEFI for your model has been installed 4 Verify the proper memory configuration and compatibility including the maximum memory size and the memory speed 5 Run diagnostic programs See Diagnosing problems on page 129 Networking problems The following are the most common networking problems Ethernet problems Problem The computer cannot connect to the network Solution Make sure that The cable is i...

Страница 150: ...ion Ensure that Wake On LAN is enabled in ThinkPad Setup If it is check with your LAN administrator for the necessary settings Problem My computer is a Gigabit Ethernet model but the computer cannot connect to the network at 1000 Mbps Instead it connects at 100 Mbps Solution Try another cable Make sure that the link partner is set to auto negotiate Make sure that the switch is 802 3ab compliant gi...

Страница 151: ...th the keyboard and other pointing devices The following are the most common problems with keyboards and other pointing devices TrackPoint pointing device problems Problem The pointer drifts when the computer is turned on or after it resumes normal operation Solution The pointer might drift when you are not using the TrackPoint pointing device during normal operation This is a normal characteristi...

Страница 152: ...reen resolution 2 Click Advanced Settings 3 Click the Adapter tab to ensure that the correct device driver name is shown in the Adapter Information window Then click the Properties button If you are prompted for an administrator password or confirmation type the password or provide confirmation Check the Device status box and make sure that the device is working correctly If the device is not work...

Страница 153: ...rnal monitor supports a lower resolution than the computer display view output on the external monitor only If you view output on both the computer display and the external monitor the external monitor screen will be blank or distorted Problem You cannot set a higher resolution than the present one on your external monitor Solution Make sure that the monitor type and other information is correct I...

Страница 154: ...dio device is configured correctly 1 Open Control Panel 2 Click Hardware and Sound 3 Click Device Manager If you are prompted for an administrator password or confirmation type the password or provide confirmation 4 Double click Sound video and game controllers 5 Make sure that the Realtek HD Audio driver is enabled and configured correctly Problem Sound does not come from a headphone or a speaker...

Страница 155: ... completely even if you set the Master volume control at minimum Solution You still can hear some sound even though you have set the Volume Mixer control at minimum To turn off the sound completely press the speaker mute button Problem When you connect a headphone to your computer while playing sound a speaker does not produce sound Solution Once the headphone is attached the streaming is automati...

Страница 156: ...puter and the working electrical outlet but the power adapter power plug icon is not displayed in the Windows notification area Also the ac power indicator does not light up Solution Do the following 1 Make sure that the connection of the ac power adapter is correct For instructions on connecting the ac power adapter see Safety Warranty and Setup Guide that comes with your computer 2 If the connec...

Страница 157: ...the computer to cool and to protect the microprocessor and other internal components Check the settings for sleep mode Problem The computer enters sleep mode immediately after the power on self test Solution Ensure that The battery is charged The operating temperature is within the acceptable range Refer to Operating environment on page 13 If the battery is charged and the temperature is within ra...

Страница 158: ...ode Solution If the wakeup function is enabled the computer consumes small amount of power This is not a defect For more information see Power saving modes on page 31 Problems with drives and other storage devices This section includes hard disk drive problems and solid state drive problems Hard disk drive problems Problem The hard disk drive makes a rattling noise intermittently Solution The ratt...

Страница 159: ...ts and connectors The following are the most common problems with ports and connectors A USB problem Problem A device connected to the USB connector does not work Solution Open the Device Manager window Make sure that the USB device setup is correct and that the assignment of computer resource and the installation of the device driver are correct To open the Device Manager window go to Control Pan...

Страница 160: ...144 User Guide ...

Страница 161: ...r computer Recording problem symptoms and details Collect the answers to the questions below before you call for help Then you will be able to get help as quickly as possible What is the problem Is it continuous or intermittent Is there an error message What is the error code if any What operating system are you using Which version Which software programs were running at the time of the problem Ca...

Страница 162: ...ing information or the diagnostic programs might tell you that you need additional or updated device drivers or other software You can get the latest technical information and download device drivers and updates from the Lenovo Web site at http www lenovo com support Lenovo Support Web site Technical support information is available on the Lenovo Support Web site at http www lenovo com support Thi...

Страница 163: ...umbers of your computer monitor and other components or your proof of purchase Description of the problem Exact wording of any error messages Hardware and software configuration information for your system Telephone numbers For a list of the Lenovo Support phone numbers for your country or region go to http www lenovo com support phone or refer to the Safety Warranty and Setup Guide that comes wit...

Страница 164: ...148 User Guide ...

Страница 165: ...pecial Interest Group SIG It supports the following profiles Advanced Audio Distribution Profile A2DP Audio Video Control Transport Protocol AVCTP Audio Video Distribution Transport Protocol AVDTP A V Remote Control Profile AVRCP Basic Imaging Profile BIP Basic Printing Profile BPP Dial Up Networking Profile DUN File Transfer Profile FTP Generic Access Profile GAP Generic A V Distribution Profile ...

Страница 166: ...rietor of the building or responsible representatives of the organization These situations and areas might for example include Using the integrated wireless cards on board of airplanes in hospitals or near petrol stations blasting areas with electro explosive devices medical implants or body worn electronic medical devices such as pace makers In any other environment where the risk of interference...

Страница 167: ...rence to radio communications However there is no guarantee that interference will not occur in a particular installation If this equipment does cause harmful interference to radio or television reception which can be determined by turning the equipment off and on the user is encouraged to try to correct the interference by one or more of the following measures Reorient or relocate the receiving a...

Страница 168: ...ur Angleichung der Rechtsvorschriften über die elektromagnetische Verträglichkeit in den EU Mitgliedsstaaten und hält die Grenzwerte der EN 55022 Klasse B ein Um dieses sicherzustellen sind die Geräte wie in den Handbüchern beschrieben zu installieren und zu betreiben Des Weiteren dürfen auch nur von der Lenovo empfohlene Kabel angeschlossen werden Lenovo übernimmt keine Verantwortung für die Einh...

Страница 169: ...Klasse B Korea Class B compliance statement Japan VCCI Class B compliance statement Japan compliance statement for products which connect to the power mains with rated current less than or equal to 20 A per phase Lenovo product service information for Taiwan Eurasian compliance mark Appendix A Regulatory Information 153 ...

Страница 170: ...154 User Guide ...

Страница 171: ...le to them for the return recycle and recovery of WEEE and to minimize any potential effects of EEE on the environment and human health due to the presence of hazardous substances For additional WEEE information go to http www lenovo com recycling Recycling information for Japan Collecting and recycling a disused Lenovo computer or monitor If you are a company employee and need to dispose of a Len...

Страница 172: ...e who uses a Lenovo notebook computer and need to dispose of a battery pack contact the proper person in Lenovo sales service or marketing and follow that person s instructions You also can refer to the instructions at http www lenovo com jp ja environment recycle battery If you use a Lenovo notebook computer at home and need to dispose of a battery pack you must comply with local ordinances and r...

Страница 173: ... accumulators are labeled to indicate that they are to be collected separately and recycled at end of life The label on the battery may also include a chemical symbol for the metal concerned in the battery Pb for lead Hg for mercury and Cd for cadmium Users of batteries and accumulators must not dispose of batteries and accumulators as unsorted municipal waste but use the collection framework avai...

Страница 174: ...158 User Guide ...

Страница 175: ...d electronic equipment RoHS recast or RoHS 2 For more information about Lenovo progress on RoHS go to http www lenovo com social_responsibility us en RoHS_Communication pdf China RoHS India RoHS RoHS compliant as per E Waste Management Handling Rules 2011 Turkish RoHS The Lenovo product meets the requirements of the Republic of Turkey Directive on the Restriction of the Use of Certain Hazardous Su...

Страница 176: ...Ukraine RoHS 160 User Guide ...

Страница 177: ...f energy an integral part of your day to day operations To help in this endeavor Lenovo has preset the following power management features to take effect when the computer has been inactive for a specified length of time Power plan Energy Saver settings when plugged into ac power Turn off the display After 10 minutes Put the computer into sleep After 20 minutes Advanced power settings Turn off har...

Страница 178: ...nager window expand Network adapters 4 Right click your network adapter device and click Properties 5 Click the Power Management tab 6 Clear the Allow this device to wake the computer check box 7 Click OK 162 User Guide ...

Страница 179: ...e publication Lenovo may make improvements and or changes in the product s and or the program s described in this publication at any time without notice The products described in this document are not intended for use in implantation or other life support applications where malfunction may result in injury or death to persons The information contained in this document does not affect or change Len...

Страница 180: ...Corporation in the U S and or other countries Microsoft Windows and BitLocker are trademarks of the Microsoft group of companies Mini DisplayPort mDP and DisplayPort are trademarks of the Video Electronics Standards Association The terms HDMI and HDMI High Definition Multimedia Interface are trademarks or registered trademarks of HDMI Licensing LLC in the United States and other countries Other co...

Страница 181: ......

Страница 182: ......

Страница 183: ......

Отзывы: