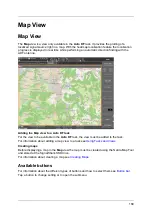
Map View
191
6.
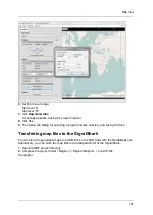
Set Zoom level range:
Start level:
0
Stop level:
17
7.
Click
Download tiles
.
A message appears, asking for project creation.
8.
Click
Yes.
9.
Then follow the dialog for selecting a project and tiles directory and saving the files.
Transferring map tiles to the SignalShark
You can store the generated maps to a USB-Stick or micoSD Card with the NardaMapTools.
Alternatively, you can store the map tiles to the data partition D of the SignalShark.
1.
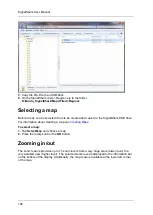
Open the NMT project directory.
2.
Compress the project folder <Region> (<Region>\Mapnik\...) to a ZIP-File.
See graphic
Содержание Narda SignalShark
Страница 1: ...User Manual Version 2019 07 ...
Страница 2: ......
Страница 14: ......
Страница 15: ...15 Online Help Version 2019 07 ...
Страница 16: ......
Страница 31: ...Introduction 31 Figure Loop antenna frequency range 9 kHz to 30 MHz ...
Страница 32: ......
Страница 38: ......
Страница 44: ......
Страница 60: ......
Страница 66: ......
Страница 74: ......
Страница 88: ......
Страница 104: ......
Страница 118: ......
Страница 132: ......
Страница 158: ......
Страница 198: ......
Страница 204: ......
Страница 214: ......
Страница 226: ......


