background image

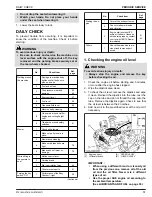
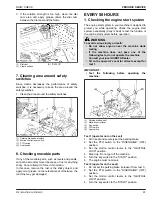
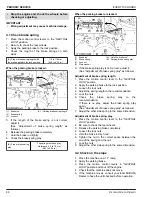
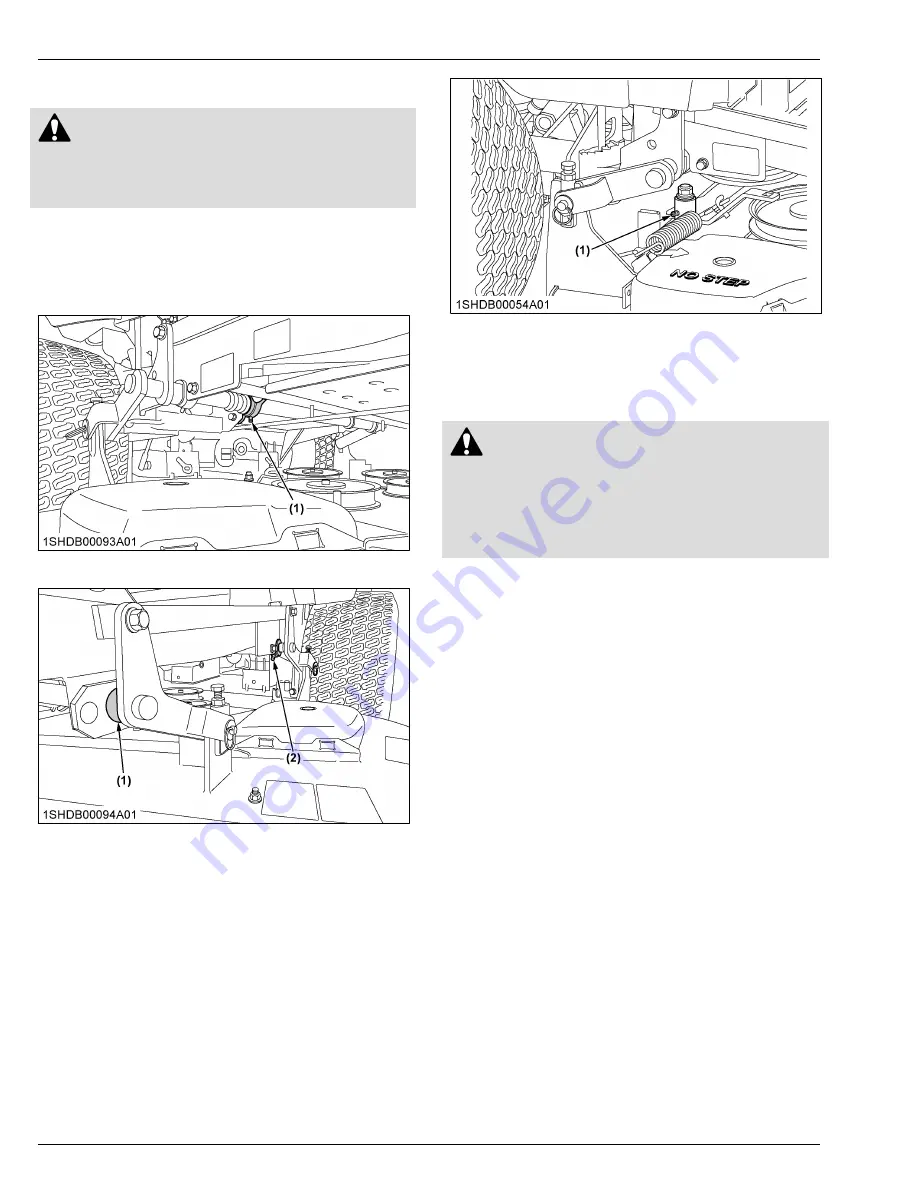
8. Greasing

 WARNING

To avoid serious injury or death:

• Be sure to stop the engine and remove the key

before greasing.

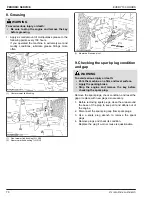
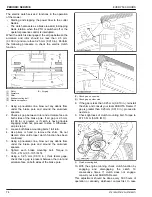
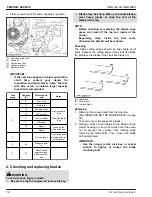
1. Apply a small amount of multipurpose grease to the

following points every 100 hours.
If  you  operated  the  machine  in  extremely  wet  and
muddy  conditions,  lubricate  grease  fittings  more
often.

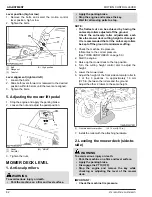
(1) Center mower link bushing

(1) Front mower link bushing (LH, RH)
(2) Rear mower link bushing (LH, RH)

(1) Mower belt tension pivot

9. Checking the spark plug condition

and gap

 WARNING

To avoid serious injury or death:

• Park the machine on a firm and level surface.
• Apply the parking brake.
• Stop  the  engine  and  remove  the  key  before

checking the spark plug.

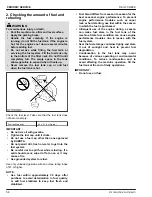
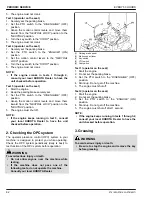
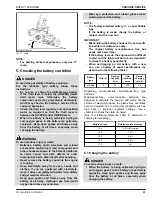
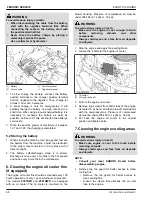
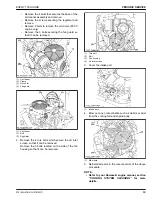
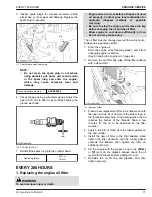
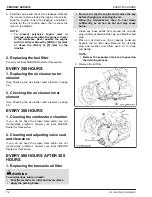
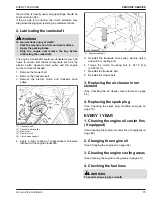
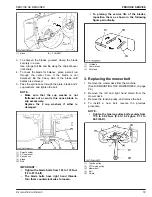
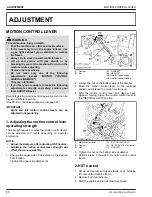
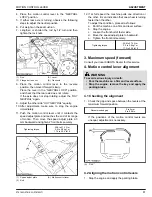
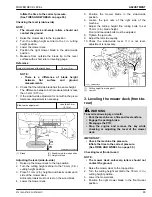
Remove the spark plugs, check condition, and reset the
gap or replace with new plugs as necessary.

1. Before removing spark plugs, clean the area around

the  base  of  the  plug  to  keep  dirt  and  debris  out  of
the engine.

2. Disconnect the spark plug cap from spark plugs.
3. Use  a  spark  plug  wrench  to  remove  the  spark

plugs.

4. Remove plugs and check its condition.

Replace the plug if worn or reuse is questionable.

 PERIODIC SERVICE

EVERY 100 HOURS

70

Z751KWi,Z781KWi,Z781KWTi

Содержание Z751KWi

Страница 1: ...AL MANUAL DEL OPERADOR English Spanish U S A Code No Código n K3881 7121 2 AX A 2 2 AK KUBOTA Corporation 2018 PRINTED IN U S A IMPRESO EN E E U U READ AND SAVE THIS MANUAL LEA Y CONSERVE ESTE MANUAL Z 7 5 1 K W i Z 7 8 1 K W i Z 7 8 1 K W T i 1SJGJ00001A01 ...

Страница 2: ...pend on KUBOTA KUBOTA Corporation es Desde su creación en 1890 KUBOTA Corporation ha crecido hasta convertirse en una de las empresas más importantes de Japón Para conseguir esta posición la empresa a lo largo de los años ha diversificado la gama de sus productos y servicios de forma notable hasta llegar hoy en día con 30 fábricas y 35 000 empleados a fabricar por encima de 1 000 elementos distint...

Страница 3: ...OPERATOR S MANUAL 1SJGJ00001A01 READ AND SAVE THIS MANUAL MODELS Z751KWi Z781KWi Z781KWTi ...

Страница 4: ...Alert Symbol Read Operator s Manual Gasoline Fuel Fuel Level Parking Brake Engaged position Parking Brake Disengaged position Battery Charging Condition Engine Stop Engine Run Starter Control Power Take Off Switch Control Off Position Disengaged Power Take Off Switch Control On Position Engaged Hours Cutting Height Fast Slow Engine Speed Control ABBREVIATION LIST Abbreviations Definitions API fpm ...

Страница 5: ...ou long satisfactory service To obtain the best use of your machine please read this manual carefully It will help you become familiar with the operation of the machine and contains many helpful hints about machine maintenance It is KUBOTA s policy to utilize as quickly as possible every advance in our research The immediate use of new techniques in the manufacturing of products may cause some sma...

Страница 6: ...e 31 3 Hour meter and code display 31 3 1 Normal mode 32 3 2 Error code mode 32 3 3 Service code mode 32 3 4 Resetting 32 4 Engine RPM numerical display 33 5 Safety switch status lights 33 6 Power usage and fuel economy monitor 34 6 1 Fuel economy monitoring mode 34 6 2 Power usage monitoring mode 34 STOPPING THE ENGINE 35 COLD WEATHER STARTING 35 WARMING UP THE ENGINE 35 1 Warm up and transmissio...

Страница 7: ...ster wheels 51 MAINTENANCE 52 SERVICE INTERVALS 52 PERIODIC SERVICE CHART LABEL 54 LUBRICANTS AND FUEL 55 PERIODIC SERVICE 56 OPENING THE STEP 56 1 Step 56 RAISING AND LOWERING THE OPERATOR S SEAT 56 DAILY CHECK 57 1 Checking the engine oil level 57 2 Checking the amount of fuel and refueling 58 3 Checking and cleaning the air intake screen 59 4 Checking the transaxle fluid level 59 5 Checking the...

Страница 8: ...5 3 Replacing the air cleaner inner element 75 4 Replacing the spark plug 75 EVERY 1 YEAR 75 1 Cleaning the engine oil cooler fins if equipped 75 2 Changing the engine oil 75 3 Cleaning the engine cooling areas 75 4 Checking the fuel lines 75 5 Checking the muffler and spark arrester if equipped 76 6 Checking the hydraulic hoses 77 EVERY 4 YEARS 77 1 Replacing the hydraulic hoses 77 2 Replacing th...

Страница 9: ... REMOVING THE MACHINE FROM STORAGE 87 TROUBLESHOOTING 88 ENGINE TROUBLESHOOTING 88 ELECTRONIC DEVICE TROUBLESHOOTING 90 BATTERY TROUBLESHOOTING 91 MACHINE TROUBLESHOOTING 92 MOWER TROUBLESHOOTING 93 INDEX 95 4 Z751KWi Z781KWi Z781KWTi ...

Страница 10: ...on gloves and so on as appropriate or required Do not wear radio or music headphones while operating the machine Do not operate the machine or any attachments while using or texting with a cellphone or any other electronic device Safe operation requires your full attention Carefully check the vicinity before operating machine or any implement attached to it Clear the work area of objects such as w...

Страница 11: ... there is no ROPS Check the seat belt regularly and replace if frayed or damaged Be certain that the seat belt can be released quickly in the event of an emergency 1 ROPS 2 Seat belt OPERATING THE MACHINE 1 Starting to operate the machine Always sit in the operator s seat when starting the engine or operating levers or controls Before starting the engine make sure that the motion control levers ar...

Страница 12: ...k with the blades running Disengage the PTO and stop the blades from rotating if not mowing 3 Safety for children Tragic accidents can occur if the operator is not alert of the presence of children Children are attracted to the machine and mowing activity Never assume that children will remain where you last saw them Keep children out of the mowing area and under the watchful care of another respo...

Страница 13: ...se a suitable truck or trailer when transporting on public roads Use extra care when loading or unloading the machine into a trailer or truck This machine is not allowed to be used on public roads SERVICING AND STORAGE 1 Servicing the machine Before servicing park the machine on a firm level surface and apply the parking brake Remove the key to prevent an accidental start up Allow the machine time...

Страница 14: ...ers for waste fluids or other products Someone particularly children may drink them by mistake Securely support the machine or any machine elements with stands or suitable blocking before working underneath For your safety do not rely on hydraulically supported devices as they may leak down suddenly drop or be accidently lowered Consult your local recycling center or KUBOTA Dealer to learn how to ...

Страница 15: ...SAFETY LABELS SAFE OPERATION 10 Z751KWi Z781KWi Z781KWTi ...

Страница 16: ...SAFE OPERATION Z751KWi Z781KWi Z781KWTi 11 ...

Страница 17: ...SAFE OPERATION 12 Z751KWi Z781KWi Z781KWTi ...

Страница 18: ...SAFE OPERATION Z751KWi Z781KWi Z781KWTi 13 ...

Страница 19: ...SAFE OPERATION 14 Z751KWi Z781KWi Z781KWTi ...

Страница 20: ...sing safety labels with new labels from your local KUBOTA Dealer If a component with safety label s attached is replaced with a new part make sure new label s is are attached in the same location s as the replaced component Attach new safety labels by applying on a clean dry surface and pressing any bubbles to the outside edge SAFE OPERATION Z751KWi Z781KWi Z781KWTi 15 ...

Страница 21: ...16 Z751KWi Z781KWi Z781KWTi ...

Страница 22: ...PS engine and mower serial numbers Locate the serial numbers now and record them in the space provided Type Serial no Machine ROPS Engine Mower Date of purchase Name of dealer To be filled in by purchaser 1 Machine identification plate 2 Machine serial no 1 ROPS serial no 1 Engine serial no 1 Mower identification plate 2 Mower serial no WARRANTY This machine is warranted under the KUBOTA Limited E...

Страница 23: ...aki Limited Warranty for details regarding warranty coverage owner obligations warranty limitations and liabilities SCRAPPING THE MACHINE AND ITS PROCEDURE To put the machine out of service correctly follow the local rules and regulations of the country or territory where you scrap it If you have questions consult your local KUBOTA Dealer SERVICING OF MACHINE SCRAPPING THE MACHINE AND ITS PROCEDUR...

Страница 24: ...ith 48 130 5 12 with 54 130 5 12 with 60 Tread Front mm in 955 37 6 Rear mm in 1020 40 2 1085 42 7 Weight with mower deck kg lbs 551 1215 with 48 569 1254 with 54 583 1285 with 60 Traveling system Tires Front 13 x 6 5 6 semi pneumatic non flat tire smooth Rear 24 x 9 5 14 4PR turf 24 x 12 14 4PR turf Traveling speeds Forward mph km h 0 to 11 2 0 to 18 0 Reverse mph km h 0 to 5 6 0 to 9 0 Steering ...

Страница 25: ...el linkage Adjustment of cutting height Dial gauge Cutting width mm in 1219 48 1372 54 1524 60 Cutting height mm in 25 to 127 1 0 to 5 0 Weight approximation kg lbs 102 225 110 243 119 262 Blade spindle speed r s rpm 71 1 4266 1 62 7 3762 1 57 5 3450 1 Blade tip velocity m s fpm 94 5 18600 1 93 4 18400 1 94 5 18600 1 Blade length mm in 423 16 7 474 18 7 523 20 6 Number of blades 3 Dimensions Total...

Страница 26: ...ich are otherwise unfit for use with the KUBOTA Machine Any malfunctions or failures of the machine resulting from use with improper implements are not covered by the warranty Unit Maximum loading weight Implement weight W1 Maximum total weight Front axle Wf Rear axle Wr Z751KWi 142 kg 313 lbs 737 kg 1624 lbs 129 kg 284 lbs 879 kg 1937 lbs Z781KWi 152 kg 335 lbs 757 kg 1669 lbs 137 kg 301 lbs 909 ...

Страница 27: ... warning lamp 30 19 Engine master warning lamp 30 20 Electrical charge warning lamp 30 21 Engine oil pressure warning lamp 30 22 Master system warning lamp 30 23 Maintenance warning lamp 30 24 PTO clutch indicator 33 25 Parking brake indicator 33 26 LH control lever indicator 33 27 RH control lever indicator 33 28 OPC indicator 33 29 Engine temperature gauge 31 30 Power usage and fuel economy moni...

Страница 28: ...alp roller front bolt shift type 46 2 Discharge chute 3 Step area indicator RCK60P 1 Anti scalp roller front bolt shift type 46 2 Discharge chute 3 Step area indicator MOWER INSTRUMENT PANEL AND CONTROLS Z751KWi Z781KWi Z781KWTi 23 ...

Страница 29: ... ADJUSTING THE CUTTING HEIGHT on page 46 4 Go backward so that right and left front tires would be on the board 38 1 mm 1 5 in high H 38 1 mm 1 5 in W 133 mm 5 25 in IMPORTANT Use a board more than 133 mm 5 25 in wide and 1600 mm 63 0 in long Make sure that right and left front tires are firm on the board 5 Make sure the direction of the front tires is as shown in the figure H 38 1 mm 1 5 in L 160...

Страница 30: ...link 2 Clevis pin 3 Plain washer 4 Snap ring P Outside 10 Remove the Φ14 mm 0 55 in shaft from the hole in the rear right side lift link 11 Raise the mower deck to 76 mm 3 0 in or higher and attach the mower belt to the PTO clutch pulley 1 Mower belt 2 PTO clutch pulley 12 Remove the step See OPENING THE STEP on page 56 13 Turn the tension arm counterclockwise with a square wrench 1 Tension arm 2 ...

Страница 31: ...lley Figure B 7 Belt between the idler pulley and PTO clutch pulley 8 Belt between the tension pulley and the PTO clutch pulley 9 PTO clutch pulley 10 PTO clutch guide 11 Pin 3 15 After mounting the mower check the mower level If necessary adjust the mower level and anti scalp rollers ADJUSTING THE MOWER See OPERATING THE MOWER on page 46 and ADJUSTMENT on page 80 DISMOUNTING THE MOWER DECK WARNIN...

Страница 32: ... in the hole of the rear right side lift link 1 Shaft Φ14 mm 0 55 in x 150 mm 6 in 2 Clevis pin 3 Lift link 4 Remove the mower belt 5 Remove 4 clevis pins mounting the mower deck 6 Push the mower lift pedal toward the seat and remove the Φ14 mm 0 55 in shaft from the hole in the rear right side lift link 7 Slowly let the mower lift pedal move to the full up position 8 Slide the mower deck from und...

Страница 33: ...out of the mower operator area STARTING THE ENGINE 1 Sit on the operator s seat Put on the seat belt 2 Apply the parking brake To apply the parking brake a Depress the parking brake pedal firmly with the left side of your right foot b While keeping the parking brake pedal depressed use the right side of your right foot to depress the parking brake lock pedal c Release the parking brake pedal while...

Страница 34: ...gine can not be started except when the PTO switch is disengaged OFF the parking brake lock pedal is applied motion control levers are in NEUTRAL LOCK position and the operator is sitting on the seat 7 Make sure that the Easy Checker lights have gone off If the light is still on immediately stop the engine and check the remedy following the instruction See CHECK DURING OPERATING on page 30 8 Warm ...

Страница 35: ...ext operation CHECK DURING OPERATING IMPORTANT Immediately stop the engine if The engine suddenly slows down or accelerates Unusual noises suddenly occur Exhaust fumes suddenly become discolored While operating make the following checks to see that all the parts are functioning normally Easy Checker on page 30 1 Easy Checker 1 Easy Checker If the warning lamps of the Easy Checker come on during op...

Страница 36: ...ntenance warning comes on If you put a fuse in the empty fuse box this blinks NOTE For checking and servicing of your machine consult your local KUBOTA Dealer for instructions LCD MONITOR 1 LCD monitor 1 Fuel gauge When the key switch is on the fuel gauge indicates the fuel level Fuel gauge has 6 bars to show how much fuel remains in the fuel tank If the fuel level is less than 1 bar the warning l...

Страница 37: ... automatically reduce throttle to low idle Park the machine and stop the engine as soon as safely possible and contact your local KUBOTA Dealer 1 Hour meter 2 Hour meter error code A The display change 3 3 Service code mode The engine and or transmission must be serviced every 100 hours So between 95 and 105 hours this display will show the maintenance reminder code whenever the key is turned ON I...

Страница 38: ...e engine has some trouble this display will show the engine error code so you or the dealer can diagnose the problem For example if the crankshaft position sensor loses synchronization while the engine is running at 3600 rpm this display will change between and This allows the dealer to diagnose the engine problem quickly If error code PXXXX is displayed consult your local KUBOTA Dealer to diagnos...

Страница 39: ...Fuel economy monitoring mode 6 1 Fuel economy monitoring mode The gauge is full when the machine is very fuel efficient When the gauge is full you are getting maximal hours of usage per gallon of fuel example more than 1 hour of usage per gallon of fuel The gauge is empty when the machine is not fuel efficient When the gauge is empty you are getting minimal hours of usage per gallon of fuel exampl...

Страница 40: ...ontinuously for more than 5 seconds If it is difficult to start the engine turn the throttle dial slightly Engine stalling is likely to occur without warming up In this case re start engine while turning the throttle dial approximately 1 4 WARMING UP THE ENGINE WARNING To avoid serious injury or death Be sure to apply the parking brake during warm up For 5 minutes after the engine start up allow t...

Страница 41: ...neutral position Shut the engine off 3 Put on safety goggles and rubber gloves 4 Ensure that vent caps are securely in place if equipped 5 Attach the red clamp to the positive red or pos terminal of the dead battery and clamp the other end of the same cable to the positive red or pos terminal of the helper battery 6 Clamp the other cable to the negative black or neg terminal of the helper battery ...

Страница 42: ... relies upon the engine driven transmission for speed direction and motion control If the engine is not running the machine cannot be driven or controlled If the engine stops when operating on a slope apply the parking brake immediately to prevent a machine runaway Do not allow anyone other than the driver to ride on the machine Do not drive the machine close to the edges of ditches or banks which...

Страница 43: ...nts and attachments If an interference occurs contact your local KUBOTA Dealer 1 Folding the ROPS 1 Loosen the knob bolts 1 to 2 turns 2 Remove both lock pins 1 Lock pin 2 Snap pin 3 Knob bolt 3 Fold the ROPS CAUTION To avoid personal injury Hold the ROPS tightly with both hands and fold the ROPS slowly and carefully 1 ROPS 4 Align the lock pin holes and insert both lock pins and secure them with ...

Страница 44: ...t friction when moving it Then replace the snap pin 1 Nut STARTING THE MACHINE WARNING To avoid serious injury or death Read and understand the safe operation section Read and understand the safety labels located on the machine To avoid the danger of exhaust fume poisoning do not operate the engine indoors without proper ventilation Never start the engine while standing on the ground Start the eng...

Страница 45: ...ustment knob to achieve the optimum suspension setting To make the suspension hard turn the suspension adjustment knob clockwise 1 Suspension adjustment knob A CLOCKWISE IMPORTANT After adjusting the operator s seat be sure to check and see that the seat is securely locked 2 Seat belt WARNING To avoid serious injury or death Always use the seat belt when the ROPS is installed Do not use the seat b...

Страница 46: ...ecrease the engine speed Turn the throttle dial clockwise to increase the engine speed 1 Throttle dial A INCREASE B DECREASE 5 Parking brake pedal To apply the parking brake 1 Depress the parking brake pedal firmly with the left side of your right foot 2 While keeping the parking brake pedal depressed use the right side of your right foot to depress the parking brake lock pedal 3 Release the parki...

Страница 47: ...ke sharp turns Always make sure your intended path is clear of obstructions or people 6 1 Stop position of the motion control lever Neutral lock position Forward and rearward movements of the motion control levers are locked when these levers are in the NEUTRAL LOCK position the engine can only be started with levers in this position 1 Motion control levers A NEUTRAL LOCK position B NEUTRAL positi...

Страница 48: ...the left push the right motion control lever further forward than the left motion control lever General right turn For forward travel to the right push the left motion control lever further forward than the right motion control lever Sharp zero left turn Push the right motion control lever forward and pull the left motion control lever rearward at the same time Sharp zero right turn Push the left ...

Страница 49: ...ing brake 4 Turn the throttle dial to the half speed position and push PTO switch to the DISENGAGE OFF position 5 Lower all implements to the ground 6 Turn off the engine and remove the key IMPORTANT Do not stop the engine when the machine is on an incline for a long time Before stopping the engine place the throttle control lever in the half speed position to help prevent the engine from backfiri...

Страница 50: ...esult When trailering the machine over a long distance Move the mower lock lever to the UNLOCK position Make sure to lower the mower to the 25 4 mm 1 in cutting height by using the mower lift pedal When transporting the machine under its own power Move the mower lock lever to the LOCK position Make sure to lift the mower to the top position by using the mower lift pedal When transporting make sure...

Страница 51: ... 50 to 80 mm 2 to 3 in high Best results are obtained by cutting often and not too short For a healthy lawn only 1 3 of the grass plant should be removed in one mowing For example tall grass with the height of 75 mm 3 in can be cut to a minimum of 50 mm 2 in For extremely tall grass set the cutting height at maximum cutting height for the first mowing then reset to the desired height and mow again...

Страница 52: ...he TOP position to the OPERATING position 5 Adjust the anti scalp rollers height as recommended below for normal operating condition To minimize gouging and roller damage or wear the anti scalp rollers will maintain the ground clearance of 6 mm 0 25 in IMPORTANT Never allow the rollers to contact the ground continuously as premature roller wear may develop if set incorrectly Anti scalp rollers mus...

Страница 53: ...tch of the mower before attempting to start the engine 1 PTO switch 1 To engage the PTO pull the PTO switch to the ENGAGED ON position 2 To disengage the PTO push the PTO switch DISENGAGED OFF position 1 PTO switch A ENGAGED ON B DISENGAGED OFF NOTE If you get off the seat while the PTO is running the engine will stop automatically operator presence control Before starting the engine push the PTO ...

Страница 54: ...wer ground speed or go over the area twice Keep the mower deck in the raised position when the mower is disengaged The mower will not cut cleanly if the ground speed is too high or if the blade speed drops due to an overload If debris builds up on the grass screen or other cooling air intake areas stop the engine and clean them Operating the engine with blocked or dirty air intake and cooling area...

Страница 55: ...turally drops slowly in the course of time Therefore check it everyday and inflate as necessary Z751KWi Z781KWi Tire sizes Recommended inflation pressure Front 13 x 6 5 6 non flat smooth Rear 24 x 9 5 14 4PR turf 83 kPa 0 84 kgf cm2 12 psi Z781KWTi Tire sizes Recommended inflation pressure Front 13 x 6 5 6 non flat smooth Rear 24 x 12 14 4PR turf 83 kPa 0 84 kgf cm2 12 psi 1 Ground A INSUFFICIENT ...

Страница 56: ... your body under the machine or the mower deck while lifting the machine Park the machine on a firm and level surface Apply the parking brake Stop the engine and remove the key before removing the front caster wheels 1 Lock nut 2 Wheel bolt 3 Yoke 4 Dust cover 1 Install the replacement wheel and dust covers 2 Install the wheel bolt and the lock nut with nylon sleeve 3 Tighten the nut 4 After insta...

Страница 57: ...0Hr 70 9 Engine cooling areas Clean every 50Hr 63 10 Muffler and spark arrester if equip ped Check every 50Hr 63 11 Air cleaner Outer el ement Check every 100Hr 64 1 Replace every 250Hr 72 Inner el ement Check every 250Hr 72 1 Replace every 500Hr 75 12 Fuel filter Check every 100Hr 65 Replace every 200Hr 72 2 13 Fuel line Check every 1 year 75 3 Replace every 4 years 77 2 14 Battery condition Chec...

Страница 58: ...KUBOTA Dealer unless the owner has the proper tools and is mechanically proficient 3 Replace if any deterioration or damage occurred crack hardening scar or deformation IMPORTANT The jobs indicated by must be done initially Maintenance instructions related to gasoline engine emissions Non warranty maintenance repairs or replacement of the emission control devices and systems should be performed by...

Страница 59: ...PERIODIC SERVICE CHART LABEL MAINTENANCE PERIODIC SERVICE CHART LABEL 54 Z751KWi Z781KWi Z781KWTi ...

Страница 60: ...nt when the oil level is at the upper level of the oil level gauge IMPORTANT To prevent serious damage to the hydraulic systems use only the fluid recommended in the previous table Fuel Clean fresh unleaded gasoline A minimum of 87 octane 87AKI 90 RON Gasoline with up to 10 ethanol ethyl or grain alcohol or up to 15 methyl tertiary butyl ether MTBE by volume is acceptable Do not use unapproved gas...

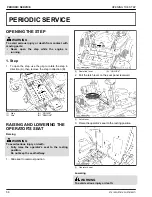
Страница 61: ...REMOVE RAISING AND LOWERING THE OPERATOR S SEAT Raising WARNING To avoid serious injury or death Fully raise the operator s seat to the resting position Do not keep the seat halfway 1 Slide seat to rearmost position 1 Seat slide lever A UNLOCK 2 Pull the latch lever on the seat panel rearward 1 Latch lever 3 Raise the operator s seat to the resting position 1 Operator s seat Lowering WARNING To av...

Страница 62: ... key switch ON 1 Performance of the Easy Checker light 30 Continued No Check item Ref page Starting the en gine 1 Color of the exhaust fumes 2 Check for abnormal noise and vibration 3 Engine start system OPC system If either of these do not operate properly contact your local KUBOTA Dealer immediately 61 62 Others 1 Check the areas where pre vious trouble was experi enced 1 Checking the engine oil...

Страница 63: ...ile refueling If a spill should occur wipe it off at once or it may cause a fire Use grounded system to refuel Use only unleaded gasoline with an octane rating index of 87 or higher NOTE Use fuel within approximately 30 days after purchase to avoid deterioration in fuel quality or add fuel stabilizer to keep fuel fresh and stabilized Fuel blend differs from season to season for the best seasonal e...

Страница 64: ...y or after every 5 hours of operation make sure the air intake screen and the air intake area are clean Dirt or chaff around the air intake screen air intake area or the engine cooling area decrease cooling performance 1 Check that the air intake screen is clear of grass clippings and debris 2 If the screen is dirty clean it with a brush or cloth 3 Remove the dust and all foreign material from the...

Страница 65: ...l IMPORTANT Do not use tires larger than specified 5 1 Inflation pressure Even though the inflation pressure is factory set to the prescribed level it naturally drops slowly in the course of time Therefore check it everyday and inflate as necessary Z751KWi Z781KWi Tire sizes Recommended inflation pressure Front 13 x 6 5 6 non flat smooth Rear 24 x 9 5 14 4PR turf 83 kPa 0 84 kgf cm2 12 psi Z781KWT...

Страница 66: ...ine start system periodically daily is best to test the function of the engine start system before operation WARNING To avoid serious injury or death Do not allow anyone near the machine while testing If the machine does not pass one of the following tests do not operate the machine Consult your local KUBOTA Dealer Sit on the operator s seat for all tests except for test 1 IMPORTANT Test the follo...

Страница 67: ...nit checked before operation 2 Checking the OPC system The operator presence control OPC system in your machine is designed to protect you while operating Check the OPC system periodically daily is best to test function of the OPC system before operation WARNING To avoid serious injury or death Do not allow anyone near the machine while testing If the machine does not pass one of the following tes...

Страница 68: ...Severe thermal burns can occur on contact Combustible debris such as leaves grass brush and so on can catch fire To avoid serious injury or death Allow the muffler engine cylinder and fins to cool before touching Remove accumulated debris from the muffler area and cylinder area It is a violation of California Public Resource Code Section 4442 to use or operate the engine on any forest covered brus...

Страница 69: ...n valve 2 Plug bolt 3 Engine block 2 After all used oil has drained reinstall the drain plug and return the hose to the hook 3 Fill with new oil up to the upper level on the dipstick 1 Engine oil port 2 Oil level dipstick A UPPER LEVEL B LOWER LEVEL 4 To check the oil level Remove the dipstick wipe it clean insert it without screwing it in and draw it out again Check to see that the oil level is b...

Страница 70: ...make the following checks and changes Never fail to check the fuel lines periodically The fuel lines are subject to wear and aging Fuel may leak out onto the running engine causing a fire The fuel line is made of rubber and ages regardless of service period 1 If the fuel filter or clamps are found damaged or deteriorated replace them 2 Check fuel filter If it is clogged by debris or contaminated w...

Страница 71: ...adjust it See Adjustment of brake spring play as follows Adjustment of brake spring length 1 Place the motion control lever to the NEUTRAL LOCK position 2 Apply the parking brake to the lock position 3 Loosen the lock nuts 4 Adjust the spring length to the recommendation 5 Lock the nuts 6 Check the brake spring play to the recommendation If there is no play adjust the brake spring play again See A...

Страница 72: ...ery explosive Wear eye protection and rubber gloves when working around the battery NOTE The factory installed battery is a non refillable type If the battery is weak charge the battery or replace it with a new one IMPORTANT Mishandling the battery shortens the service life and adds to maintenance costs The original battery is maintenance free but needs some servicing If the battery is weak the en...

Страница 73: ...the engine oil cooler fins if equipped The engine oil cooler fins should be cleaned every 100 hours operation or every 1 year whichever comes first The models Z781KWi and Z781KWTi are equipped with an oil cooler The oil cooler is mounted on the blower housing Pressure of compressed air must be under 205 kPa 2 1 kgf cm 30 psi WARNING To avoid serious injury or death Make sure the engine is cool eno...

Страница 74: ...x bolts which secure the air inlet screen so that it can be removed Remove the 3 bolts located on the side of the fan housing so that it can be removed 1 Torx bolt 2 Bolt 3 Fan housing 4 Air inlet screen 3 Cover the intake port 1 Intake port 4 Blow out any contaminants such as debris or dust from the cooling fan and engine body 1 Blow here 5 Reinstall all parts in the reverse order of the above pr...

Страница 75: ...ndition and gap WARNING To avoid serious injury or death Park the machine on a firm and level surface Apply the parking brake Stop the engine and remove the key before checking the spark plug Remove the spark plugs check condition and reset the gap or replace with new plugs as necessary 1 Before removing spark plugs clean the area around the base of the plug to keep dirt and debris out of the engi...

Страница 76: ...il can be hot and may cause burns The oil filter must be changed every 200 service hours Always use a genuine oil filter 1 Drain the engine oil Drain the engine oil by following steps 1 and 2 from changing engine oil section See Changing the engine oil on page 64 2 Remove the old filter and wipe off the filter adapter with a clean cloth 1 Engine oil filter 3 Place a new replacement filter in a sha...

Страница 77: ...re not mechanically proficient consult your local KUBOTA Dealer for this service 2 Cleaning and adjusting valve seat and clearance If you do not have the proper tools and or are not mechanically proficient consult your local KUBOTA Dealer for this service EVERY 500 HOURS AFTER 300 HOURS 1 Replacing the transaxle oil filter WARNING To avoid serious injury or death Park the machine on a firm and lev...

Страница 78: ...objects or bystanders 1 Open the bypass valves of both transaxles with the bypass levers See Hydrostatic transaxle bypass lever on page 45 2 Start the engine and disengage the parking brake 3 Set the engine throttle to low idle 4 Slowly move the motion control levers to the max forward position Hold for 30 seconds 5 Slowly move the motion control levers to the max reverse position Hold for 30 seco...

Страница 79: ...ake mounting bolts 1 full turn 4 Use pliers or hand to remove the shim Do not discard shim until proper clutch function has been confirmed 5 Using a pneumatic line blow out any debris from under the brake pole and around the aluminum spacers 6 Tighten each brake mounting bolt Torque to 13 14 2 N m 9 5 10 5 lbf ft 7 Using a 0 25 mm 0 010 in thick feeler gage check that a gap is present between the ...

Страница 80: ...elt 4 Electric clutch 5 Clutch mounting bolt 4 Apply a light coating of copper based anti seize lubricant to the engine crankshaft 1 Engine crankshaft 5 Reinstall the transaxle drive pulley electric clutch and clutch mounting bolt 6 Torque the clutch mounting bolt to 67 75 N m 50 55 lbf ft 7 Reinstall the transaxle belt 8 Reinstall the mower belt 3 Replacing the air cleaner inner element See Check...

Страница 81: ...hem by hand or air blow IMPORTANT When the fuel line is disconnected for maintenance or repair close both ends of the fuel line with a piece of clean cloth or paper to prevent dust and dirt from entering In addition particular care must be taken not to admit dust and dirt into the fuel pump Entrance of dust and dirt causes malfunction of the fuel pump 1 Fuel line 2 Pipe clamp 3 Fuel valve 1 Fuel l...

Страница 82: ... repair them at once 1 Hydraulic hose LH RH 2 Hose clamp LH RH 3 Transaxle fluid expansion tank LH RH 1 Hose clamp LH RH EVERY 4 YEARS 1 Replacing the hydraulic hoses Consult your local KUBOTA Dealer for this service 2 Replacing the fuel lines Consult your local KUBOTA Dealer for this service SERVICE AS REQUIRED 1 Replacing the fuses WARNING To avoid serious injury or death Park the machine on a f...

Страница 83: ... remove the key Blades may be sharp When you handle blades wear heavy gloves or wrap the end of the blades with a rag NOTE Before checking or replacing the blades wipe grass and mud off the top and inside of the mower Especially clean inside the belt cover otherwise the belt life will be reduced Checking The blade cutting edges should be kept sharp at all times Sharpen the cutting edges if they lo...

Страница 84: ...e 5 Bolt IMPORTANT Tighten the blade bolts from 103 to 118 N m 76 to 87 lbf ft The blade bolts have right hand threads Turn them counterclockwise to loosen To prolong the service life of the blades reposition them as shown in the following figure periodically 1 LH blade 2 Center blade 3 RH blade 3 Replacing the mower belt 1 Remove the mower deck from the machine See DISMOUNTING THE MOWER DECK on p...

Страница 85: ...ired to move the motion control levers can be adjusted to 3 levels depending on operator preference NOTE Adjust the dampers after adjusting HST neutral Adjusting the motion control lever strength will affect the maneuverability 1 Change the upper side of the damper to the desired hole location Tighten the upper side damper nut 1 Damper 2 Nut A LIGHTER B HEAVIER H1 Hole for lighter setting H2 Hole ...

Страница 86: ... 2 lbf ft 1 Speed adjust plate 2 Bolt A Motion control lever 12 If at full speed the machine pulls one direction or the other it is an indication that one wheel is turning faster than the other To adjust the condition proceed as follows a Park the machine on a firm and level surface b Stop the engine c Loosen the front bolt of faster side d Move the speed adjust plate to backward e Tighten the fro...

Страница 87: ...adjustments each time the mower deck cutting height is changed It is recommended that all the anti scalp rollers be kept off the ground to minimize scuffing 1 Check the machine tire pressure Inflate tires to the correct pressure See TIRES AND WHEELS on page 50 2 Start the engine 3 Raise up the mower deck to the top position 4 Turn the cutting height control dial to adjust the height 5 Lower the mo...

Страница 88: ...ion 3 Place 51 mm 2 in height wood blocks under each side of the mower deck Anti scalp rollers must not rest on the wood block 4 Lower the mower deck 5 Position the mower blade in the side to side position 6 Loosen the jam nuts of the right side of the machine 7 Adjust the cutting height fine tuning bolts to set 76 mm 3 in blade height Front and rear side bolts must be adjusted 8 Tighten the jam n...

Страница 89: ...ront to rear 1 Raise up the mower deck to the top position 2 Turn the cutting height set dial to the 76 mm 3 in cutting height position 3 Place 51 mm 2 in height wood blocks under each side of the mower deck Anti scalp rollers must not rest on the wood block 4 Lower the mower deck 5 Loosen the jam nuts of the front side of the machine 6 Adjust the cutting height fine tuning bolts to set 76 mm 3 in...

Страница 90: ...5 57 0 4 84 5 82 45 54 61 0 73 2 6 22 7 47 M10 lbf ft N m kgf m 35 5 41 2 48 1 55 8 4 9 5 7 44 9 52 1 60 8 70 5 6 2 7 2 1 2 lbf ft N m kgf m 80 96 108 5 130 2 11 07 13 29 110 132 149 2 179 0 15 22 18 27 M12 lbf ft N m kgf m 57 2 66 5 77 5 90 1 7 9 9 2 76 0 86 8 103 117 10 5 12 0 9 16 lbf ft N m kgf m 110 132 149 2 179 0 15 22 18 27 160 192 217 0 260 4 22 14 26 57 M14 lbf ft N m kgf m 91 2 108 124 ...

Страница 91: ... 3 2 9 48 1 55 9 52 0 3 9 4 9 5 7 5 3 0 4 M12 17 or 19 46 3 53 5 49 9 3 6 62 8 72 6 67 7 4 9 6 4 7 4 6 9 0 5 57 1 66 5 61 8 4 7 77 6 90 2 83 9 6 3 8 0 9 2 8 6 0 6 M14 19 or 22 79 6 92 6 86 1 6 5 107 9 125 5 116 7 8 8 11 0 12 8 11 9 0 9 91 1 108 5 99 8 8 7 123 6 147 0 135 3 11 7 12 6 15 0 13 8 1 2 NOTE Figure 7 on the top of the bolt indicates that the bolt is made of special material Before tighte...

Страница 92: ...nce a month in the hot season and once every 2 months in the cold season 7 Drain the fuel system or use a fuel stabilizer to prevent deterioration of the gasoline If you choose to use a fuel stabilizer follow the manufacturers recommendations and add the correct amount for the capacity of the fuel system Fill the fuel tank with clean fresh gasoline Run the engine for 2 to 3 minutes 8 Store the mac...

Страница 93: ...leaner clogged Clean or replace the air cleaner Spark plug damaged Adjust the spark plug gap or replace the spark plug Check the spark plug wire connection Fuse blown Replace the fuse The engine oil viscosity is wrong Use oils of different viscosities depending on the ambient temperature The battery becomes weak and the engine does not turn over quick enough Clean battery cables and terminals Char...

Страница 94: ...gine overloaded Lower speed or reduce load Engine oil insufficient Fill engine oil The engine air intake screen and cooling fins are dirty Clean the air intake screen and cooling fins Air cleaner element plugged Clean or replace the air cleaner element Engine speed too low Operate at FAST speed Operating ground speed too fast Operate the machine at slower ground speed The engine knocks Stale or lo...

Страница 95: ...rror code indicates the location of the trouble If an error code appears immediately contact your local KUBOTA Dealer for repairs 1 Master system warning lamp 2 Error code Displayed error code Trouble Operator s action Err 2 Fuel sensor trouble Contact your local KUBOTA Dealer Err 3 EEPROM trouble Err 21 CAN communication trouble TROUBLESHOOTING ELECTRONIC DEVICE TROUBLESHOOTING 90 Z751KWi Z781KWi...

Страница 96: ...d prop erly before initial use When viewed from the top the top of the plates look whitish The battery was used too much without re charging Charge the battery sufficiently Charge the battery properly Recharging is impossible The battery life has expired Replace the battery Terminals are severely corroded and heated up Poor terminal con nection Clean the terminal and tighten securely Keep the term...

Страница 97: ...motion control levers are in the NEUTRAL LOCK position op erating the engine The hydrostatic lever linkage is not correctly adjusted Ask your dealer for hydrostatic lever linkage adjustment The control linkage pivots are sticking Pull up and lubricate linkage Master system warning lamp flashes Fuel sensor is disconnected Check wire harness Coolant temperature sensor is disconnected Check wire harn...

Страница 98: ...even cut Mower deck not level Level the mower deck Ground speed too fast Slow down Blades dull Have blades sharpened Blades worn or damaged Replace the blades Low tire inflation Add air to correct pressure Anti scalp rollers not adjusted correctly Adjust the anti scalp rollers Wheels pressure not adjusted correctly Set both tire pressure to the correct pressure See TIRES on page 50 Blades scalping...

Страница 99: ...eck and reset the engine rpm Ground speed too fast Slow down Debris wrapped around mower spindles Clean the mower Front of deck too low Adjust the mower deck See MOWER DECK LEVEL on page 82 If you have any questions contact your local KUBOTA Dealer TROUBLESHOOTING 94 Z751KWi Z781KWi Z781KWTi ...
Страница 100: ... pressure 50 60 checking the tire pressure warning information 60 checking the transaxle fluid level 59 cleaning the air intake screen 59 refueling 58 daily check list 57 E Easy Checker indicators 30 electric clutch adjusting 73 electronic device troubleshooting 90 engine jump starting 36 operating warning information 28 starting 28 starting in cold weather 35 starting information 29 stopping 35 s...

Страница 101: ... operating warning 37 motion control lever 42 adjusting warning information 80 adjusting HST neutral 80 adjusting maximum speed forward 81 adjusting the operating strength 80 aligning 81 alignment 81 checking the alignment 81 operating position 42 stop position 42 mower adjusting 26 operating 48 troubleshooting 93 type 23 mower belt replacing 79 mower deck dismounting 26 front to rear leveling 83 ...

Страница 102: ... of the labels 15 safety switch status lights 33 seat belt 40 service code mode 32 service intervals 52 slope checking 66 spark arrester if equipped checking 63 76 spark plug replacing 75 spark plug condition and gap checking 70 step opening 56 switches 22 T throttle dial 41 operating 29 tightening torque chart 86 transaxle fluid changing 73 transaxle oil filter replacing 72 transmission oil warmi...

Отзывы: