24
Software Control Application
6.
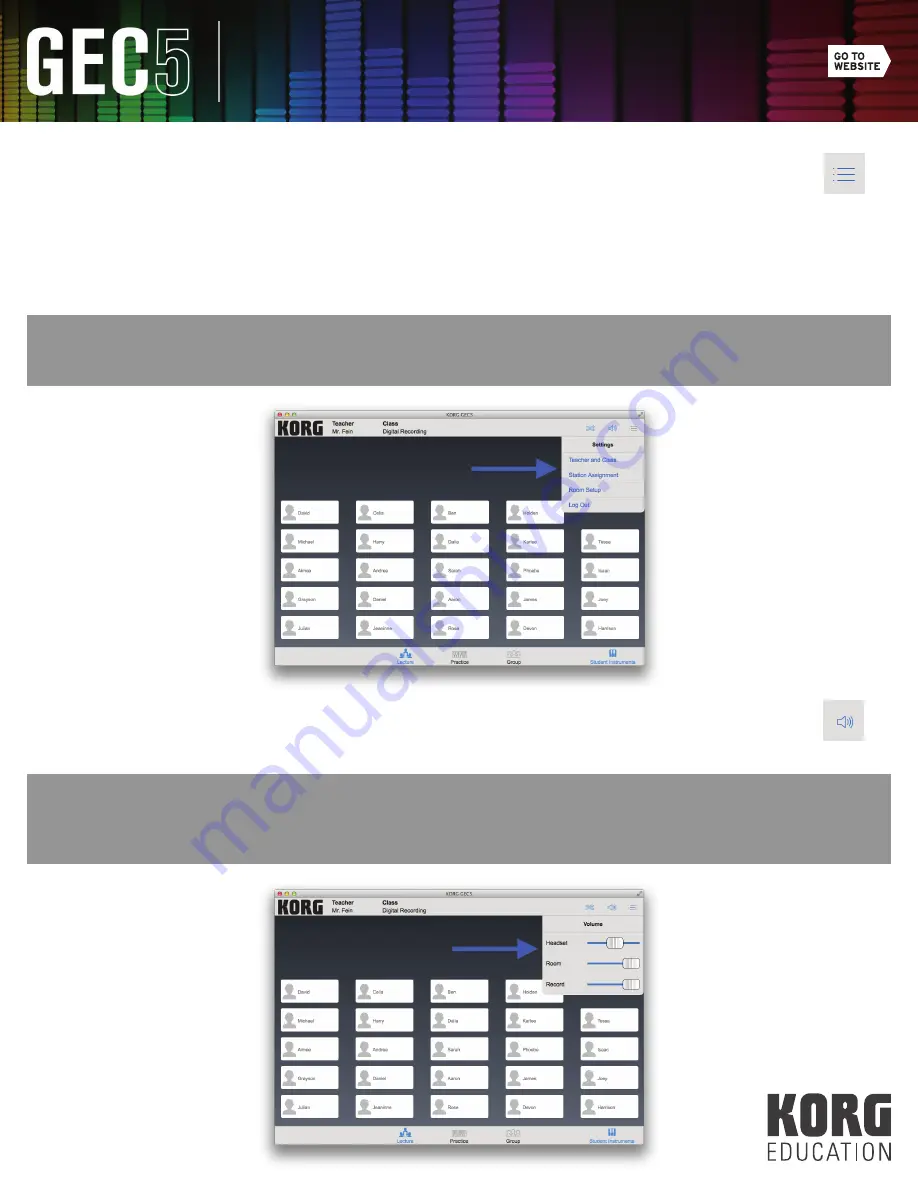
Click the Setup icon (see Fig. 29) in the upper right corner to modify your setup options (see Fig. 30).
a.
Teacher and Class: In this screen you can add, edit, or delete a teacher account.
Click on “Edit” next to the teacher account to add, edit, or delete a class.
b.
Station Assignment: In this screen you can modify the names for each student station.
c.
Room Setup: In this screen you can drag the student stations around the screen to modify the layout of your
virtual
room.
d.
Log Out: Click here to log out the current teacher and return to the opening screen.
TIP:
To save time, you can skip creating teacher accounts and classes all together. Simply use the Default Teacher
account for all users.
(Fig. 30)
(Fig. 32)
(Fig. 29)
(Fig. 31)
7.
Click the Volume Adjustment icon (see Fig. 31). In this screen you can modify the volume of the teacher
headset, room output, and record output (see Fig. 32). You can also use the Teacher Unit volume knob
to adjust the teacher headset volume.
TIP:
To minimize system noise, I suggest turning the Room volume all the way up. When playing through your speakers,
start with the volume all the way down and slowly turn the speaker volume up to a comfortable level. You can do the
same for the Record volume and adjust the input level of your recording device accordingly.


