background image

19

Software Control Application

Installing the Application:

Now that you have completed your hardware set up in your lab, it’s time to configure the GEC5 Software Control Application 
for your new lab. The Teacher Unit will act as a server for the room and save any customizations you make along with setting 
up Teachers, assigning Classes and even creating presets. The Korg GEC5 Software Control Application is available for any 
desktop or laptop using a Windows or Mac operating system or tablets using iOS or Android. Because the Teacher Unit saves 
the information you input for your room set up, you can transition from desktop to tablet with ease.
 
First, choose the device option that fits your needs best and follow the download instructions provided online:


• 

Windows Computer


Visit http://www.korg.com/us/support/download/software/0/576/2983/


• 

Mac Computer


Visit http://www.korg.com/us/support/download/software/0/576/2984/


  • iPad
  

Visit https://itunes.apple.com/us/app/korg-gec5-controller/id1073023302?mt=8


  • Android
  

Visit https://play.google.com/store/apps/details?id=org.korg.gec5


Room Setup:

Once you have the application installed on your device, you are ready to really begin using the GEC5.  Be sure that all cables 
are securely connected (especially all CAT5 cables) and the Teacher Unit is powered on.  Launch the application from your 
device.  The very first time you launch the application, you will go through a brief room setup.  If the application does not find 
your GEC5 hardware, quit the application, recheck your CAT5 connections, verify the power to the Teacher Unit is on, and 
re-launch the application.  Follow the on-screen prompts to setup your virtual room in the GEC5 application.

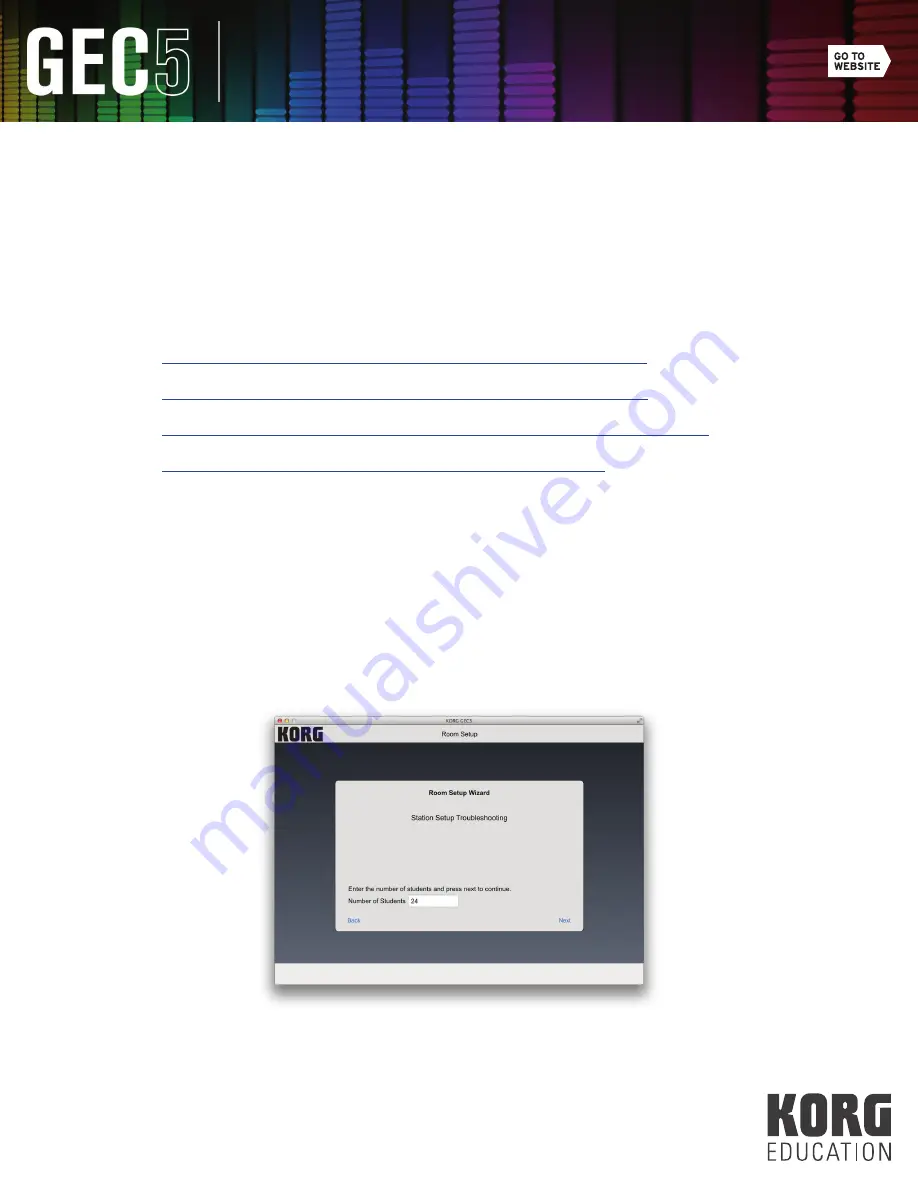
1. 

Welcome: Click Next (see Fig. 18). 

(Fig. 18)

Содержание GEC5

Страница 1: ...1 A Practical Guide to Using the Korg GEC5 in the Classroom ...

Страница 2: ...GUAGE LAB MULTI PURPOSE TECHNOLOGY LAB SOFTWARE CONTROL APPLICATION 19 INSTALLING THE APPLICATION WINDOWS COMPUTER MAC COMPUTER IPAD ANDROID TABLET ROOM SETUP TEACHER AND CLASS SETUP CALL BUTTON GEC5 MODES OF FUNCTIONALITY 26 LECTURE MODE PRACTICE MODE GROUP MODE ALL CALL INSTALLATION 30 THE PLANNING STAGE SITE PLAN CHECKLIST CABLING ESTIMATES AND REQUIREMENTS SIZING CABLES POSITIONING EQUIPMENT M...

Страница 3: ...th the teacher share audio with the class and work collaboratively with a peer The GEC is the audio nerve center of my classroom and provides the perfect teaching environment for all audio based activities The GEC has steadily improved over the years and the new GEC5 is a dramatic upgrade The GEC5 s rack mounted Teacher Unit and a computer tablet application provide a much more user friendly envir...

Страница 4: ...e or Aux inputs to the students In other words if the teacher increases the volume with the volume knob it will only impact the volume to the teacher headphones and this will have zero impact on the volume of teacher devices to the student stations 3 Aux In 1 This is a stereo input to connect any external device such as a laptop tablet or MP3 player 4 Power Toggle the switch to turn the power on o...

Страница 5: ...will mostly likely need dual TS male 1 4 out of your interface to stereo 3 5mm male into Teacher Unit Be sure to check the user manual of your audio interface to confirm the proper cabling for your specific device 4 Room Out Connect your room speakers to this jack a If you have active self powered speakers use two cables for Left Right stereo sound with a balanced TRS 1 4 into Teacher Unit Room Ou...

Страница 6: ...ple AirPort Express visit http www apple com airport express For more information on the Apple AirPort Extreme visit http www apple com airport extreme TIP Use this Record Out jack to capture live recordings of student performances Save the file as an MP3 and build digital portfolios of student work for assessment TIP Label each CAT5 with the student station that it is connected to in the event th...

Страница 7: ...c PC app or tablet app since they both access the same wireless router TIP Although I prefer to have both GEC5 access AND internet access on my device while working the GEC5 it is perfectly fine to use and operate the GEC5 as a stand alone unit with no internet connectivity TIP When mounting each Student Interface to the student workstation be sure to set them back about 1 2 to allow for the cable...

Страница 8: ...cation with students in the room TIP Get students comfortable pressing the Call Button for help from day 1 In my music production classes I invite students to share their first project with the class and I offer bonus points for doing so Any student who would like to share and earn bonus points must press his her Call Button to alert me during our sharing time This gets students comfortable with s...

Страница 9: ...ce unit Be sure to check the user manual of your audio interface to confirm the proper cabling for your specific device see Fig 5 2 Instrument In Connect your keyboard instrument to this input If your keyboard instrument has a Left and Right audio output you will most likely need dual TS male 1 4 out of your keyboard instrument to stereo RCA male into Student Interface unit see Fig 6 If your keybo...

Страница 10: ...rface cable see Fig 9 4 Network This all important jack connects each Student Interface Unit to the main Teacher Unit at the teacher station Use a CAT5 cable to make this connection TIP Since each Student Interface Unit is hard wired to the Teacher Unit it is important to plan the layout of the room prior to installation It is difficult to move stations more than a few feet after installation and ...

Страница 11: ... without a wireless router In this setup there is no option for tablet connectivity See Fig 10 for a detailed diagram 1 Front a Audio device iPod laptop etc to Teacher Unit Aux In 1 b Headphones to headphone input 2 Back a AC power adapter to power input b Keyboard audio output to Instrument In c Computer audio interface output to Aux In 2 d Room Out to active speakers or power amp if using passiv...

Страница 12: ...input for use when utilizing the Mac PC application or tablet head phone jack for use when utilizing the tablet application 2 Back a AC power adapter to power input b Keyboard audio output to Instrument In c Computer audio interface output to Aux In 2 d Room Out to active speakers or power amp if using passive speakers e Record out to computer audio interface input 1 2 stereo f CAT5 cables connect...

Страница 13: ... Keyboard or Piano Lab In this situation you will connect the keyboard output to the Student Interface instrument input See Fig 12 for a detailed diagram 1 Front a Audio device iPod laptop etc to Student Interface Aux In 1 optional b Headphones to each headphone input 2 Back a Keyboard audio output to Instrument In b Network to Teacher Unit using CAT5 cable Fig 12 ...

Страница 14: ...k You could also use an audio interface for computer audio output and connect the output of your audio interface to the Student Interface Aux In 2 jack See Fig 13 for a detailed diagram 3 Front a Audio device iPod laptop etc to Student Interface Aux In 1 b Headphones to each headphone input 4 Back a Computer audio output to Aux In 2 b Keyboard audio output to Instrument In c Network to Teacher Uni...

Страница 15: ...o the Student Interface Instrument In jack See Fig 14 for a detailed diagram 1 Front a Audio device iPod laptop etc to Student Interface Aux In 1 b Headphones to each headphone input 2 Back a Guitar output to stand alone guitar processor external amp simulator b Stand alone guitar processor external amp simulator output to Instrument In 2 c Network to Teacher Unit using CAT5 cable Fig 14 ...

Страница 16: ... In this situation you do not need to connect anything to the Student Interface Instrument In jack See Fig 15 for a detailed diagram 1 Front a Audio device iPod laptop etc to Student Interface Aux In 1 b Headphones to each headphone input 2 Back a Guitar output to computer audio interface input b Computer audio interface output to Aux In 2 c Network to Teacher Unit using CAT5 cable Fig 15 ...

Страница 17: ...the computer audio interface Use software such as Audacity on your computer to record the audio output of the student headset microphones See Fig 16 for a detailed diagram 1 Front a Audio device iPod laptop etc to Student Interface Aux In 1 b Headphones to each headphone input 2 Back a Computer audio output to Aux In 2 b Mic Out to computer audio input c Network to Teacher Unit using CAT5 cable Fi...

Страница 18: ... guitar keyboard and voice recording See Fig 17 for a detailed diagram 1 Front a Audio device iPod laptop etc to Student Interface Aux In 1 b Headphones to each headphone input 2 Back a Guitar output to computer audio interface input 1 b Mic Out to computer audio interface input 2 c Computer audio interface output to Aux In 2 d Keyboard output to Instrument In e Network to Teacher Unit using CAT5 ...

Страница 19: ...ne Windows Computer Visit http www korg com us support download software 0 576 2983 Mac Computer Visit http www korg com us support download software 0 576 2984 iPad Visit https itunes apple com us app korg gec5 controller id1073023302 mt 8 Android Visit https play google com store apps details id org korg gec5 Room Setup Once you have the application installed on your device you are ready to real...

Страница 20: ...Next see Fig 20 Fig 20 Fig 21 Fig 19 TIP Be sure the number of stations is accurate during the initial room set up Adding stations is easy a new Student Interface Unit is automatically detected when plugged in but once added stations cannot be deleted 3 Station Setup Select either individual stations or split stations see Fig 21 If you have one student working at each station or two students worki...

Страница 21: ...acher will have all the same audio functionality as if the students were at separate keyboards Split Station mode is ideal for labs where space restrictions are a factor as it essentially allows you to have double the number of keyboard students as you have keyboards NOTE You must load specialized Korg Split Sounds into your Korg keyboard to make use of the Split feature TIP When you are finished ...

Страница 22: ...sses 1 Click Add a Teacher in the bottom right corner of the main GEC5 screen see Fig 24 2 Enter a name and click OK see Fig 25 4 Click any of the Teacher Profiles to begin adding classes Click Add a Class and enter a name for the class see Fig 27 3 Continue adding as many teachers as needed see Fig 26 Fig 24 Fig 25 Fig 26 Fig 27 ...

Страница 23: ...pplication Download the GEC5 Station Assignment Template xlsx template file from http www korg com us support download product 0 576 Open the GEC5 Station Assignment Template xlsx template file Enter information such as student names into the GREEN fields in the template file Select File Save As Set the Format to Comma Separated Values csv and save the file to a memorable location NOTE Click Conti...

Страница 24: ...nd return to the opening screen TIP To save time you can skip creating teacher accounts and classes all together Simply use the Default Teacher account for all users Fig 30 Fig 32 Fig 29 Fig 31 7 Click the Volume Adjustment icon see Fig 31 In this screen you can modify the volume of the teacher headset room output and record output see Fig 32 You can also use the Teacher Unit volume knob to adjust...

Страница 25: ...o try restarting the application and or the Teacher Unit If the problem persists try replacing the CAT5 cable Call Button The Call Button exists on each Student Interface Unit When students press the Call Button the student station on the GEC5 application screen will light up yellow see Fig 35 To answer the call double click twice on the student station To remove the yellow tag double click again ...

Страница 26: ...Mode To communicate 1 on 1 with a student double click the student station again You will now see a head phone with microphone icon see Fig 40 TIP My most common uses for Practice Mode include Individual student practice time Students can work on their material in a quiet classroom setting Eavesdropping As the teacher I can monitor student progress to help manage my class and keep students moving ...

Страница 27: ...see Fig 42 2 Select one of the Auto Group presets Duet Random Duet Quartet Group All and Ungroup All a Duet Groups are automatically created for stations 1 2 3 4 5 6 etc b Random Duet Each time you click on Random Duet the GEC5 groups different stations together c Quartet Groups are automatically created for stations 1 2 3 4 5 6 7 8 etc d Group All This groups all of the students together Fig 43 F...

Страница 28: ... hold on the student you want to remove until the icon turns blue and click Ungroup see Fig 45 TIP If you want to quickly remove all groupings Select Recall Preset and choose the Ungroup all Auto Group TIP If you have a set grouping that you commonly use you can create you own custom preset 1 Manual group the students as desired 2 Select Save Preset from the top center of the screen 3 Select one o...

Страница 29: ...s I press All Call and instruct the students to pause their practicing while we discuss the music theory concepts behind the chord progression for the piano piece I m always amazed at how quickly the students look up when I press the All Call button All Call Fig 46 All Call is available in Practice and Group mode see Fig 46 Press it to route signal from the teacher mic to every head phone set conn...

Страница 30: ...n easily access his or her instrument as well as external audio equipment such as additional instruments computer keyboard digital recorders CD players burners etc Position the room speakers so that the Teacher as well as the Students can hear them Site Plan Checklist 1 Diagram the dimensions of the physical site where the GEC5 will be located Make sure that the diagram is drawn to scale 2 Note on...

Страница 31: ... standard stereo receiver to the room speakers This wire should be of the heaviest gauge practical Sizing Cables The placement of the equipment in your lab will determine the lengths of cabling required In order to select the appropri ate lengths of communications cable measure the distance from the Teacher Unit to the floor floor distance from teacher station to student station floor to Student I...

Страница 32: ...instrument output to the Teacher Unit s instrument inputs e Connect the audio signals from the teacher computer or other auxiliary devices to the Teacher Unit auxiliary inputs f Connect the audio signals from the Record Out jack on the back of the Teacher Unit to any digital recording device or computer audio interface g If the Teacher Unit is to be connected to an external amplification system co...

Страница 33: ...ork 1 Open the Wi Fi settings on your device and select AirPort Express or AirPort Extreme see Fig 47 2 Select Create a New Network and enter a name and password for your network If asked to Extend this Network choose Other Options and select Next see Fig 48 Fig 47 Fig 48 ...

Страница 34: ...and your upstream network and select Next and then select Done see Fig 51 3 Download the AirPort Utility application a Mac and iPad users Download the AirPort Utility from the App Store b Windows users Download the AirPort Utility from the the Apple website https support apple com kb DL1547 locale en_US c Tablet users The AirPort Utility is not currently available for non iPad tablet users Setup y...

Страница 35: ...e AirPort Utility and select your AirPort Express Extreme router see Fig 52 a If you connected your AirPort to the Internet step 2b you may have a Double NAT status message This is normal and can be safely ignored Fig 52 Fig 53 ...

Страница 36: ...ou to our customers we offer complimentary product support via e mail for products within their warranty period For operational support for products outside of their warranty period please refer to our extensive on line support materials manuals FAQs videos etc For more information visit us online http www korg com us support contact Note This equipment has been tested and found to comply with the...

Отзывы: