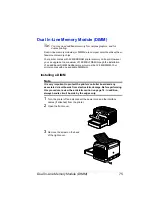
Dual In-Line Memory Module (DIMM)
76
4
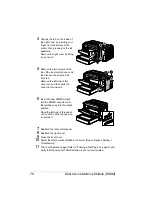
Unhook the tab on the inside of
the right cover by inserting your
finger from the bottom of the
printer, then pressing on the tab
backward.
Remove the right cover by lifting
it up and out.
5
Remove the two screws at the
top of the inner metal panel, and
then loosen the screw at the
front tab.
Remove the left side of this
panel out, and then slide the
panel up to remove it.
6
Insert the new DIMM straight
into the DIMM connector until
the latches snap into the locked
position.
Move the left side of this panel
out, and then slide the panel up
to remove it.
7
Reattach the inner metal panel.
8
Reattach the right cover.
9
Close the front cover.
10
Select the total amount of RAM in the driver (Device Options Setting ->
Total Memory)
11
Print a configuration page (Refer to “Printing a Test Page” on page 3) and
verify that the amount of RAM installed in your printer is listed.
Содержание PagePro 1350EN
Страница 1: ...PagePro 1350EN User s Guide 4136 9562 01A 1800813 001B...
Страница 9: ...Introduction...
Страница 18: ...Uninstalling the Printer Driver 10...
Страница 19: ...Working with the PCL 6 Printer Driver...
Страница 24: ...Using the PCL 6 Printer Driver 16...
Страница 25: ...Working with the PCL 5e Printer Driver...
Страница 30: ...Using the PCL 5e Printer Driver 22...
Страница 31: ...Working with the Status Display...
Страница 36: ...Closing the Status Display 28...
Страница 37: ...Using Media...
Страница 51: ...Replacing Consumables...
Страница 61: ...Replacing the Drum Cartridge 53 8 Press on the front cover grip and close the front cover...
Страница 62: ...Replacing the Drum Cartridge 54...
Страница 63: ...Maintaining the Printer...
Страница 67: ...Troubleshooting...
Страница 81: ...Installing Accessories...
Страница 85: ...Appendix...
Страница 89: ...Technical Specifications 81...
Страница 90: ...Technical Specifications 82...


