


Advanced Copy Operations
5
Konica 7115F/7118F
5-11
Setting the “Erase” Function
To make copies using an “Erase” setting
1
Load the document to be copied.
❍
Refer to “Loading the Document” on page 4-1.
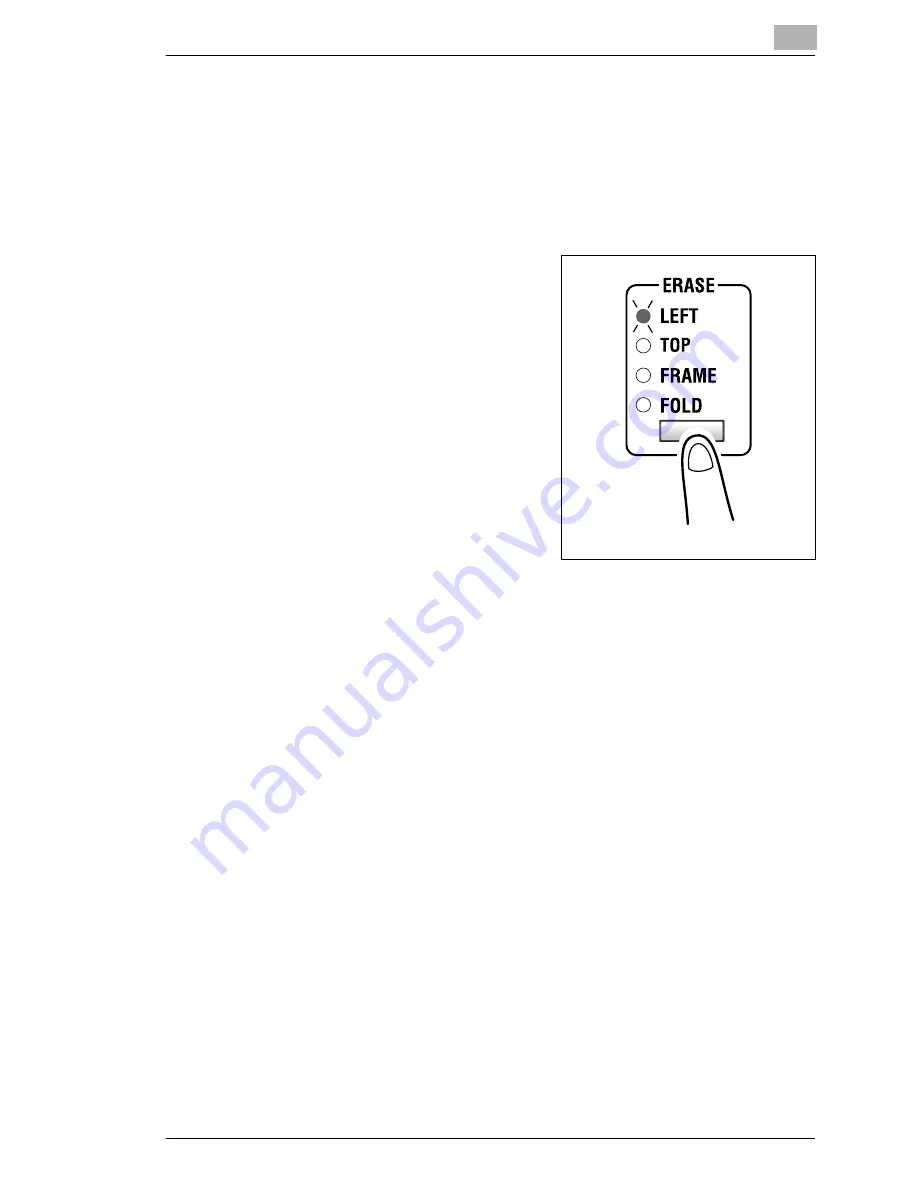
2
Press the [ERASE] key to light the
indicator for the desired “Erase”
setting.
?
Do you know how large of an
area is erased?
➜
The width of the erased area for
the “Left”, “Top” and “Frame”
settings can be set between
5 mm and 20 mm, in 1 mm
increments. The default setting is
10 mm.
➜
The width of the erased area for
the “Fold” setting is fixed at
10 mm.
➜
The width of the erased area for the “Left”, “Top” and “Frame”
settings can be changed using the “ERASE SETTING” function in
the Initial Set mode (p. 9-36).
3
If necessary, specify any other copy settings.
4
Enter the number of copies to be made on the KEYPAD, and then
press the [START] key.
Содержание 7115F
Страница 1: ...7115F 7118F FK 117...
Страница 30: ...2 Precautions 2 6 Konica 7115F 7118F...
Страница 118: ...5 Advanced Copy Operations 5 16 Konica 7115F 7118F...
Страница 264: ...10 Initial Set Mode Fax Functions 10 54 Konica 7115F 7118F...
Страница 284: ...12 Error Messages 12 14 Konica 7115F 7118F 5 Load the paper into the Bypass Tray again...
Страница 292: ...12 Error Messages 12 22 Konica 7115F 7118F...
Страница 300: ...13 Troubleshooting 13 8 Konica 7115F 7118F...
Страница 325: ...Index 15 Konica 7115F 7118F 15 7 Z Zoom setting 4 21 AMS 4 21 X Y zoom function 4 23...
Страница 326: ...15 Index 15 8 Konica 7115F 7118F...
Страница 327: ...MANUFACTURER TOKYO JAPAN ONICA CORPORATION K INSTRUCTION MANUAL 7115F 7118F FK 117 2002 3 4506 7772 01 Printed in China...


