


•
Ensure that the airflow direction of the power supply is the same as the chassis. Labels on the power
supply handle indicate the direction of airflow. See
“QFX5220 Cooling System” on page 52
for more
information.
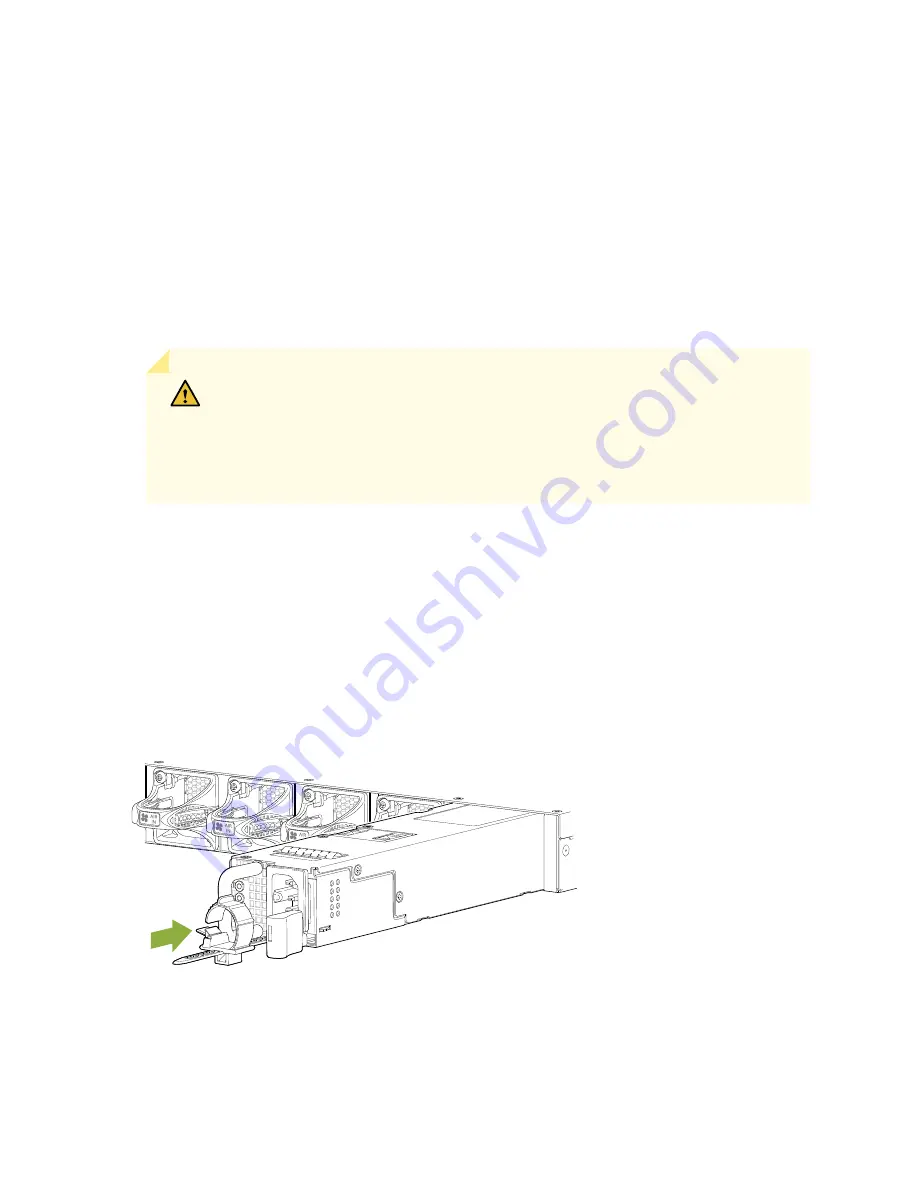
To install a power supply in a QFX5220 (see
1. Attach the ESD grounding strap to your bare wrist, and connect the strap to the ESD point on the
chassis.
2. Take care not to touch power supply components, pins, leads, or solder connections as you remove
the power supply from its bag.
CAUTION:
Verify that the direction of the arrow on the power supply handle matches
the direction of airflow in the chassis. Ensure that each power supply you install in
the chassis has the same airflow direction. If you install power supplies with two
different airflow directions, Junos OS raises an alarm, and the status (ALM) LED blinks
amber.
3. If the power supply has a protective plastic wrap, peel and remove the plastic wrap from all four sides
of the power supply.
4. Using both hands, place the power supply in the power supply slot on the FRU panel of the switch and
slide it in until it is fully seated and the locking lever slides into place. See
and
.
Figure 68: Installing a QFX5220-32CD AC Power Supply
g051058
161
Содержание QFX5220
Страница 1: ...QFX5220 Switch Hardware Guide Published 2019 11 07 ...
Страница 18: ......
Страница 77: ......
Страница 107: ......
Страница 148: ......
Страница 172: ...5 CHAPTER Troubleshooting Hardware Troubleshooting the QFX5220 179 ...
Страница 173: ......
Страница 182: ......
Страница 206: ...Restricted Access Warning 213 ...
Страница 221: ...Jewelry Removal Warning 228 ...
Страница 224: ...Operating Temperature Warning 231 ...
Страница 234: ...DC Power Disconnection Warning 241 ...
Страница 238: ...DC Power Wiring Sequence Warning 245 ...
Страница 241: ...DC Power Wiring Terminations Warning 248 ...