


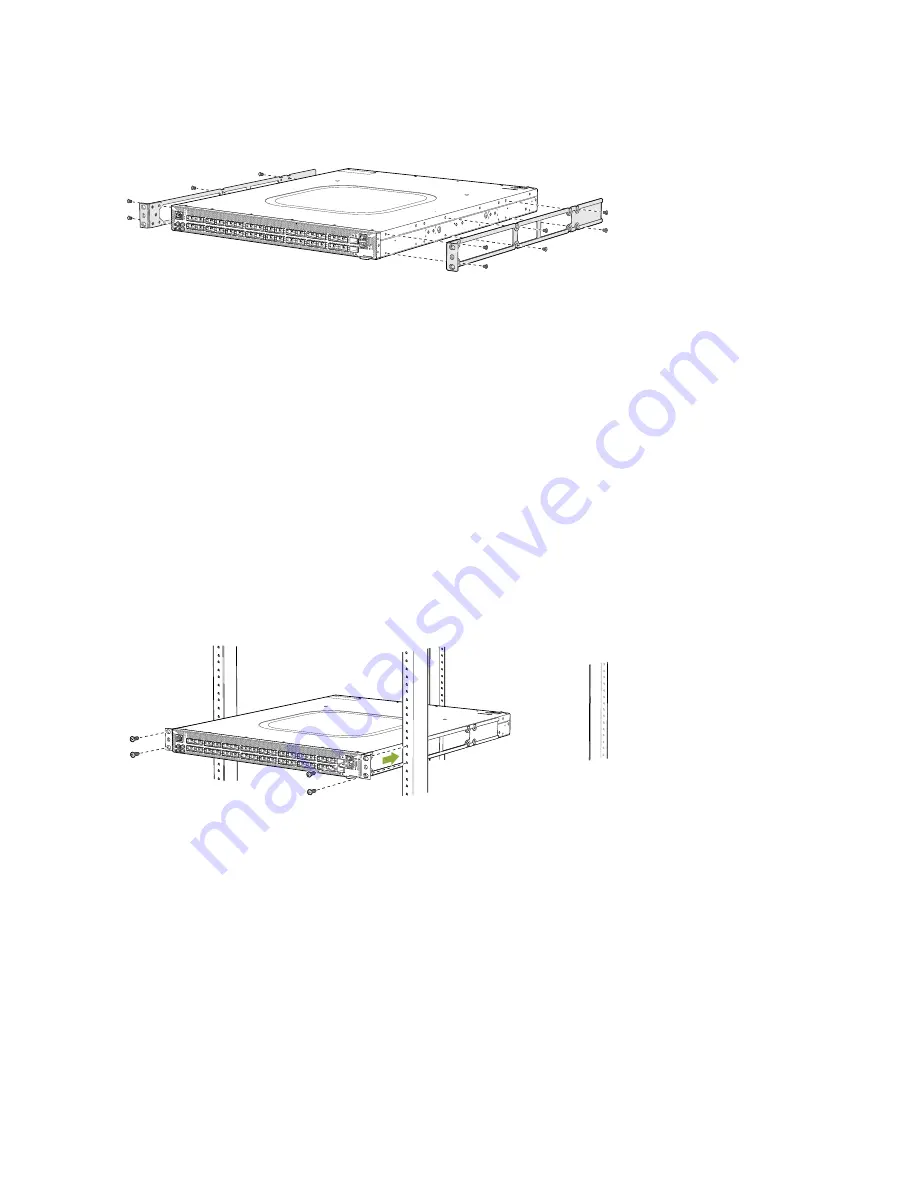
Figure 35: Attaching Mounting Rails to the QFX5220-32CD
g051081
4. Attach the mounting rail to the switch using six mounting screws. Tighten the screws using a Phillips
number 2 screwdriver.
5. Repeats Step
and Step
on the opposite side of the switch.
6. Have one person grasp both sides of the switch, lift it, and position it in the rack so that the front
bracket is aligned with the rack holes.
7. Have a second person secure the front of the switch to the rack using four mounting screws (and cage
nuts and washers if your rack requires them.) Tighten the screws. See
for an
example of connecting the mounting rails and blades to a QFX5220-32CD.
Figure 36: Attaching QFX5220-32CD to the Rack
g051082
8. Continue to support the switch while sliding the rear mounting-blades into the channel of the side
mounting-rails and securing the blades to the rack. Use the four mounting screws (and cage nuts and
washers if your rack requires them) to attach each blade to the rack. Tighten the screws. See
.
121
Содержание QFX5220
Страница 1: ...QFX5220 Switch Hardware Guide Published 2019 11 07 ...
Страница 18: ......
Страница 77: ......
Страница 107: ......
Страница 148: ......
Страница 172: ...5 CHAPTER Troubleshooting Hardware Troubleshooting the QFX5220 179 ...
Страница 173: ......
Страница 182: ......
Страница 206: ...Restricted Access Warning 213 ...
Страница 221: ...Jewelry Removal Warning 228 ...
Страница 224: ...Operating Temperature Warning 231 ...
Страница 234: ...DC Power Disconnection Warning 241 ...
Страница 238: ...DC Power Wiring Sequence Warning 245 ...
Страница 241: ...DC Power Wiring Terminations Warning 248 ...