


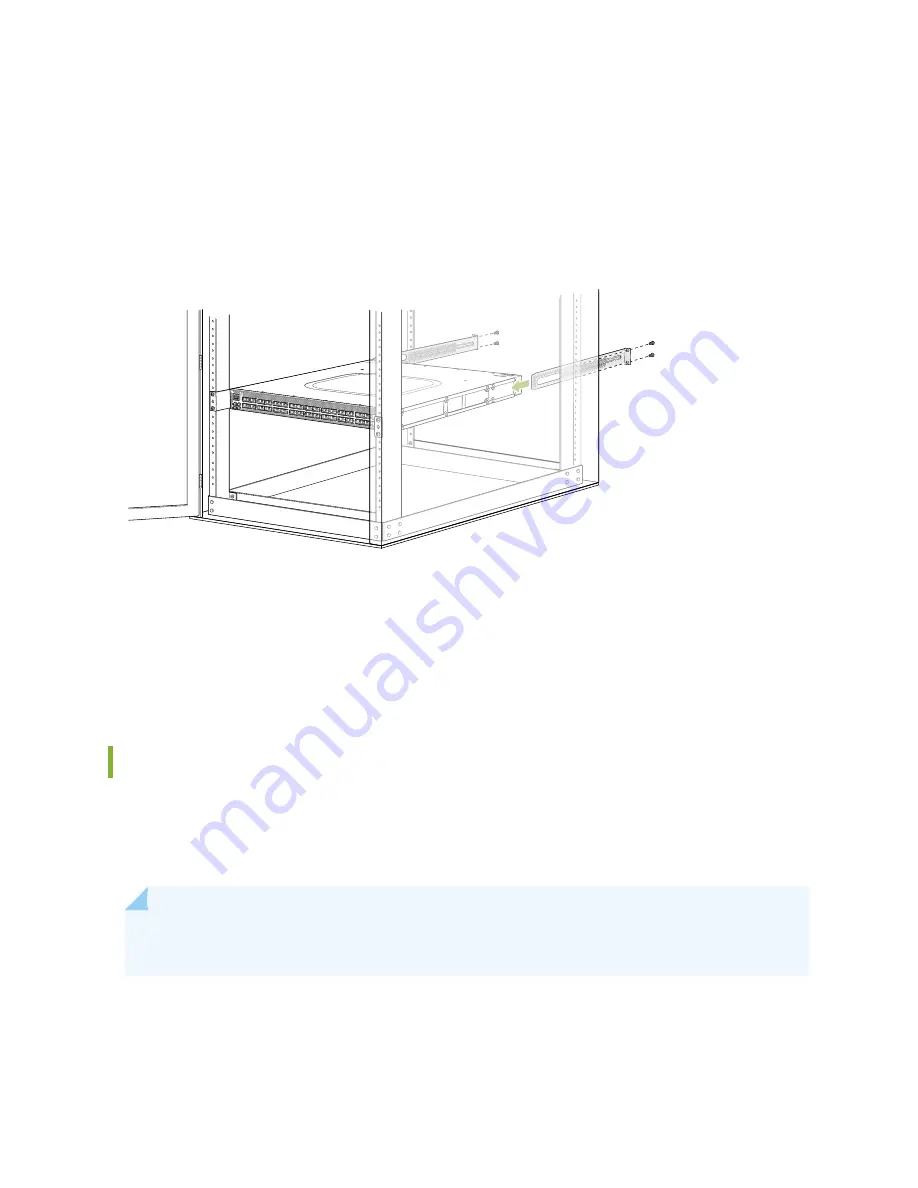
12. Continue to support the switch while sliding the rear mounting-blades into the channel of the extended
mounting-rails and securing the mounting blades to the rack. Use the four mounting screws (and cage
nuts and washers if your rack requires them) to attach each blade to the rack. Tighten the screws. See
.
Figure 42: Sliding the Mounting Blade into the Extended Mounting Rail
g050338
13. Ensure that the switch chassis is level by verifying that all the screws on the front of the rack are aligned
with the screws at the back of the rack.
14. We recommend that you insert dust covers in any unused ports.
EMI Panel Installation on QFX5220-128C
The QFX5220-128C has an EMI front panel to protect fiber optic cabling and to provide additional
protection from electromagnetic interference (EMI). The five in. deepEMI panel connects directly to the
rack and can be added before or after optics are installed.
NOTE:
If your system uses many DACs, you might need a deeper EMI door. A 14 in. deep EMI
panel is available as a spare. The extra deep EMI panel is QFX5220-141-EMI-DR.
Before you begin, see
and ensure you have the following tools and parts:
125
Содержание QFX5220
Страница 1: ...QFX5220 Switch Hardware Guide Published 2019 11 07 ...
Страница 18: ......
Страница 77: ......
Страница 107: ......
Страница 148: ......
Страница 172: ...5 CHAPTER Troubleshooting Hardware Troubleshooting the QFX5220 179 ...
Страница 173: ......
Страница 182: ......
Страница 206: ...Restricted Access Warning 213 ...
Страница 221: ...Jewelry Removal Warning 228 ...
Страница 224: ...Operating Temperature Warning 231 ...
Страница 234: ...DC Power Disconnection Warning 241 ...
Страница 238: ...DC Power Wiring Sequence Warning 245 ...
Страница 241: ...DC Power Wiring Terminations Warning 248 ...