vii
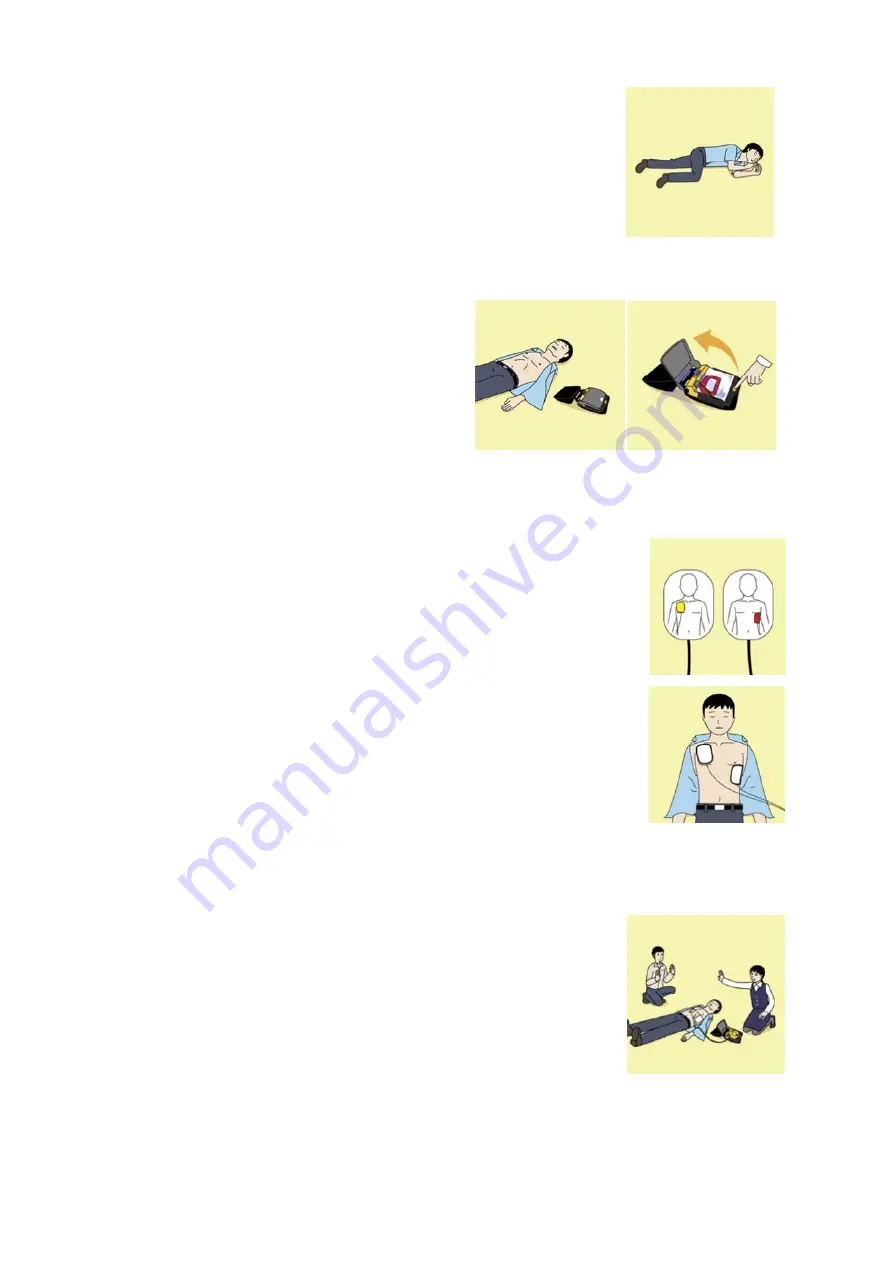
7. When to stop cardiopulmonary resuscitation (CPR)
a) When the injured or ill person has been handed over to the
emergency services
b) When the injured or ill person has started moaning or breathing
normally, lay him/her on his/her side in a recovery position and wait
for the arrival of emergency services.
8. Arrival and preparation of an AED
a) Place the AED at an easy-to-use position. If
there are multiple first-aiders, continue CPR
until the AED becomes ready.
b) Turn on the power to the AED unit. Depending
on the model of the AED, you may have to
push the power on button, or the AED
automatically turns on when you open the
cover.
c) Follow the voice prompts of the AED.
9. Attach the electrode pads to the injured or ill person's bare chest
a) Remove all clothing from the chest, abdomen, and arms.
b) Open the package of electrode pads, peel the pads off and securely
place them on the chest of the injured or ill person, with the adhesive
side facing the chest. If the pads are not securely attached to the chest,
the AED may not function. Paste the pads exactly at the positions
indicated on the pads, If the chest is wet with water, wipe dry with a dry
towel and the like, and then paste the pads. If there is a pacemaker or
implantable cardioverter defibrillator (ICD), paste the pads at least 3cm
away from them. If a medical patch or plaster is present, peel it off and
then paste the pads. If the injured or ill person's chest hair is thick, paste
the pads on the chest hair once, peel them off to remove the chest hair,
and then paste new pads.
c) Some AED models require to connect a connector by following voice
prompts.
d) The electrode pads for small children should not be used for children
over the age of 8 and for adults.
10. Electrocardiogram analysis
a) The AED automatically analyzes electrocardiograms. Follow the
voice prompts of the AED and ensure that nobody is touching the
injured or ill person while you are operating the AED.
b) On some AED models, you may need to push a button to analyze the
heart rhythm.
Turn on the power.
Содержание J-Marine NeCST
Страница 2: ......
Страница 25: ...xxiii...
Страница 33: ...2 6 External Views of HNS 00010 Display Processing Unit MASS APPROX 1 91kg UNIT mm 1 91kg mm...
Страница 39: ...2 12 MASS APPROX 18 9kg UNIT mm 18 9kg mm External Views SMT1000I 171 00 219 00 439 00...
Страница 40: ...2 13 External Views of AP9630...
Страница 42: ...2 15 External Views of HJP 100 3 MASS 6 5kg UNIT mm 6 5kg mm...
Страница 58: ...2 31 FURUNO ECDIS VDR For 230V configuration Figure 2 6 2c JAN 470 2ANN for FURUNO ECDIS connection diagram...
Страница 61: ...2 34 Figure 2 6 2f FURUNO ECDIS VDR connection diagram...
Страница 67: ...3 6 Windows starts Then double tap the NeCST icon The NeCST app starts...
Страница 77: ...3 16 The delete confirmation pop up is displayed To cancel the import of the route tap the Cancel button...
Страница 91: ...3 30 Deleting WP of Route The tapped WP is deleted Editing Route Data...
Страница 99: ...3 38 If the Soft Version of JAN 7201 9201 is earlier than 01 30 110 you can use the following procedure...
Страница 100: ...3 39 The route data of JAN 470 is displayed on ECIDS...
Страница 128: ...3 67 Deleting Circle The selected circle is deleted...
Страница 141: ...3 80 If the Soft Version of JAN 7201 9201 is earlier than 01 30 110 you can use the following procedure...
Страница 143: ...3 82 JAN 701B 901B The Handwritten data is displayed on ECDIS...
Страница 152: ...3 91 JAN 701B 901B The Handwritten data is displayed on ECDIS...
Страница 155: ...3 94 An addition to a created memo can be made The mode switches to the Edit mode...
Страница 174: ...3 113 The file selection screen is displayed Select supplied permit txt Information of the used Cell Permit is displayed...
Страница 181: ...3 120 If Success is displayed and Chart process is displayed Running update is completed...
Страница 182: ...3 121 Starting the Chart Import Software The chart import software starts...
Страница 184: ...3 123 The file selection screen is displayed Select supplied permit txt Information of the used Cell Permit is displayed...
Страница 217: ...3 156 The photo list is displayed The selected photo and icon are displayed...
Страница 275: ...6 2...
Страница 287: ...7 12...
Страница 290: ......
Страница 291: ......


