


16
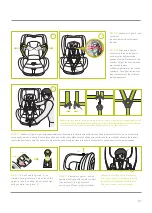
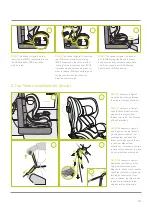
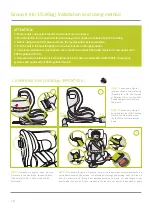
Step 10:
As shown in figure
10, rotate car seat to forward
facing (Please refer to P8 -The
Function of Rotation).
Step 11:
As shown in figure
11, open the Side Protection in
the side which is near the door
(Please refer to P8 - The
Function of Side Protection).
Step 12:
As shown in figure 12,
tighten the top tether until Top Tether
Adjuster shows green. Meanwhile,
shake the car seat to check the top
tether is tightened favorably and
correctly. If you want to release top
tether, push the button to make top
tether adjuster revolve some angle.
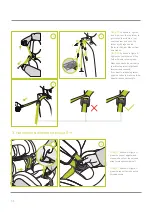
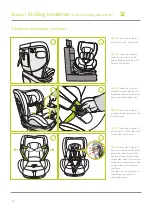
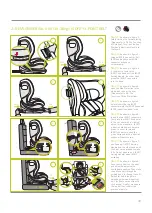
Step 9:
As shown in figure
9, pull the Headrest setting
handle upward to adjust the
headrest to the right position
according to different height
of children.
Attention: after sitting, adjust the
headrest to the right position. In the
forward facing installation for Group
I, shoulder pads should higher a little
bit. One or two fingers is the best
distance from the bottom of headrest
to child's shoulders.
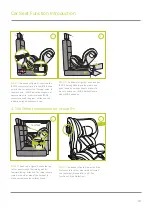
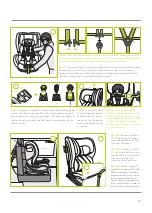
Step 7:
As shown in figure 7, pull harness adjustment strap outward to fix child and avoid
harness strap to constrict child too much. It is better to make adult palm can insert
between harness strap and child's chest. Make sure the tightness is comfortable for your
child and ensure the lap belt restrict the position of pelvis.
7
Methods to use harness buckle: guide the two buckle latches together and engage them before
putting them into the harness buckle with a click nose. Pull the buckle latches to check whether
it is locked well. The buckle latches will be released if you press the red button.
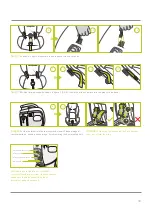
Step 8:
As shown in figure 8, Children who less than 10kg should use
Level 1, and children who equal 10kg or over 10kg should use Level 2.
Before adjustment, loosen five-point safety belt and open buckle. Then
twist the strap to go through a vertical slot and make sure buckle are
fixed in the slot.
Level 1
Level 2
1
2
3
Pull
8
9
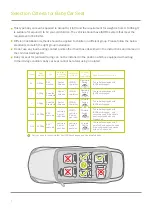
Car door
10
11
12


