
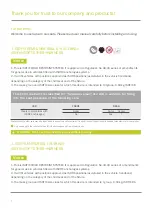


13
1
2
3
4
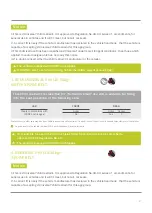
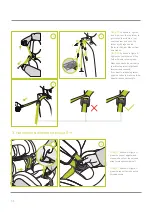
Pull
Push
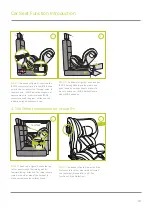
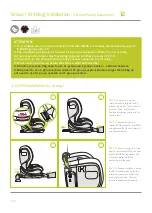
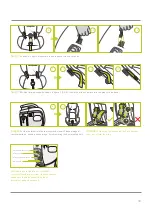
1. ISOFIX Installation for Group I
Step 1
: As shown in figure 1,
rotate car seat to forward facing
(Please refer to P8 -The Function of
Rotation). Then, pull the Seat
Position Adjustment Handle to the
suitable level.
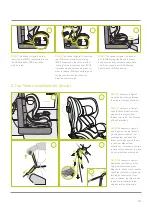
Step 2:
As shown in figure 2,
release ISOFIX connector. Pull ISOFIX
settingkey and ISOFIX connector will
pop up automatically.
Step 3:
As shown in figure 3, if you
want to remove the ISOFIX, one hand
pull the ISOFIX Setting Handle, the
other hand press the ISOFIX
connectors into the base.
Step 4:
As shown in figure 4, before
ISOFIX installation, pick up the top
tether from rear cover and pull out
some top tether strap. Then, put
them in the headrest temporarily.
Pull
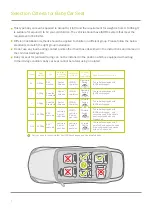
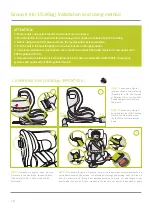
Group I (9-18kg) Installation
(Forward facing placement)
ATTENTION:
1. Only suitable use in the listed vehicles fitted with ISOFIX anchorages systems and approved
to ECE Regulation No. 14.
2. The installation for Group I is forward facing and is applied to children from 9 to 18kg.
3. This car seat for Group I has four sitting postures and they are level 2/3/4/5.
4. Important - In the driving condition, baby car seat cannot be lateral using.
5. Don’t use forward facing before the child s weight exceeds 9kg!
6. Children less than 9kg need to use 0+ group and 1 group cushion
;
children between
9-12kg need to use 1 group cushion without 0+ group cushion; children larger than 12kg do
not need to use 0+ group cushion and 1 group cushion.
Pull


