

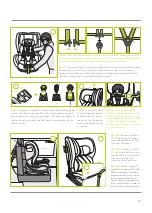


click
Push
Pull
click
Pull
Push
20
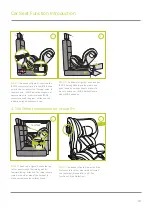
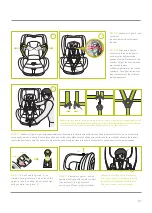
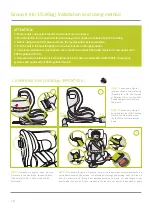
Step 1:
As shown in figure 1,
rotate car seat to forward facing
(Please refer to P8 -The Function
of Rotation). Then, pull the Seat
Position Adjustment Handle to
the level 2.
Step 2:
As shown in figure 2,
release ISOFIX connector. Pull
ISOFIX settingkey and ISOFIX
connector will pop up
automatically.
Step 3:
As shown in figure 3,
if you want to remove the
ISOFIT, one hand pull the ISOFIT
Setting Handle, the other hand
press the ISOFIT connectors
into the base.
Step 4:
As shown in figure 4,
open the Side Protection in the
side which is near the door
(Please refer to P8 - The
Function of Side Protection).
4
3
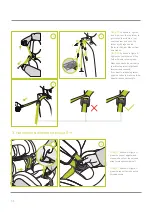
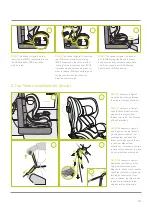
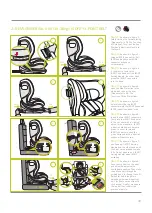
Step 5:
As shown in figure 5,
before insert the two ISOFIT
connectors into the ISOFIT fixed point,
ISOFIT indication window is red.
Step 7:
As shown in figure 7,
one hand pull ISOFIT Setting
Handle and the other hand push
the baby car seat base to make
it fix. Do not need to pull ISOFIT
Setting Handle, when ISOFIT
seized up.
Step 8:
As shown in figure 8,
have your child sit on the seat
and adjust headrest to the
comfortable position. Then make
the oblique belt through the
guiding hook for Group II and III,
horizontal belt through two
harness guiders and insert car
belt tongue to car buckle with
click sound. Finally, make sure
the lap belt can restrict the
position of pelvis.
Step 6:
As shown in figure 6,
insert the two ISOFIT connectors
firmly into the ISOFIT fixed point
in the car seat with a "clicking"
noise. In the meantime, ISOFIT
indication window will become
green. In order to release
ISOFIT connectors, push the
green button and the indication
window will become red.
6
5
7
8
Pull
1
Pull
Push
2
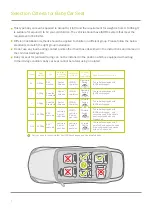
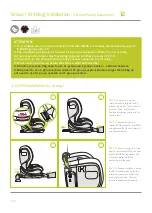
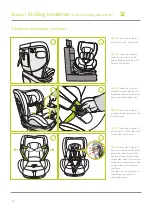
2. SEMI-UNIVERSAL II+III (15-36kg): 3-POINT BELT


