


15
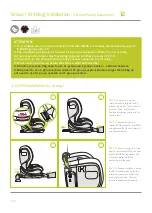
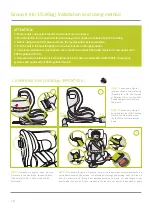
Group I (9-18kg) Installation
(Forward facing placement)
1
2
3
4
5
6
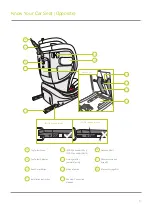
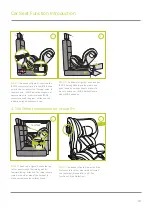
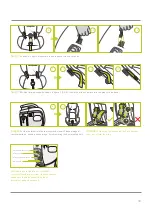
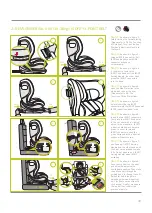
3. Harness Installation for Group I
Step 1:
As shown in figure 1,
pull out some top tether strap.
Step 2:
As shown in figure 2,
rotate the car seat to the 90
degree ((Please refer to P8 -The
Function of Rotation).
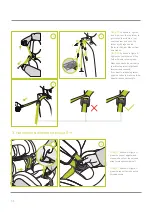
Step 3:
As shown in figure 3,
press the central adjuster and
meanwhile, pull out the harness
strap to release shoulder belt.
Step 4:
As shown in figure 4,
press the red button to open the
harness buckle.
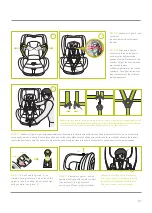
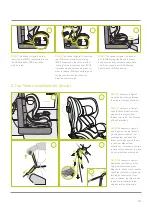
Step 5:
As shown in figure 5,
pull out both of the shoulder belt
to both sides of the seat.
Step 6:
As shown in figure 6,
have your child sit on the seat to
ensure the lap belt restrict the
position of pelvis. Please check
the shoulder height, the shoulder
belts are required to place a little
bit higher level of your child's
shoulders.
Too high or too low may reduce
the safety of the children's
restraining system.


