


10
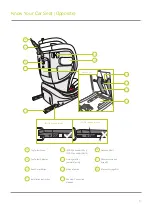
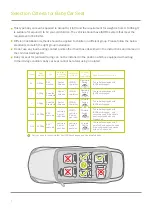
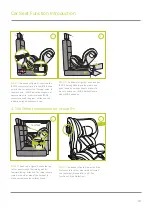
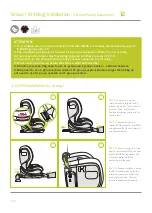
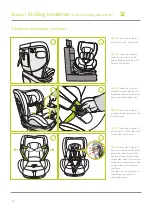
Car Seat Function Introduction
click
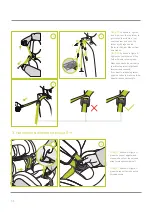
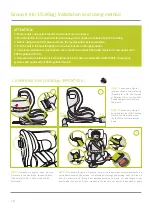
2. Top Tether Installation for Group 0+I
Step1:
As shown in figure 1, make the top
tether pass through the Guiding slot for
rearward facing. Attention: Top tether should
install in the other side of the car door to
make convenience for children to use.
Step 2:
As shown in figure 2, open the Side
Protection in the other side which not install
the top tether (Please refer to P8 - The
Function of Side Protection).
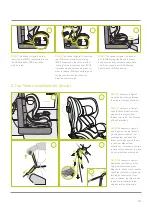
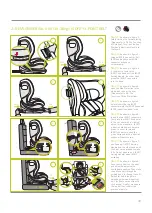
Pull
Push
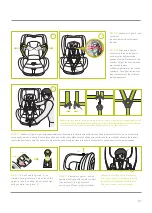
Step 5:
As shown in figure 5, insert the two
ISOFIX connectors firmly into the ISOFIX fixed
point in the car seat with a "clicking" noise. In
the meantime, ISOFIX indication window will
become green. In order to release ISOFIX
connectors, push the green button and the
indication window will become red.
Step 6:
As shown in figure 6, one hand pull
ISOFIX Setting Handle and the other hand
push the baby car seat base to make it fix.
Do not need to pull ISOFIX Setting Handle,
when ISOFIX seized up.
Car door
5
6
1
2


