Jabiru Aircraft
Pty Ptd
Aircraft Service Manual
Jabiru J230-C
REVISION
0
Dated : Feb 2006
Issued By: RAS
Page: 70 of 171
L:\files\Technical_manuals\J230_J430\J230.J430_Work_files\J230-C_Tech_Rev_1.doc
Print Date: 14/01/2009 4:41:00 PM
2.
New piston sealing O-Rings should be installed each time the brakes are
disassembled. If re-use is necessary, they should be wiped with a clean cloth
saturated in automotive brake fluid and inspected for damage.
NOTE:
Thorough cleaning is important. Dirt and chips are the greatest single cause of
malfunctions and leaks in hydraulic brake systems.
3.
Check brake linings for deterioration or excessive wear.
4.
Inspect brake cylinder bore for scoring. A scored cylinder will leak or cause rapid
bucket wear. If wear is evident, install a new brake cylinder.
5.
If the anchor bolts on the brake assembly are nicked or gouged, replace with new
bolts.
6.
Inspect wheel brake disc for a minimum thickness of 2mm. If brake disc is below
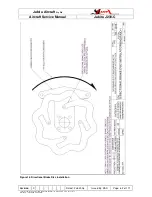
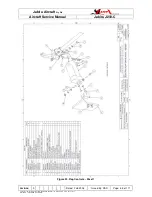
minimum thickness, install a new part. For directional brake discs, refer to Figure 16
for installation details.
6.8.4.3
WHEEL BRAKE INSTALLATION
1.
Place brake cylinder assembly in position on backing plate.
2.
Install bolts, springs, outboard pad and nuts/washers.
3.
Reconnect flexible hose.
4.
Fill master cylinder reservoir with brake fluid.
5.
Bleed brakes – Refer to Paragraph 6.8.5.
6.8.4.4
BRAKE LINING INSTALLATION
New brake linings should be installed when the existing linings are worn to expose the
rivet heads.
To replace outboard lining:
1.
Remove bolts securing outboard brake pad and brake cylinder to backing plate.
2.
Remove outboard brake pad.
3.
Place brake pad on a table with lining side down flat. Centre a 1/8” (or slightly
smaller) punch on the rolled rivet and hit the punch sharply with a hammer. Punch
out all rivets securing the lining to the pad plate.
NOTE:
A replacement kit for brake pads and rivets is available from JABIRU
4.
Clamp the flat side of an anvil in a vice.

