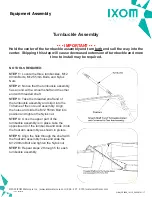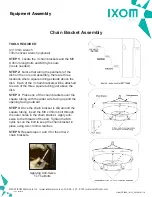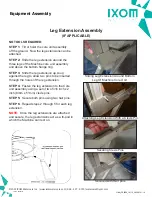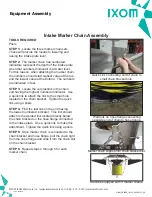
Float Assembly
NO TOOLS REQUIRED
STEP 1:
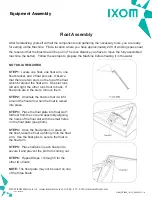
Locate one float, one float arm, one
float bracket, and 2 float pin sets. Observe
that there are two slots on the top of the float
which fit around the float arm. One slot runs
left and right, the other runs front to back. If
float pins are in the slots, remove them.
STEP 2:
Orientate the float so that it will fit
around the float arm when the float is raised
into place.
STEP 3:
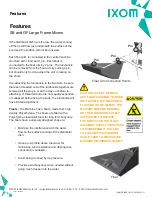
Place the float plate into float slot 1
furthest from the core unit assembly aligning
the holes of the float slot with the small holes
on the float plate (see photo).
STEP 4:
Once the float plate is in place on
the float, raise the float up fitting it into the float
arm. Use the float pins to secure the float to
the float arm.
STEP 5:
Place hairpins in each float pin to
secure it and prevent the pin from coming out.
STEP 6:
Repeat Steps 1 through 5 for the
other two floats.
NOTE:
The float plate may not be used on one
of the three floats.
After familiarizing yourself with all the components and gathering the necessary tools, you are ready
for setting up the Machine. Find a location where you have approximately 20 ft of working space near
the reservoir that the Machine will be put in (The less distance you have to move the fully assembled
machine, the better). Follow these steps to prepare the Machine before floating it in the water:
©2022 IXOM Watercare Inc. | www.ixomwatercare.com | 866 - 437 - 8076 | [email protected]
Equipment Assembly
10155_20220110
O&M_GF2500_10115_20220121 - 14

