21
SEC
T
IO
N
iPecs™
LAB
/ User Manual
01
02
03
04
05
06
07
08
09
10
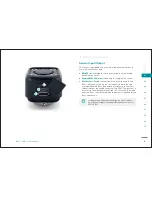
Charging the iPecs Lab Sensor
The iPecs Lab sensor is shipped with a partial-charged battery. Be
sure to charge the battery completely before you begin. The sen-
sor can be charged by using either the supplied AC Adapter or by
connecting the sensor to an approved PC using the USB adapter.
The sensor battery has a
6-hr charge time
.
Periodic charging of the sensor battery is recommended.
Deep discharging before recharging, while recommended for
Ni-Cd batteries, will actually shorten the life of the
Lithium-ion
batteries in the iPecs Lab sensor.
Keeping the battery fully-
charged is benefi cial to the battery life.
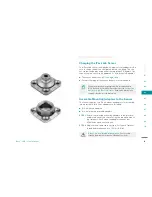
Assemble Mounting Adapters to the Sensor
The sensor requires two 4-hole mounting adapters for assembly
into a prosthetic limb. Four adapters are included:
(2) 4-hole male adapters
(2) 4-hole female rotatable adapters
STEP 1
Attach the selected mounting adapters at the proximal
and distal ends of the sensor, using the provided mount-
ing fasteners. Each mounting adapter requires four
M6x14mm mounting fasteners.
STEP 2
Apply service-removable Loctite
®
242
®
to each fastener
thread and torque evenly to 12 N·m (8.9 lbf).
Always use a calibrated torque wrench.
Over- or under-
torquing the mounting fasteners will damage the sensor.
Hardware Installation
Содержание 104441-01
Страница 1: ...User Manual...
Страница 4: ...System Overview 01...
Страница 11: ...Software Installation 02...
Страница 16: ...USB Driver Installation 03...
Страница 20: ...Hardware Installation 04...
Страница 25: ...Software Overview 05...
Страница 31: ...Recording Data 06...
Страница 34: ...Uninstalling Software 07...
Страница 37: ...Uninstalling USB Driver 08...
Страница 40: ...System Calibration 09...
Страница 46: ...Troubleshooting 10...

