


39
English
5.10.3 Deleting a preset
1) To delete a preset, call up any screen view which includes the button
“Load”, such as the view “Assign”, “Channel” or “System” or a
view for sound adjustment or dynamic-range processing�
2) Tap the button “Load”� The view “Load Preset” (fig� 31) will be
displayed�
3) Tap the appropriate button on the right side of the screen view to
select the category of the preset to be deleted�
4) Use the keys
and
(18) or tap the appropriate list item to select
the preset to be deleted�
To go to other pages of the storage list, use the keys
and
(18)
or the buttons “Up Page” and “Down Page”�
5) Use the button “Delete” to delete the preset�
A confirmation prompt will appear: Tap “Yes” to confirm, or tap
“No” to cancel�
6 Additional Functions
6.1 Channel names
Names can be assigned to the channels for easier distinction� In some
screen views, these names will appear, in addition to the predefined
channel designation, beneath the corresponding long faders� If no
name is assigned, the channel number will appear instead� To rename
a channel:
1) Select any screen view which includes a long fader of the channel
desired�
2) On the screen, touch the designation shown beneath the fader for
a few seconds� A keyboard will be displayed (fig� 30)�
3) Use the keyboard to enter the new name for the channel�
Use the button “abc�” to go to lower-case letters, “ABC�” to go
to upper-case letters, and “�?123” to go to special characters and
numerals�
To delete the character most recently entered, use the button
�
4) To terminate the entry, tap the button “Enter”� To cancel the entry
without changing the name and to exit the keyboard, use the
button
�
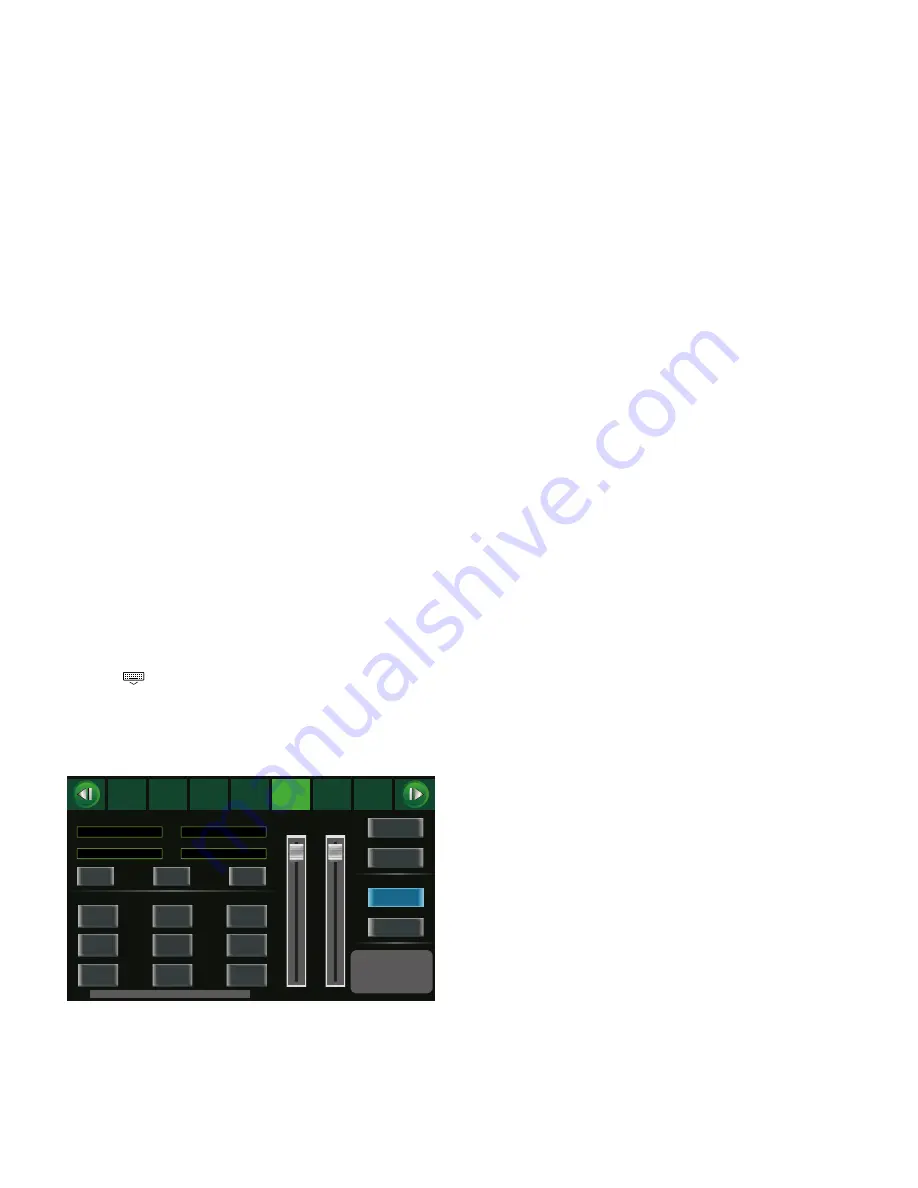
6.2 System settings
Use the screen view “System” (fig� 32) to make the system set-
tings described in the following chapters� To call up the screen view
“System”, press the key SYSTEM (16)�
Current Scene
FX1
Selected Channel
FX2
Shortcut To
Meters
Digital
LCD
Brightness Adjust
Knob
Load
Copy
Save
Default Setting
Default Page Setting
Mixer Mode
PFL
Solo Mode
Assign
Channel
System
Routing
PEQ
GEQ
FX 1
FX 2
Gate
Comp
Mode
AUX/SUB
Lock
48V
Mixer
DCA
DCA
Routing
GEQ
Long
Faders
Setting
Password
Default
Default
Default
Default
DSP_Firmware_1_V1.1
DSP_Firmware_2_V1.1
MCU_Firmware_1_V1.0
MCU_Firmware_2_V1.0
Device Name: DMIX-20
Long Fader
Fig. 32 System
6.2.1 Mode Aux /Sub
Depending on the requirements, the mixer can be either used with 4
Aux ways and 4 subgroups or with 8 Aux ways and no subgroups� In
the operating mode with 8 Aux ways, the connections and operating
elements of the subgroups are used for the Aux ways 5 – 8� In the view
“System” (fig� 32), the button in the lower left indicates the current
operating mode: “AUX / SUB Mode” or “8 AUX Mode”�
1) To switch between the operating modes, tap this button�
2) A confirmation prompt will appear: Tap “Yes” or press the key
ENTER (20) to confirm�
6.2.2 Screen view at switch-on
When the mixer is switched on, the screen will display one of the two
mixer views� To define the screen view to be displayed at switch-on,
use the buttons “Long Fader” and “Mixer Mode” in the screen view
“System” (fig� 32)� The button of the currently selected setting is
highlighted in colour�
6.2.3 Adjusting screen /knob brightness
The brightness of the screen (9) and of the illuminated rotary knobs
PARAMETER ADJUST (18) as well as of SUB 1– 4 and MAIN (25) can
be adjusted according to the lighting conditions at the place of
operation: In the view “System” (32), beneath “Bright Adjust”, tap
the appropriate control “LCD” or “Knob” and then slide it as required�
6.2.4 Device name
As for the channels (see chapter 6�1), the device name of the mixer
can be changed: In the view “System” (fig� 32), touch the field “De-
vice Name:” for a few seconds to display a keyboard, and then enter
a new name�
6.2.5 Resetting
To reset all settings of the mixer to their factory settings, tap the but-
ton “Default Setting” in the view “System” (fig� 32)� A confirmation
prompt will appear: Tap “Yes” or press the key ENTER (20) to confirm�
Note:
Any presets you may have saved (
☞
chapter 5�10) will be retained�
6.2.6 Locking the unit
To lock the mixer and thus to protect it against unauthorized operation:
1) In the view “System” (fig� 32), tap the button “Lock”� A keyboard
will be displayed (fig� 30)�
2) Enter the password of the mixer� To correct your input, use the
button
�
The predefined password is “1111” (use the button “�?123” to
enter numerals)� To increase the protection against unauthorized
access, change the predefined password (
☞
chapter 6�2�7)�
3) To terminate the entry, tap the button “Enter”� The mixer is now
locked� “System Locked!” is shown in the lower right of the view
“Mixer”�
4) When you try to operate the mixer, the keyboard will immediately
be displayed� To unlock the mixer, enter the password and then
confirm it with the button “Enter”�
When an incorrect password is entered, the message “Password
not correct!” will be shown: Tap “OK” and then enter the correct
password�


