


cDVR User Guide, Release 2.0
91
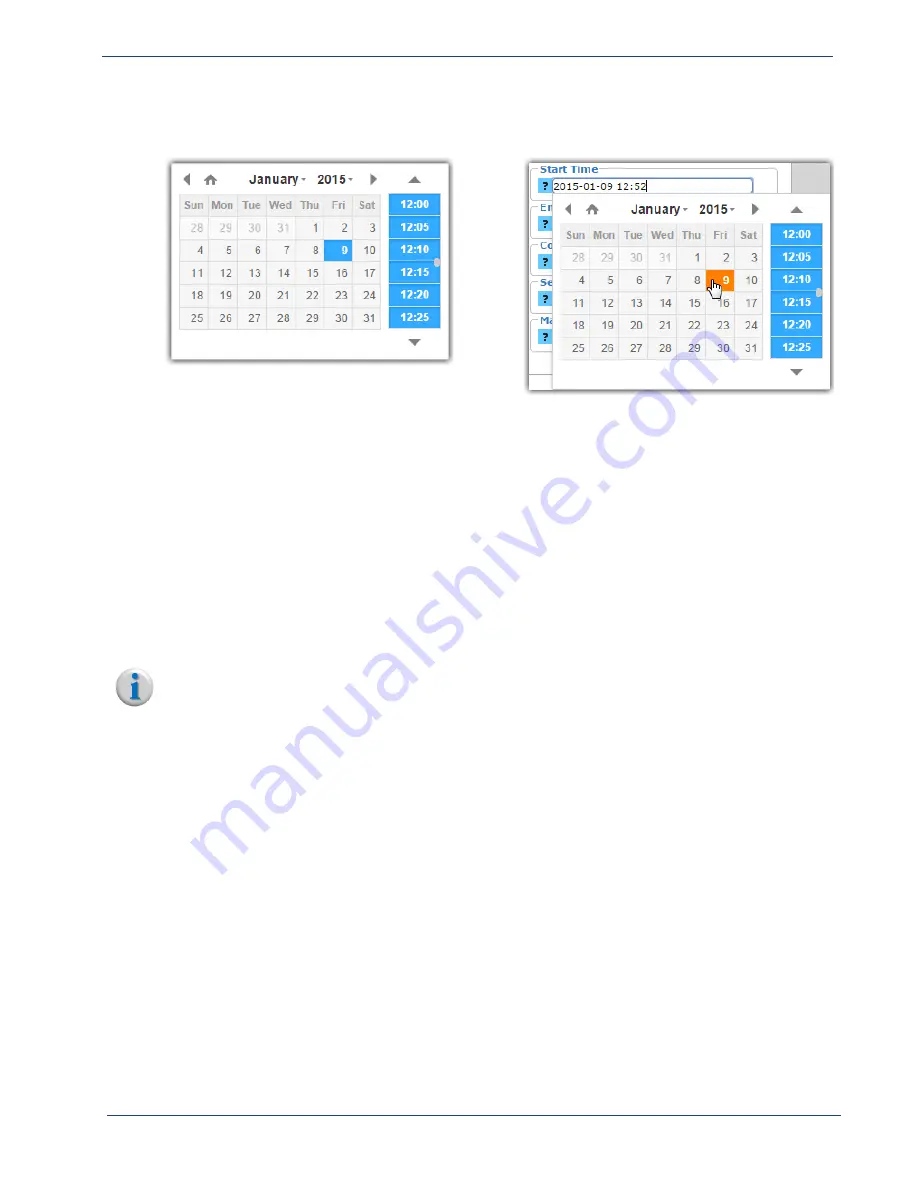
Configuration - Schedules Sub-tab
displayed, clicking on the
Start Time
or
End Time
field produces an interactive calendar for ease of
scheduling:
You can enter start and end times in one of two ways:
•
Typing the date and time manually in the relevant fields;
•
Clicking the highlighted current date, which will automatically enter the current date and time.
•
Clicking on the desired date and using the time slider to the right of the date to adjust start/end
time.
For Continuous Record only:
•
In addition to the above three options, if you are scheduling a CR from the
SCHEDULES
tab,
leaving the start time empty will automatically start the recording as soon as the schedule is saved,
and leaving the end time empty will record content indefinitely with no stop time.
Or, you can use a combination of all of the above as suits your needs.
Note:
When clicking the current date in order to start the recording immediately, we recommend that
you adjust the time up by one minute in order to ensure the current time does not pass before
you save the schedule. For example: if you have scheduled the recording to start at 12:10 PM and
the current time is 12:10 PM, if the time changes to 12:11 PM before you save the schedule, you
will receive an error that the start time has passed when trying to save the schedule.
Modifying
a
Recording
Schedule
You can modify various aspects of a recording schedule depending on whether the recording has
begun. To modify a recording schedule, proceed as follows
1.
From
CONFIGURATION > SCHEDULES
, locate the recording you wish to modify and click the
“wrench” icon to modify.
2.
If the recording has not yet begun you can modify any field as described in
.
If the recording has already begun, but not yet ended, the only parameter you can modify is the
End Time
(refer to the
“Scheduling Calendar” on page 90
).
3.
Click
Submit
to save changes to the RM database.


