IJ4000 Impulse Jet
Section 2: Quick Start
5765-018 Operations Manual Rev J
Page 25
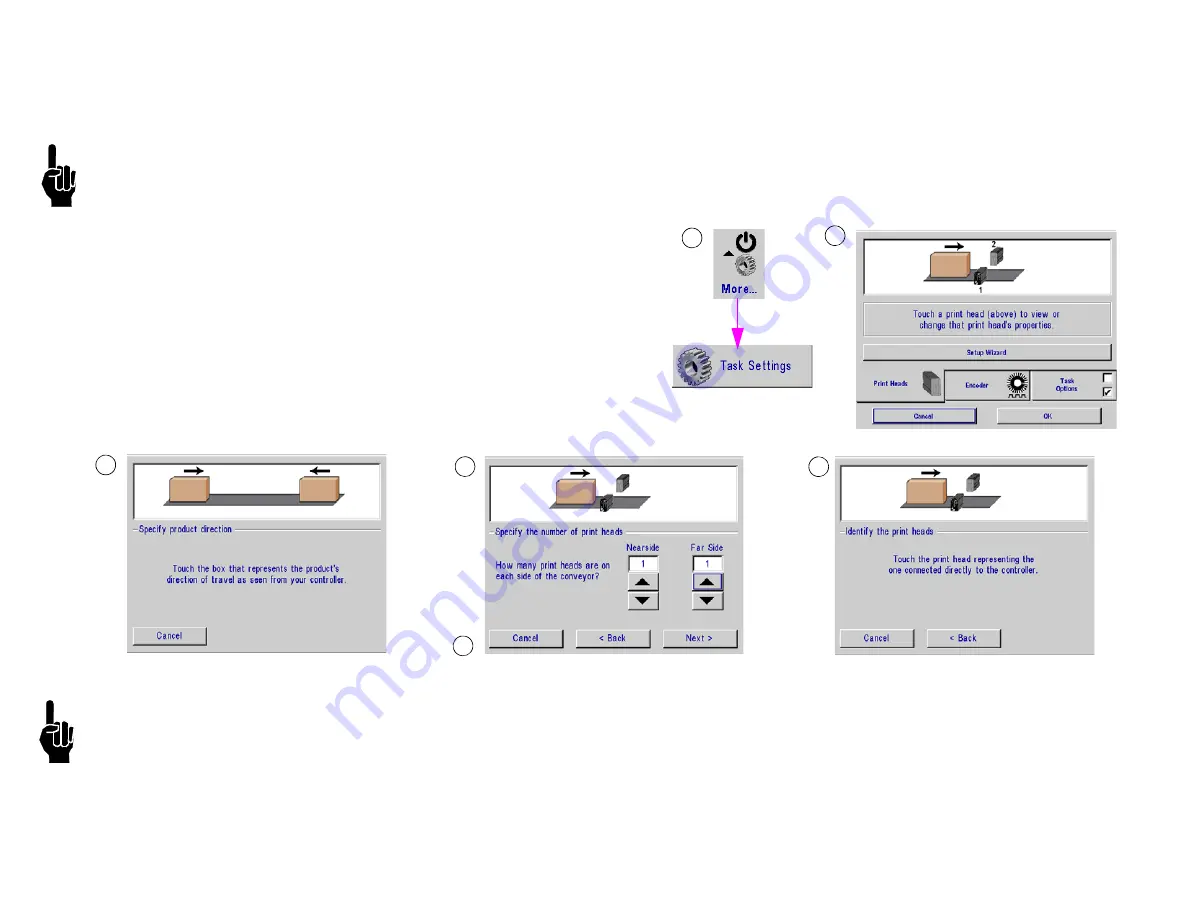
Step 11: Configure the Print Head via the Controller
NOTE:
It is recommended that there is no message printing when re-doing the print head setup. If the warning message ("Changing the print
head setup while printing may cause print problems. Continue?") is displayed, click
No
, then cancel
the setup. Return to the Message Screen
and cancel the print message before proceeding.
1. Select the
More
menu option, then select
Task Settings
,
2. Touch the
Setup Wizard
button.
3. Touch the box that represents the direction the product will move on the
conveyor (as seen while standing in front of the IJ4000-HMI or Task 1
Print Head).
4. Touch the up/down arrows to set the number of print heads on each side
of the conveyor.
5. Touch the
Next>
button.
6. Touch the first print head in the daisy chain. (If there is only one print
head, this step is bypassed.)
NOTES:
•
The first print head in the daisy chain should be the top print head in the system, as this one will be printing the top line of data and will be the
first one prompted to enter data.
•
The procedure may be aborted by pressing Cancel or the Escape key at any time without changing the current print head setup.
•
Repeat above steps for Task 2.
•
Each Task can power up to two (2) IJ384E or one (1) IJ768E print heads.
1
2
3
4
5
6


