167
K.5.4 Change the name of a Drive
Click the right mouse button on the drive icon.
This menu option opens a dialog where you can enter a new name for the selected drive (up
to 7 characters).
K.5.5 Remove a Host Drive
Click the right mouse button on the Host Drive icon. By selecting this menu item you can
delete a Host Drive.
CAUTION !
By deleting a Host Drive, all other Host Drives which are part of the same Array Drive
or Logical Drive, the Array Drive or Logical Drive itself and all its components are de-
leted ! ALL DATA WILL BE LOST.
To prevent the operating system from crashing and to hinder the unintentional deletion of
drives all partitions on the Host Drive (and it’s related Host Drives if it is split into several
Host Drives) must be deleted before the Host Drive can be removed.
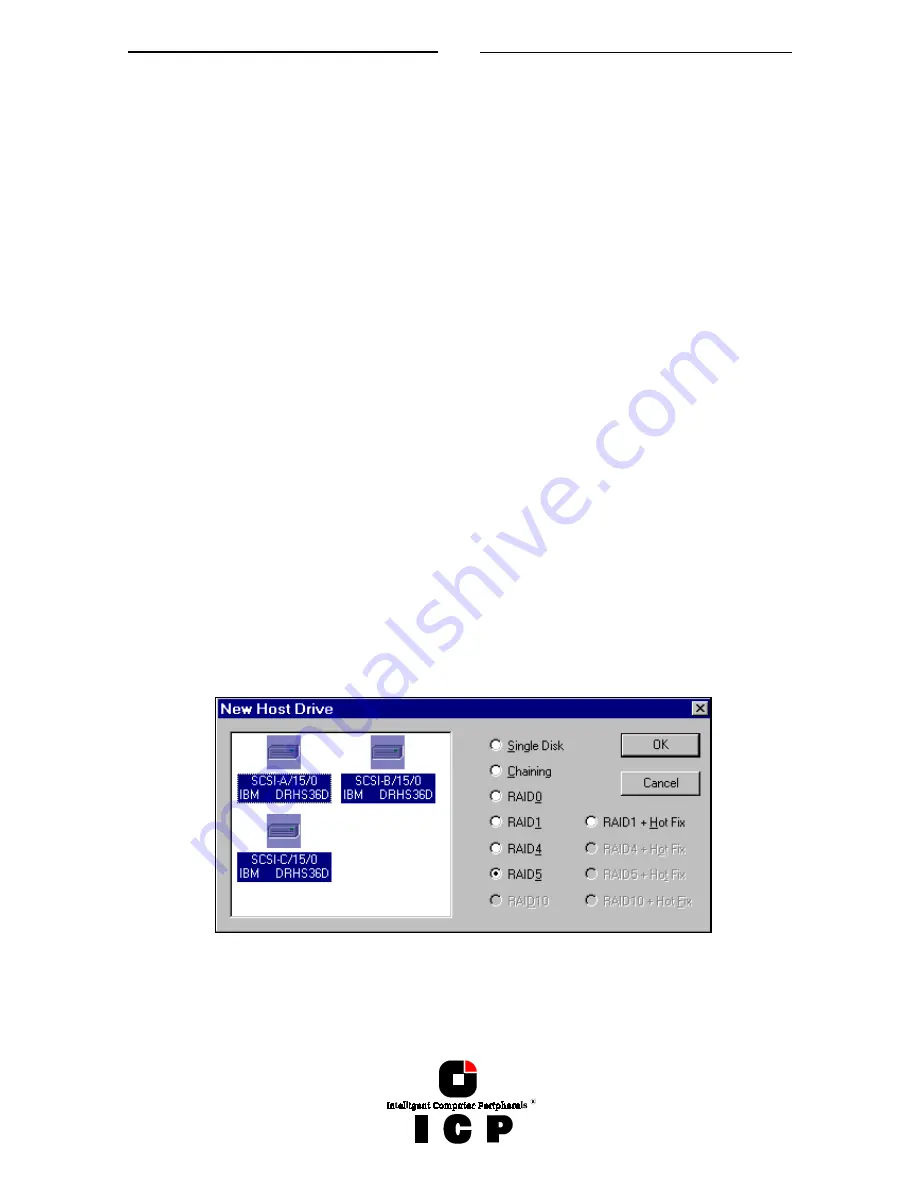
K.5.6 Create a new Host Drive
Double click on the new Host Drive icon. Only the Host Drives are "visible" for the operating
system.
The structure of the Host Drives is not known to the operating system i.e., the operating
system does not recognize that a given Host Drive consists of a number of hard disks
forming a disk array. To the operating system this Host Drive simply appears as one single
hard disk with the capacity of the disk array. This complete transparency represents the
easiest way to operate disk arrays under any operating system, neither operating system
nor the computer need to be involved in the administration of these complex disk array
configurations. To create a new Host Drive, you need one or more Physical Drives which are
not yet part of another Host Drive. After double clicking on the New Host Drive icon a new
window opens.
On the left side you see a box with the available Physical Drives, under the drives you can
see their physical coordinates (channel/ID/LUN), the manufacturer and the vendor-unique
name. On the right side you see a list of all possible Host Drive types which can be config-
ured. When there is no Physical Drive selected in the left box, all possibilities are disabled
Содержание GDT RS Series
Страница 2: ...2...
Страница 14: ...14 L 1 Technical Data of the ICP Controller 184 L 2 Boot Error Messages 184 L 3 Index 185...
Страница 15: ...15 Chapter A General General General General Information Information Information Information...
Страница 35: ...35 Chapter B Hardware Hardware Hardware Hardware Installation Installation Installation Installation...
Страница 40: ...40 Example for a SCSI Flat Ribbon Cable for 8 Bit SCSI Devices narrow...
Страница 41: ...41 Example for a SCSI Flat Ribbon Cable for 16 Bit SCSI Devices wide...
Страница 47: ...47 Several internal Wide Ultra2 and Ultra 160 SCSI Hard Disks...
Страница 52: ...52...
Страница 53: ...53 Chapter C Quick Setup Quick Setup Quick Setup Quick Setup...
Страница 68: ...68 Replacement either manually or through hot fix method...
Страница 70: ...70...
Страница 71: ...71 Chapter D Using MS DOS Using MS DOS Using MS DOS Using MS DOS...
Страница 81: ...81 Chapter E Using NetWare Using NetWare Using NetWare Using NetWare...
Страница 88: ...88...
Страница 96: ...96...
Страница 97: ...97 Chapter G Using LINUX Using LINUX Using LINUX Using LINUX...
Страница 102: ...102...
Страница 103: ...103 Chapter H Using SCO UNIX Using SCO UNIX Using SCO UNIX Using SCO UNIX...
Страница 110: ...110...
Страница 111: ...111 Chapter I Using UnixWare Using UnixWare Using UnixWare Using UnixWare...
Страница 115: ...115 Chapter J ICP RAID Console ICP RAID Console ICP RAID Console ICP RAID Console ICPCON ICPCON ICPCON ICPCON...
Страница 147: ...147 Chapter K ICP RAID Navigator ICP RAID Navigator ICP RAID Navigator ICP RAID Navigator...
Страница 182: ...182...
Страница 183: ...183 Chapter L Appendix Appendix Appendix Appendix...


