iCanView110/110W User’s Guide
Rev.1.4 (Jan. 2005)
55 of 56
6.4.
How To Upgrade Your iCanView110 System
There are two ways of upgrading system software of iCanView110. In most cases it is more
convenient upgrade the system software in automatic sequence. But for the case where your
iCanView110 cannot be connected to our upgrade server you are recommended to use manual
upgrade.
1. Automatic Upgrade
1) Connect to iCanView110 and log on to administrative mode with administrator’s ID and
Password. Then start “
Upgrade & Reset
” menu.
2) When your system software is older than the latest release, the admin page will indicates
the fact by blinking red arrow mark on the right of “
Upgrade & Reset
” menu. Click
“
Upgrade & Reset
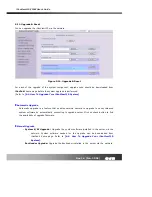
” menu when the indicator is blinking. You will find a screen as shown in
Figure 5-12. Click “
UPGRADE
” button to start the upgrade.
3) The server will notify the end of upgrade process on your screen.
4) Click
Confirm
button on the right of
System Reset
to reboot iCanView110.
5) After the reboot is finished, log on to iCanView110 with administrator ID and password.
Then click “
Status Report
” menu to display the current status of iCanView110.
6) Confirm the version number and date of all the system software on your iCanView110.
2. Manual Upgrade
1) Save the upgrade system software to your PC. Upgrade software can be downloaded from
iCanTek’s home page or provided in CD.
2) Log on to administrative mode and select “Update & Reset” menu.
3) Click "Browse..." to find the files you want to use for upgrade. This will open a "Choose file"
dialogue window. The file extension is “ief”.
4) When you've found the file, click "Open." This will select the file and close the "Choose file"
서식 있음: 글머리 기호 및
번호 매기기


