


422
IBM eX5 Implementation Guide
Installing on an HX5 with MAX5 attached
To correctly configure and install the ESX 4.1 or ESXi 4.1 Installable editions of the ESX
server, follow these instructions.
Common steps for both ESX 4.1 and ESXi 4.1 Installable editions
Perform the following steps for both operating system types:
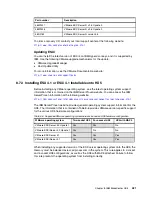
1. Ensure that you have the latest FPGA code installed on the HX5 by updating it, if required.
2. Physically attach the MAX5 using the instructions that are provided in the IBM
BladeCenter HX5 Installation and User’s Guide, which is available at this website:
http://ibm.com/support/entry/portal/docdisplay?lndocid=MIGR-5084612
3. Reflash the FPGA code to ensure that both the HX5 FPGA code and MAX5 FPGA code
are at the same level.
4. When the FPGA code has been flashed, log in to UEFI by pressing F1 at the UEFI splash
panel.
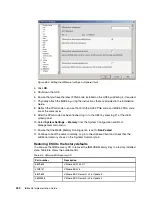
5. Select System Settings
Memory from the System Configuration and Boot
Management main menu.
6. Ensure that the MAX5 Memory Scaling option is set to Non-Pooled.
Exit the UEFI when finished and proceed to the installation of the respective version of ESX
server.
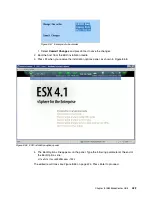
For ESX 4.1 installations
To correctly install ESX 4.1 onto an HX5 with a MAX5 attached, complete the following steps:
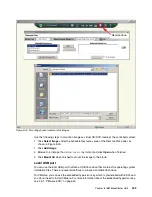
1. Set the boot order
To ensure that you can install and boot ESX 4.1 successfully, you must change the boot
order options in the UEFI. ESX server is not UEFI aware at present, and therefore, you
must use the Legacy Only option for the first bootable device entry after the CD/DVD
Rom. The next boot entry must be the hard disk to which you are installing.
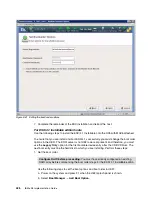
Use the following steps to set the boot options and boot order in UEFI:
a. Power on the system and press F1 when the UEFI splash panel displays.
b. Select Boot Manager
Add Boot Option.
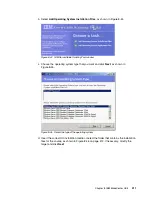
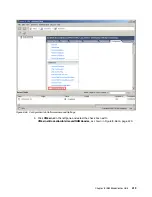
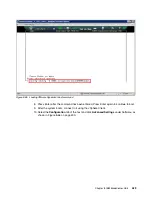
c. Select CD/DVD Rom, Legacy Only, and Hard Disk 0, as shown in Figure 8-57 on
page 423, for example, if you use internal drives that have been configured as an
integrated mirror with the onboard RAID controller. If you cannot find these boot
options, the options are already in the boot list.
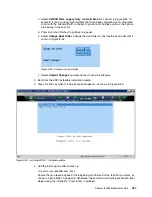
d. Press Esc when finished to go back one panel.
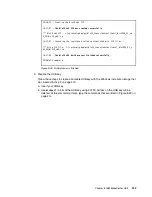
e. Select Change Boot Order. Change the boot order to the boot order that is shown in
Configure RAID before proceeding: You must have already configured an existing
RAID array before setting the boot order for ESX 4.1.
Содержание x3850 X5
Страница 2: ......
Страница 3: ...International Technical Support Organization IBM eX5 Implementation Guide May 2011 SG24 7909 00...
Страница 20: ...xviii IBM eX5 Implementation Guide...
Страница 32: ...12 IBM eX5 Implementation Guide...
Страница 34: ...14 IBM eX5 Implementation Guide...
Страница 74: ...54 IBM eX5 Implementation Guide...
Страница 136: ...116 IBM eX5 Implementation Guide...
Страница 238: ...218 IBM eX5 Implementation Guide...
Страница 392: ...372 IBM eX5 Implementation Guide...
Страница 466: ...446 IBM eX5 Implementation Guide...
Страница 484: ...464 IBM eX5 Implementation Guide Figure 9 14 IMM Remote Control Video Viewer showing power control options...
Страница 560: ...540 IBM eX5 Implementation Guide...
Страница 564: ...544 IBM eX5 Implementation Guide...
Страница 578: ...IBM eX5 Implementation Guide IBM eX5 Implementation Guide...
Страница 579: ......


