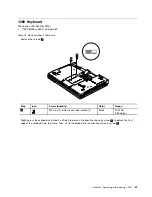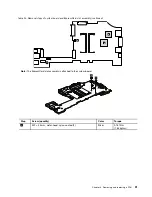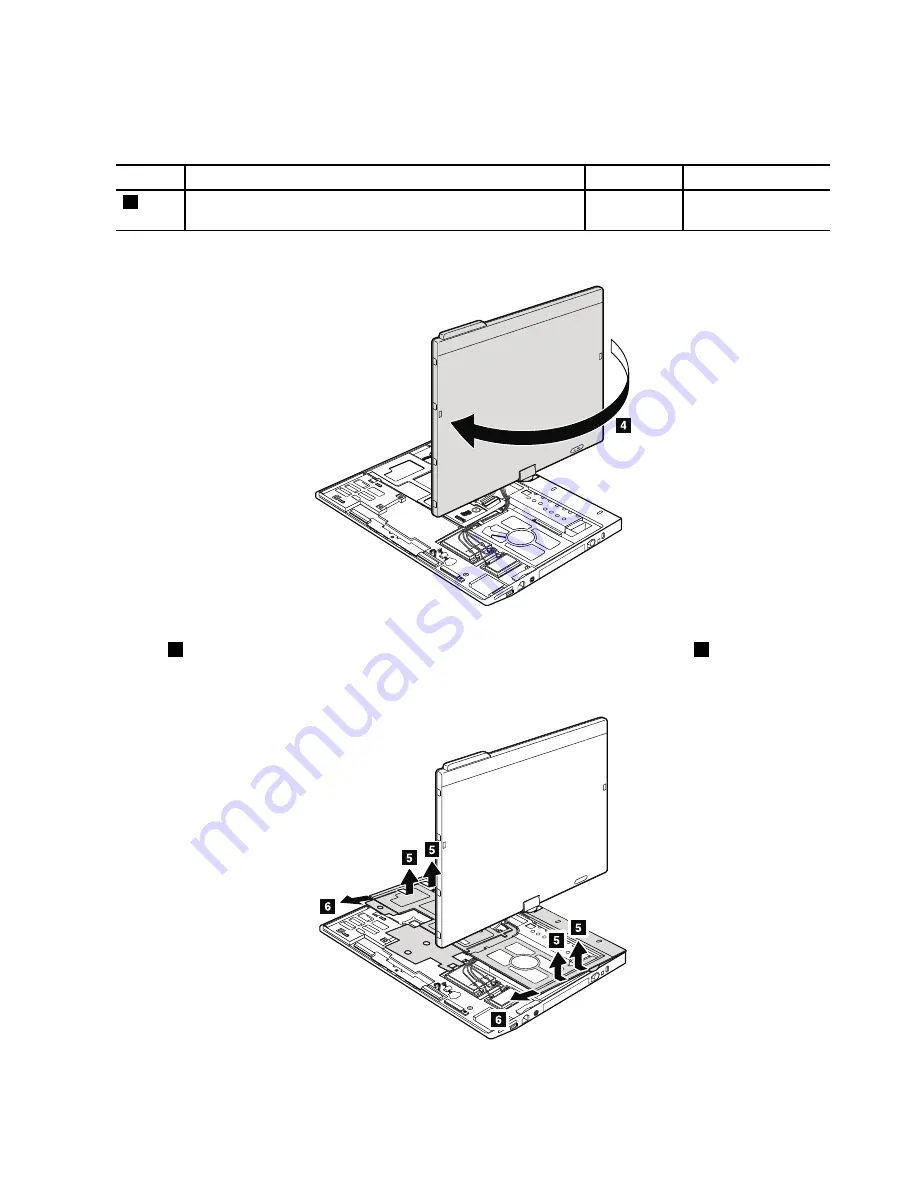
Table 20. Removal steps of keyboard bezel (continued)
Step
Screw (quantity)
Color
Torque
3
M2 × 2 mm, wafer-head, nylon-coated (4)
Black
0.181 Nm
(1.85 kgfcm)
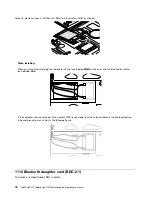
Rotate the LCD unit as shown in the following figure.
In step
5
, detach the claws. Then remove the keyboard bezel in the direction shown by arrow
6
.
Attention:
When you service the keyboard bezel, avoid any kind of rough handling.
Chapter 8
.
Removing and replacing a FRU
81
Содержание ThinkPad X220
Страница 1: ...ThinkPad X220 Tablet and X220i Tablet Hardware Maintenance Manual ...
Страница 6: ...iv ThinkPad X220 Tablet and X220i Tablet Hardware Maintenance Manual ...
Страница 18: ...12 ThinkPad X220 Tablet and X220i Tablet Hardware Maintenance Manual ...
Страница 19: ...Chapter 1 Safety information 13 ...
Страница 23: ...Chapter 1 Safety information 17 ...
Страница 24: ...18 ThinkPad X220 Tablet and X220i Tablet Hardware Maintenance Manual ...
Страница 25: ...Chapter 1 Safety information 19 ...
Страница 26: ...20 ThinkPad X220 Tablet and X220i Tablet Hardware Maintenance Manual ...
Страница 27: ...Chapter 1 Safety information 21 ...
Страница 28: ...22 ThinkPad X220 Tablet and X220i Tablet Hardware Maintenance Manual ...
Страница 42: ...36 ThinkPad X220 Tablet and X220i Tablet Hardware Maintenance Manual ...
Страница 64: ...58 ThinkPad X220 Tablet and X220i Tablet Hardware Maintenance Manual ...
Страница 77: ...Table 15 Removal steps of palm rest continued 2 3 4 4 5 5 5 Chapter 8 Removing and replacing a FRU 71 ...
Страница 79: ...Table 16 Removal steps of backup battery Chapter 8 Removing and replacing a FRU 73 ...
Страница 112: ...106 ThinkPad X220 Tablet and X220i Tablet Hardware Maintenance Manual ...
Страница 118: ...112 ThinkPad X220 Tablet and X220i Tablet Hardware Maintenance Manual ...
Страница 144: ...138 ThinkPad X220 Tablet and X220i Tablet Hardware Maintenance Manual ...
Страница 145: ......
Страница 146: ...Part Number 0A60175_01 Printed in China 1P P N 0A60175_01 0A60175_01 ...

