background image

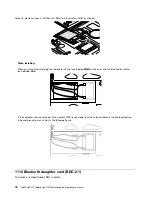
Table 17. Removal steps of PCI Express Mini Card for wireless LAN/WiMAX (continued)

Step

Screw (quantity)

Color

Torque

2

M2 × 3.5 mm, wafer-head, nylon-coated (1)

Silver

0.181 Nm
(1.85 kgfcm)

Chapter 8

.

Removing and replacing a FRU

75

Содержание ThinkPad X220

Страница 1: ...ThinkPad X220 Tablet and X220i Tablet Hardware Maintenance Manual ...

Страница 2: ...tion under Notices on page 135 Second Edition April 2011 Copyright Lenovo 2011 LIMITED AND RESTRICTED RIGHTS NOTICE If data or software is delivered pursuant a General Services Administration GSA contract use reproduction or disclosure is subject to restrictions set forth in Contract No GS 35F 05925 ...

Страница 3: ... using Product Recovery discs 37 Restoring the factory contents by using Recovery Disc Set 37 Passwords 39 Power on password 39 Hard disk password 39 Supervisor password 39 How to remove the power on password 39 How to remove the hard disk password 40 Power management 40 Screen blank mode 40 Sleep Standby mode 41 Hibernation mode 41 Symptom to FRU index 42 Numeric error codes 43 Error messages 47 ...

Страница 4: ...pter 10 Parts list 113 Overall 114 LCD FRUs 122 Keyboard 125 Miscellaneous parts 127 AC adapters 128 Power cords 128 Recovery discs 129 Windows XP Professional DVDs 129 Windows XP Professional Generic 32bit DVDs 129 Windows XP Tablet 32 bit DVDs 130 Windows Vista Business 32 bit DVDs 130 Windows Vista Home Basic 32 bit DVDs 131 Windows 7 Professional 32 bit DVDs 131 Windows 7 Ultimate 32 bit DVDs ...

Страница 5: ...agnostic tests to troubleshoot problems Important This manual is intended only for trained service technicians who are familiar with ThinkPad products Use this manual along with the advanced diagnostic tests to troubleshoot problems effectively Before servicing a ThinkPad product be sure to read all the information under Chapter 1 Safety information on page 1 and Chapter 2 Important service inform...

Страница 6: ...iv ThinkPad X220 Tablet and X220i Tablet Hardware Maintenance Manual ...

Страница 7: ...t unsafe Before you start the machine make sure that other service technicians and the customer s personnel are not in a hazardous position Place removed covers and other parts in a safe place away from all personnel while you are servicing the machine Keep your toolcase away from walk areas so that other people will not trip over it Do not wear loose clothing that can be trapped in the moving par...

Страница 8: ...hand in your pocket or behind your back Attention An electrical shock can occur only when there is a complete circuit By observing the above rule you may prevent a current from passing through your body When using testers set the controls correctly and use the approved probe leads and accessories for that tester Stand on suitable rubber mats obtained locally if necessary to insulate you from groun...

Страница 9: ...nd the power cord disconnected Checklist 1 Check exterior covers for damage loose broken or sharp edges 2 Power off the computer Disconnect the power cord 3 Check the power cord for a A third wire ground connector in good condition Use a meter to measure third wire ground continuity for 0 1 ohm or less between the external ground pin and the frame ground b The power cord should be the type specifi...

Страница 10: ...he ESD ground clip to any frame ground ground braid or green wire ground When working on a double insulated or battery operated system use an ESD common ground or reference point You can use coax or connector outside shells on these systems Use the round ground prong of the ac plug on ac operated computers Grounding requirements Electrical grounding of the computer is required for operator safety ...

Страница 11: ...ANGER The lithium battery can cause a fire an explosion or a severe burn Do not recharge it remove its polarized connector disassemble it heat it above 100 C 212 F incinerate it or expose its cell contents to water Dispose of the battery as required by local ordinances or regulations Use only the battery in the appropriate parts listing Use of an incorrect battery can result in ignition or explosi...

Страница 12: ...ing replaced do as follows before removing it power off the computer unplug all power cords from electrical outlets remove the battery pack and disconnect any interconnecting cables 6 ThinkPad X220 Tablet and X220i Tablet Hardware Maintenance Manual ...

Страница 13: ... água ou deixe a entrar em curto circuito Descarte a bateria conforme requerido pelas leis ou regulamentos locais Use somente a bateria nas partes listadas apropriadas O uso de uma bateria incorreta pode resultar em combustão ou explosão da bateria PERIGO O pacote da bateria contém uma pequena quantidade de níquel Não o desmonte jogue o no fogo ou na água ou deixe o entrar em curto circuito Descar...

Страница 14: ...capa plástica que protege a parte inferior da placa inversora PERIGO Embora as principais baterias possuam baixa voltagem uma bateria em curto circuito ou aterrada pode produzir corrente o bastante para queimar materiais de pessoal ou inflamáveis PERIGO A menos que uma hot swap seja permitida para a FRU que está sendo substituída faça o seguinte antes de removê la desligue o computador desconecte ...

Страница 15: ...uvegarde contient du lithium Elle présente des risques d incendie d explosion ou de brûlures graves Ne la rechargez pas ne retirez pas son connecteur polarisé et ne la démontez pas Ne l exposez pas à une temperature supérieure à 100 C ne la faites pas brûler et n en exposez pas le contenu à l eau Mettez la pile au rebut conformément à la réglementation en vigueur Une pile inappropriée risque de pr...

Страница 16: ... beachten Beim Ersetzen der Bereitschafts oder Systembatterie nur Batterien des Typs verwenden der in der Ersatzteilliste aufgeführt ist Der Einsatz falscher Batterien kann zu Entzündung oder Explosion führen VORSICHT Akkus enthalten geringe Mengen von Nickel Sie dürfen nicht zerlegt wiederaufgeladen kurzgeschlossen oder Feuer oder Wasser ausgesetzt werden Bei der Entsorgung die örtlichen Bestimmu...

Страница 17: ...d ein Arzt aufgesucht werden VORSICHT Aus Sicherheitsgründen die Kunststoffabdeckung die den unteren Teil der Spannungswandlerplatine umgibt nicht entfernen VORSICHT Obwohl Hauptbatterien eine niedrige Spannung haben können sie doch bei Kurzschluß oder Erdung genug Strom abgeben um brennbare Materialien zu entzünden oder Verletzungen bei Personen hervorzurufen VORSICHT Wenn ein Austausch der FRU b...

Страница 18: ...12 ThinkPad X220 Tablet and X220i Tablet Hardware Maintenance Manual ...

Страница 19: ...Chapter 1 Safety information 13 ...

Страница 20: ...ezas metálicas pueden causar cortocircuitos eléctricos Algunas baterías de reserva contienen una pequeña cantidad de níquel y cadmio No las desmonte ni recargue ni las eche al fuego o al agua ni las cortocircuite Deséchelas tal como dispone la normativa local Utilice sólo baterías que se encuentren en la lista de piezas La utilización de una batería no apropiada puede provocar la ignición o explos...

Страница 21: ...D se rompe y el fluido de su interior entra en contacto con sus ojos o sus manos lave inmediatamente las áreas afectadas con agua durante 15 minutos como mínimo Obtenga atención medica si se presenta algún síntoma del fluido despues de lavarse Para evitar descargas no quite la cubierta de plástico que rodea la parte baja de la tarjeta invertida Aunque las baterías principales tienen un voltaje baj...

Страница 22: ...he laser compliance statements in this section are provided in the following languages English Arabic Brazilian Portuguese French German Hebrew Japanese Korean Spanish Traditional Chinese 16 ThinkPad X220 Tablet and X220i Tablet Hardware Maintenance Manual ...

Страница 23: ...Chapter 1 Safety information 17 ...

Страница 24: ...18 ThinkPad X220 Tablet and X220i Tablet Hardware Maintenance Manual ...

Страница 25: ...Chapter 1 Safety information 19 ...

Страница 26: ...20 ThinkPad X220 Tablet and X220i Tablet Hardware Maintenance Manual ...

Страница 27: ...Chapter 1 Safety information 21 ...

Страница 28: ...22 ThinkPad X220 Tablet and X220i Tablet Hardware Maintenance Manual ...

Страница 29: ...or installing any software fixes drivers and UEFI BIOS downloads Customers in Canada should call the Customer Support Center at 800 565 3344 for assistance or download information Strategy for replacing FRUs Before replacing parts Make sure that all software fixes drivers and UEFI BIOS downloads are installed before replacing any FRUs listed in this manual After a system board is replaced ensure t...

Страница 30: ...use all customer data on the hard disk to be lost Be sure that the customer has a current backup of the data before doing this task Attention The drive startup sequence in the computer you are servicing may have been changed Be extremely careful during write operations such as copying saving or formatting If you select an incorrect drive data or programs can be overwritten Important notice for rep...

Страница 31: ... in the HMM General Announce Variant GAV This is a standard model fixed configuration GAVs are announced and offered to all customers The MTM portion of the machine label is a 4 digit MT and 3 digit model where model a fixed part number not CTO Example 1829 F1U Also PEW eSupport and the HMM will list these products under the same fixed model number FRU identification for CTO CMV and GAV products T...

Страница 32: ...l level eSupport can be used to view the complete list of FRUs for a machine type and model To view the complete list of FRUs type in the machine type and model Example 1829 CTO under Quick path Under View by Document Type select Parts information Under Filter by Category select Service parts Under Parts Information by Date select System service parts The list of service parts by description with ...

Страница 33: ...ariety of reasons that have nothing to do with a hardware defect such as cosmic radiation electrostatic discharge or software errors Consider replacing a FRU only when a problem recurs If you suspect that a FRU is defective clear the error log and run the test again If the error does not recur do not replace the FRU Be careful not to replace a nondefective FRU What to do first When you do return a...

Страница 34: ...to test only ThinkPad products The use of non ThinkPad products prototype cards or modified options can lead to false indications of errors and invalid system responses 1 Identify the failing symptoms in as much detail as possible 2 Verify the symptoms Try to re create the failure by running the diagnostic test or by repeating the operation Diagnostics using PC Doctor for DOS The ThinkPad Notebook...

Страница 35: ...uter 3 Turn on the computer If the computer cannot be powered on go to Power system checkout on page 33 and check the power sources If an error code appears go to Symptom to FRU index on page 42 4 When the ThinkPad logo comes up immediately press F12 to enter the Boot Menu 5 Insert the PC Doctor CD into the internal optical drive 6 Press cursor keys to select ATAPI CDx x 0 1 and then press Enter 7...

Страница 36: ...et to Active 10 Run the applicable function test 11 Follow the instructions on the screen If there is a problem PC Doctor shows messages describing it 12 To exit the test select Quit Exit Diag To cancel the test press Esc Note After running PC Doctor check the time and date on the system and reset them if they are incorrect Detecting system information with PC Doctor PC Doctor can detect the follo...

Страница 37: ... Health and Diagnostics Windows Vista and Windows XP Click Start All Programs ThinkVantage Lenovo ThinkVantage Toolbox Follow the instructions on the screen Lenovo ThinkVantageToolbox also has problem determination aids that determine software and usage problems For additional information about this program see the Help for the program PC Doctor for Windows In some models of ThinkPad Notebook PC D...

Страница 38: ...inkVangate button is displayed at the lower left of the screen press F1 to enter the ThinkPad Setup program 4 Using cursor keys select HDD diagnostic program Press enter 5 Using cursor keys select Main hard disk drive or Ultrabay hard disk drive 6 Press Enter to start the diagnostic program Diskette drive 1 Diagnostics Diskette Drives 2 Interactive Tests Diskette Optical drive 1 Diagnostics Other ...

Страница 39: ...If the power on indicator does not turn on check the power cord of the ac power adapter for correct continuity and installation If the computer does not charge during operation go to Checking operational charging on page 33 To check the ac power adapter do the following 1 Unplug the ac power adapter cable from the computer 2 Measure the output voltage at the plug of the ac power adapter cable See ...

Страница 40: ...t may not be able to charge Remove it from the computer and leave it at room temperature for a while After it cools down reinstall and recharge it To check the battery pack do the following 1 Power off the computer 2 Remove the battery pack and measure the voltage between battery terminals 1 and 7 See the following figure Terminal Voltage V dc 1 0 to 16 8 7 Ground 1 2 3 4 5 6 7 3 If the voltage is...

Страница 41: ... Ground Red Black If the voltage is correct replace the system board If the voltage is not correct replace the backup battery If the backup battery discharges quickly after replacement replace the system board Chapter 3 General checkout 35 ...

Страница 42: ...36 ThinkPad X220 Tablet and X220i Tablet Hardware Maintenance Manual ...

Страница 43: ...ead the license If you agree with the terms select I accept these terms and conditions and then click Next 4 Insert the Operating System Recovery Disc when prompted and click Yes to begin the operating system recovery process 5 Insert the Product Recovery Disc when prompted and click OK 6 If you have a Supplemental Recovery Disc insert it when prompted and click Yes If you do not have a Supplement...

Страница 44: ...g the following procedure a Press and hold down the F1 key and then turn on the computer When the logo screen is displayed or if you hear repeating beeps release the F1 key The ThinkPad Setup program opens b Use the arrow keys to select Startup Boot c Select the CD DVD drive as the 1st Boot Device 2 Insert the Operating System Recovery Disc into the DVD drive 3 Press F10 to save the ThinkPad Setup...

Страница 45: ...access to the hard disk even if the user has changed the user HDP Note There are two modes for the HDP User only and Master User The Master User mode requires two HDPs the system administrator enters both in the same operation The system administrator then provides the user HDP to the system user Attention If the user HDP has been forgotten check whether a master HDP has been set If it has it can ...

Страница 46: ...hnician neither Lenovo nor Lenovo authorized service technicians provide any services to reset the user HDPs or to recover data from the hard disk drive The hard disk drive can be replaced for a scheduled fee To remove a user HDP that has been forgotten when the SVP and the master HDP are known do the following 1 Turn on the computer 2 When the ThinkPad logo comes up immediately press F1 to enter ...

Страница 47: ...e within that time If the battery indicator blinks orange indicating that the battery power is low Note Even if you do not set the low battery alarm the charge indicator notifies you when the battery is low and then the computer enters the power saving mode automatically To cause the computer to return from sleep standby mode and resume operation do one of the following Press the Fn key Open the L...

Страница 48: ...r codes on page 43 Error messages on page 47 Beep symptoms on page 48 No beep symptoms on page 49 LCD related symptoms on page 49 Intermittent problems on page 49 Undetermined problems on page 50 The symptom to FRU index in this section lists symptoms and errors and their possible causes The most likely cause is listed first in boldface type Note Do the FRU replacement or other actions in the sequ...

Страница 49: ...EAIA data access error The access to EEPROM is failed System board 0188 Invalid RFID Serialization Information Area System board 0189 Invalid RFID configuration information area The EEPROM checksum is not correct System board 0190 Critical low battery error 1 Charge the battery pack 2 Battery pack 0191 System Security Invalid Remote Change requested 1 Run the ThinkPad Setup program and then save c...

Страница 50: ...at the hard disk drive 2 Load Setup Defaults in the ThinkPad Setup program 3 Hard disk drive 4 System board 021x Keyboard error Run interactive tests of the keyboard and the auxiliary input device 0220 Monitor type error Monitor type does not match the one specified in CMOS Load Setup Defaults in the ThinkPad Setup program 0230 Shadow RAM error Shadow RAM fails at offset nnnn System board 0231 Sys...

Страница 51: ...up Defaults in the ThinkPad Setup program 2 Replace the backup battery 3 System board 02F5 DMA test failed 1 DIMM 2 System board 02F6 Software NMI failed 1 DIMM 2 System board 02F7 Fail safe timer NMI failed 1 DIMM 2 System board 1801 Attached docking station is not supported Shut down the computer and remove it from the docking station 1802 Unauthorized network card is plugged in Turn off and rem...

Страница 52: ...station or port replicator if it is attached to the ThinkPad Notebook 2 Place the ThinkPad Notebook on a horizontal surface Do not apply any physical shock to the computer 3 Run Diagnostics ThinkPad Devices HDD Active Protection Test 2010 Warning Your internal hard disk drive HDD may not function correctly on this system Ensure that your HDD is supported on this system and that the latest HDD firm...

Страница 53: ...Device address conflict 1 Load Setup Defaults in the ThinkPad Setup program 2 Backup battery 3 System board Allocation error for device 1 Load Setup Defaults in the ThinkPad Setup program 2 Backup battery 3 System board Failing bits nnnn 1 DIMM 2 System board Invalid system configuration data 1 DIMM 2 System board I O device IRQ conflict 1 Load Setup Defaults in the ThinkPad Setup program 2 Backup...

Страница 54: ...embly 3 External CRT 4 System board One long and two short beeps and a blank or unreadable LCD 1 System board 2 LCD assembly 3 DIMM Two short beeps with error codes POST error See Numeric error codes on page 43 Two short beeps and a blank screen 1 System board 2 DIMM Two or more beeps or a continuous beep Operating system starts successfully If a mini PCI Ethernet card is installed confirm that Al...

Страница 55: ...This policy applies to all ThinkPad Notebooks purchased on 1 January 2008 or later Lenovo will not provide replacement if the LCD is within specification as we cannot guarantee that any replacement LCD will have zero pixel defects One pixel consists of R G B sub pixels Table 6 LCD related symptoms Symptom or error FRU or action in sequence No beep power on indicator on and a blank LCD during POST ...

Страница 56: ...eckout on page 33 1 Turn off the computer 2 Visually check each FRU for damage Replace any damaged FRU 3 Remove or disconnect all of the following devices a Non ThinkPad devices b Devices attached to the docking station or the port replicator c Printer mouse and other external devices d Battery pack e Hard disk drive f External diskette drive or optical drive g DIMM h Optical disk or diskette in t...

Страница 57: ...Chapter 5 Status indicators This chapter presents the system status indicators that show the status of the computer 5 6 Copyright Lenovo 2011 51 ...

Страница 58: ... drive errors 4 Fingerprint reader status Green The fingerprint reader is ready to swipe Blinking green The fingerprint is being authenticated or has been authenticated Blinking amber The fingerprint could not be authenticated 5 Battery status Green The battery is being charged when its charge level is between 80 and 100 Or the battery is being discharged when its charge level is between 0 and 80 ...

Страница 59: ...tion you must have the ThinkPad PM device driver installed on the computer 2 If you want to use the combination to put the computer into hibernation mode or do nothing mode in Windows XP shut the computer down or show the panel for turning off the computer change the settings in the Power Manager Fn F5 Enable or disable the built in wireless networking features and the Bluetooth features If you pr...

Страница 60: ...yed only if the ThinkPad computer has been attached to a ThinkPad X200 UltraBase The computer can be detached from the ThinkPad X200 UltraBase Run EasyEject Actions This button is used to select stop or remove external devices connected to the ThinkPad computer Configure EasyEject Actions Opens the ThinkPad EasyEject Utility main window Fn F9 Settings Configures the settings for the Fn F9 function...

Страница 61: ...the replacement CRU and 2 you may be charged for the replacement CRU if Lenovo does not receive the defective part within thirty 30 days of your receipt of the replacement CRU See your Lenovo Limited Warranty documentation for full details This chapter presents notices related to removing and replacing parts Read this chapter carefully before replacing any FRU Screw notices Loose screws can cause ...

Страница 62: ... number of the system unit to its original value Before replacing the system board save the original serial number by doing the following 1 Install the LENOVO ThinkPad Hardware Maintenance Diskette Version 1 76 or later and restart the computer 2 From the main menu select 1 Set System Identification 3 Select 2 Read S N data from EEPROM The serial number of each device in your computer is displayed...

Страница 63: ...e ECA Information Read Write function on the LENOVO ThinkPad Hardware Maintenance Diskette Version 1 76 or later 1 Insert the LENOVO ThinkPad Hardware Maintenance Diskette Version 1 76 or later and restart the computer 2 From the main menu select 6 Set ECA Information 3 To read ECA information select 2 Read ECA rework number from EEPROM and follow the instruction 4 To read box build date select 5 ...

Страница 64: ...58 ThinkPad X220 Tablet and X220i Tablet Hardware Maintenance Manual ...

Страница 65: ...isk of damaging parts 2 Before replacing any FRU review Chapter 7 FRU replacement notices on page 55 3 Begin by removing any FRUs that have to be removed before replacing the failing FRU Any such FRUs are listed at the top of each FRU replacement page Remove them in the order in which they are listed 4 Follow the correct sequence in the steps for removing a FRU as given in the drawings by the numb...

Страница 66: ...ove the SIM card you need to remove the battery pack first See 1020 Battery pack on page 61 After you finish the servicing make sure that you insert the card back into the slot firmly Notice on disconnecting a cable from a flip lock ZIF connector Some cables used in ThinkPad X220 Tablet and X220i Tablet models are connected to flip lock ZIF connectors When disconnecting a cable from a flip lock ZI...

Страница 67: ...ective The only exception to this is if the battery pack is physically damaged or a customer is reporting a possible safety issue If Lenovo ThinkVantage Toolbox is not installed in the computer the customer should download this program before a non physically damaged battery pack is replaced Note that the replacement of a physically damaged battery pack is not covered by the warranty DANGER Use on...

Страница 68: ...n 1030 Hard disk drive HDD and solid state drive SSD For access remove this FRU 1020 Battery pack on page 61 Attention Do not drop the hard disk drive or apply any physical shock to it The hard disk drive is sensitive to physical shock Improper handling can cause damage and permanent loss of data Before removing the drive have the user make a backup copy of all the information on it if possible Ne...

Страница 69: ...hard disk drive and solid state drive Note Loosen the screw 1 1 2 3 Step Screw quantity Color Torque 1 Hard disk drive screw M3 3 mm wafer head nylon coated 1 Black 0 181 Nm 1 85 kgfcm 4 Chapter 8 Removing and replacing a FRU 63 ...

Страница 70: ...cers 6 6 When installing Rubber rails on the hard disk drive or spacers on the solid state drive must be attached to the replacement drive Otherwise the drive cannot be installed properly 1040 DIMM For access remove this FRU 1020 Battery pack on page 61 64 ThinkPad X220 Tablet and X220i Tablet Hardware Maintenance Manual ...

Страница 71: ...MM slot cover as shown in the following figure Note Loosen the screws 1 2 1 1 Note If only one DIMM is used on the computer you are servicing the card must be installed in SLOT 0 a but not in SLOT 1 b a b Chapter 8 Removing and replacing a FRU 65 ...

Страница 72: ...ot it until it snaps into place Make sure that it is firmly installed in the slot and does not move easily 1050 Hinge caps For access remove this FRU 1020 Battery pack on page 61 Table 13 Removal steps of hinge caps 1 Open the LCD unit and then remove the hinge cap 2 3 66 ThinkPad X220 Tablet and X220i Tablet Hardware Maintenance Manual ...

Страница 73: ...ew quantity Color Torque 1 M2 6 mm wafer head nylon coated 2 Black 0 181 Nm 1 85 kgfcm Slightly press the keyboard and slide it a little bit forward in the direction shown by arrow 2 to detach the front edge of the keyboard from the frame Then lift up the keyboard in the direction shown by arrow 3 Chapter 8 Removing and replacing a FRU 67 ...

Страница 74: ...ble 14 Removal steps of keyboard continued Lift the keyboard a little in the direction shown by arrow 5 and then detach the connector 4 68 ThinkPad X220 Tablet and X220i Tablet Hardware Maintenance Manual ...

Страница 75: ...der the frame as shown in the following figure Then press the keys to latch the keyboard firmly in place 3 Gently press the keys with your palms and slightly slide the keyboard toward you until it snaps into position 4 Secure the keyboard by tightening the screws from the bottom side of the computer Chapter 8 Removing and replacing a FRU 69 ...

Страница 76: ...20 Battery pack on page 61 1060 Keyboard on page 67 Table 15 Removal steps of palm rest Step Icon Screw quantity Color Torque 1 M2 6 mm wafer head nylon coated 5 Black 0 181 Nm 1 85 kgfcm 70 ThinkPad X220 Tablet and X220i Tablet Hardware Maintenance Manual ...

Страница 77: ...Table 15 Removal steps of palm rest continued 2 3 4 4 5 5 5 Chapter 8 Removing and replacing a FRU 71 ...

Страница 78: ...the palm rest until it clicks into place 4 Close the LCD cover and turn the computer over And then fasten the five screws to secure the palm rest 1080 Backup battery DANGER Use only the battery specified in the parts list for your computer Any other battery could ignite or explode For access remove these FRUs in order 1020 Battery pack on page 61 1060 Keyboard on page 67 1070 Palm rest on page 70 ...

Страница 79: ...Table 16 Removal steps of backup battery Chapter 8 Removing and replacing a FRU 73 ...

Страница 80: ...page 61 1060 Keyboard on page 67 1070 Palm rest on page 70 Table 17 Removal steps of PCI Express Mini Card for wireless LAN WiMAX In step 1 unplug the jacks by using the removal tool antenna RF connector P N 08K7159 or pick the connectors with your fingers and gently unplug them in the direction shown by the arrow Note Some models might have three antenna cables 74 ThinkPad X220 Tablet and X220i T...

Страница 81: ...Removal steps of PCI Express Mini Card for wireless LAN WiMAX continued Step Screw quantity Color Torque 2 M2 3 5 mm wafer head nylon coated 1 Silver 0 181 Nm 1 85 kgfcm Chapter 8 Removing and replacing a FRU 75 ...

Страница 82: ... cables put the white cable in the cable protection tube In models with a wireless LAN card that has three antenna connecotrs plug the gray cable MAIN into the jack labeled TR1 the white cable third into the jack labeled RO or TR3 and the black cable AUX into the jack labeled TR2 on the card 1100 PCI Express Mini Card for wireless WAN For access remove these FRUs in order 1020 Battery pack on page...

Страница 83: ... by using the removal tool antenna RF connector P N 08K7159 or pick the connectors with your fingers and gently unplug them in the direction of the arrow Step Screw quantity Color Torque 2 M2 3 5 mm wafer head nylon coated 1 Silver 0 181 Nm 1 85 kgfcm Chapter 8 Removing and replacing a FRU 77 ...

Страница 84: ...n the card and the blue cable into the jack labeled AUX If the computer you are servicing is the wireless WAN ready model put the antenna cables in the cable protection tube and place them as shown in the following figure 1110 Bluetooth daughter card BDC 2 1 For access remove these FRUs in order 78 ThinkPad X220 Tablet and X220i Tablet Hardware Maintenance Manual ...

Страница 85: ...rew quantity Color Torque 1 M2 3 5 mm wafer head nylon coated 1 Silver 0 181 Nm 1 85 kgfcm When installing Make sure that the connector 2 is attached firmly 1120 Keyboard bezel For access remove these FRUs in order 1010 Digitizer pen on page 61 1020 Battery pack on page 61 1060 Keyboard on page 67 Chapter 8 Removing and replacing a FRU 79 ...

Страница 86: ... keyboard bezel 1 2 2 1 1 Step Screw quantity Color Torque 1 M2 6 mm wafer head nylon coated 3 Black 0 181 Nm 1 85 kgfcm 2 M2 3 5 mm wafer head nylon coated 2 Silver 0 181 Nm 1 85 kgfcm 80 ThinkPad X220 Tablet and X220i Tablet Hardware Maintenance Manual ...

Страница 87: ...nylon coated 4 Black 0 181 Nm 1 85 kgfcm Rotate the LCD unit as shown in the following figure In step 5 detach the claws Then remove the keyboard bezel in the direction shown by arrow 6 Attention When you service the keyboard bezel avoid any kind of rough handling Chapter 8 Removing and replacing a FRU 81 ...

Страница 88: ...61 1050 Hinge caps on page 66 1060 Keyboard on page 67 1070 Palm rest on page 70 1090 PCI Express Mini Card for wireless LAN WiMAX on page 74 1100 PCI Express Mini Card for wireless WAN on page 76 1120 Keyboard bezel on page 79 Table 21 Removal steps of LCD assembly Step Screw quantity Color Torque 1 M2 5 6 mm wafer head nylon coated 2 Black 0 392 Nm 4 kgfcm 82 ThinkPad X220 Tablet and X220i Table...

Страница 89: ...ep Screw quantity Color Torque 2 M2 5 6 mm wafer head nylon coated 2 Black 0 392 Nm 4 kgfcm Before step 3 strip off the tapes securing the antenna cables and release the cables from the cable guides of the frame Chapter 8 Removing and replacing a FRU 83 ...

Страница 90: ... the cables correctly and you tape up the cables in the proper positions as shown in the following figure When you route the cables make sure that they are not subjected to any tension Tension could cause the cables to be damaged by the cable guides or a wire to be broken 84 ThinkPad X220 Tablet and X220i Tablet Hardware Maintenance Manual ...

Страница 91: ... Express Mini Card for wireless WAN on page 76 1110 Bluetooth daughter card BDC 2 1 on page 78 1120 Keyboard bezel on page 79 1130 LCD assembly on page 82 Table 22 Removal steps of DC in connector base cover fan digitizer pen case and pen switch assembly Remove the top shielding assembly at first 3 2 Step Screw quantity Color Torque 1 M1 6 x 3 4 2A mm shoulder socket head nylon coated 1 Black 0 18...

Страница 92: ...tch assembly continued 4 4 4 4 Step Screw quantity Color Torque 4 M2 3 5 mm wafer head nylon coated 4 Silver 0 181 Nm 1 85 kgfcm 5 6 7 When installing Make sure that the wireless switch is adjusted as shown by callout a 86 ThinkPad X220 Tablet and X220i Tablet Hardware Maintenance Manual ...

Страница 93: ...pen switch assembly continued Turn the system board over and then disconnect the DC in connector the fan connector and the pen switch connector from the system board 8 9 10 11 Disconnect the fan assembly from the system board 12 13 14 15 16 Chapter 8 Removing and replacing a FRU 87 ...

Страница 94: ...firmly a b a Applying labels to the base cover The new base cover FRU is shipped with a kit containing labels of several kinds Note If the Windows Authentication label COA 2 is attached to a part that is replaced return the old part with the label attached to the customer or provide a letter to the customer stating what the label was originally on the system and what the label part number serial n...

Страница 95: ... Israel label 76 2 mm x 31 8 mm 25 Ethernet label or Onboard LAN MAV address label For some models you need to apply two FCC labels 17 and 21 Check the old base cover if it has two FCC labels apply both to the new base cover For the location of each label refer the following figure 1 2 3 4 5 6 7 8 10 14 15 16 24 23 22 17 18 19 20 21 9 11 12 13 25 1150 System board and ExpressCard slot assemblies I...

Страница 96: ...ion System still functions The procedure is as follows 1 Place the computer on a horizontal surface 2 Run Diagnostics ThinkPad Devices HDD Active Protection Test Attention Do not apply physical shock to the computer while the test is running For access remove these FRUs in order 1010 Digitizer pen on page 61 1020 Battery pack on page 61 1050 Hinge caps on page 66 1060 Keyboard on page 67 1070 Palm...

Страница 97: ...pressCard slot assembly continued b c a Note The ExpressCard slot assembly is attached to the system board Step Screw quantity Color Torque 1 M2 3 5 mm wafer head nylon coated 2 Silver 0 181 Nm 1 85 kgfcm Chapter 8 Removing and replacing a FRU 91 ...

Страница 98: ...ry pack on page 61 1050 Hinge caps on page 66 1060 Keyboard on page 67 1070 Palm rest on page 70 1090 PCI Express Mini Card for wireless LAN WiMAX on page 74 1100 PCI Express Mini Card for wireless WAN on page 76 1110 Bluetooth daughter card BDC 2 1 on page 78 1120 Keyboard bezel on page 79 1130 LCD assembly on page 82 1140 DC in connector base cover fan digitizer pen case and pen switch assembly ...

Страница 99: ...Table 24 Removal steps of speaker assembly Remove the speaker assembly from the base cover assembly 1 2 3 Chapter 8 Removing and replacing a FRU 93 ...

Страница 100: ...1020 Battery pack on page 61 1060 Keyboard on page 67 1070 Palm rest on page 70 Attention Do not drop the hard disk drive or apply any physical shock to it The hard disk drive is sensitive to physical shock Improper handling can cause damage and permanent loss of data Before removing the drive have the user make a backup copy of all the information on it if possible Never remove the drive while th...

Страница 101: ... state drive 1 Step Screw quantity Color Torque 1 M2 3 mm flat head nylon coated 1 Black 0 181 Nm 1 85 kgfcm 2 2010 LCD front bezel For access remove this FRU 1020 Battery pack on page 61 Chapter 8 Removing and replacing a FRU 95 ...

Страница 102: ...Step Screw cap Screw quantity Color Torque 1 M2 5 8 mm wafer head nylon coated 3 Black 0 392 Nm 4 kgfcm 2 3 2 4 When installing Attach the fingerprint reader connector firmly 96 ThinkPad X220 Tablet and X220i Tablet Hardware Maintenance Manual ...

Страница 103: ...in order 1020 Battery pack on page 61 2010 LCD front bezel on page 95 Table 26 Removal steps of Micro Processor card Step Screw quantity Color Torque 1 M2 3 5 mm wafer head nylon coated 2 Silver 0 181 Nm 1 85 kgfcm Chapter 8 Removing and replacing a FRU 97 ...

Страница 104: ...attery pack on page 61 1050 Hinge caps on page 66 1060 Keyboard on page 67 1070 Palm rest on page 70 1090 PCI Express Mini Card for wireless LAN WiMAX on page 74 1100 PCI Express Mini Card for wireless WAN on page 76 1120 Keyboard bezel on page 79 1130 LCD assembly on page 82 2010 LCD front bezel on page 95 2020 Micro Processor card on page 97 98 ThinkPad X220 Tablet and X220i Tablet Hardware Main...

Страница 105: ...tension which could cause them to be damaged by the cable guides or a wire to be broken 3 3 2 2 2040 LCD panel and LCD cable For access remove these FRUs in order 1010 Digitizer pen on page 61 1020 Battery pack on page 61 1050 Hinge caps on page 66 1060 Keyboard on page 67 1070 Palm rest on page 70 1090 PCI Express Mini Card for wireless LAN WiMAX on page 74 1100 PCI Express Mini Card for wireless...

Страница 106: ...28 Removal steps of LCD panel and LCD cable 2 2 2 1 1 1 1 1 1 Step Screw cap Screw quantity Color Torque 1 M2 5 8 mm wafer head nylon coated 6 Black 0 392 Nm 4 kgfcm 2 M2 3 5 mm wafer head nylon coated 3 Silver 0 181 Nm 1 85 kgfcm 100 ThinkPad X220 Tablet and X220i Tablet Hardware Maintenance Manual ...

Страница 107: ...nel 3 3 3 3 3 3 3 3 3 3 When installing Make sure that all the claws are attached firmly When attaching the LCD panel to the cover gently press the left and right edges covered with metal Do not press the surface of the panel or apply any excessive force to the panel Chapter 8 Removing and replacing a FRU 101 ...

Страница 108: ...er pen on page 61 1020 Battery pack on page 61 1050 Hinge caps on page 66 1060 Keyboard on page 67 1070 Palm rest on page 70 1090 PCI Express Mini Card for wireless LAN WiMAX on page 74 1100 PCI Express Mini Card for wireless WAN on page 76 1120 Keyboard bezel on page 79 1130 LCD assembly on page 82 2010 LCD front bezel on page 95 2020 Micro Processor card on page 97 2030 Hinge on page 98 2040 LCD...

Страница 109: ...pack on page 61 1050 Hinge caps on page 66 1060 Keyboard on page 67 1070 Palm rest on page 70 1090 PCI Express Mini Card for wireless LAN WiMAX on page 74 1100 PCI Express Mini Card for wireless WAN on page 76 1120 Keyboard bezel on page 79 1130 LCD assembly on page 82 2010 LCD front bezel on page 95 2020 Micro Processor card on page 97 2030 Hinge on page 98 2040 LCD panel and LCD cable on page 99...

Страница 110: ...eps of LCD rear cover and wireless antenna cables 1 Step Screw quantity Color Torque 1 M2 3 5 mm wafer head nylon coated 1 Silver 0 181 Nm 1 85 kgfcm 2 104 ThinkPad X220 Tablet and X220i Tablet Hardware Maintenance Manual ...

Страница 111: ...sembly as shown in the following figure a Wireless WAN antenna AUX blue b Wireless LAN antenna AUX black c Wireless LAN antenna MAIN gray d Wireless WAN antenna MAIN red a b c d Attention As you route the antenna cables make sure that they are not subjected to any tension Tension could cause the cables to be damaged by the cable guides or a wire to be broken Chapter 8 Removing and replacing a FRU ...

Страница 112: ...106 ThinkPad X220 Tablet and X220i Tablet Hardware Maintenance Manual ...

Страница 113: ...Chapter 9 Locations This chapter presents the locations of ThinkPad X220 Tablet and X220i Tablet features and hardware components Copyright Lenovo 2011 107 ...

Страница 114: ...olid state drive SSD 6 Combo audio jack 7 Ethernet connector 8 Always On USB connector 9 Media card reader slot 10 TrackPoint pointing stick 11 TrackPoint buttons 12 Touch pad 13 UltraNav 14 Volume control buttons 15 ThinkVantage button 16 Power switch 108 ThinkPad X220 Tablet and X220i Tablet Hardware Maintenance Manual ...

Страница 115: ...Wireless radio switch 4 USB connector 5 DisplayPort connector 6 External monitor connector 7 USB connector 8 ac power connector 2 3 4 5 6 7 8 1 Rear view tablet mode 1 Tablet buttons 2 Fingerprint reader 3 Status indicators Note For the description of each indicator see Chapter 5 Status indicators on page 51 1 3 2 Chapter 9 Locations 109 ...

Страница 116: ...Bottom view 1 Battery pack latch 2 Battery pack 3 Docking connector 4 DIMM slots 5 Built in speakers 1 2 3 1 4 5 110 ThinkPad X220 Tablet and X220i Tablet Hardware Maintenance Manual ...

Страница 117: ... monitor connector 6 Headphone jack 7 Microphone jack 8 USB connectors 9 Security keyhole 10 Security lock key 11 Serial Ultrabay Slim device 1 2 3 4 5 6 7 9 10 11 8 Bottom view ThinkPad X220 UltraBase 1 UltraBase eject request button 2 Docking indicator 3 UltraBase eject lever 4 Holes for speakers 1 2 3 4 Chapter 9 Locations 111 ...

Страница 118: ...112 ThinkPad X220 Tablet and X220i Tablet Hardware Maintenance Manual ...

Страница 119: ...sibility you may request that Lenovo installs an Optional service CRU according to the warranty service for your product Where you are installing the CRU Lenovo will ship the CRU to you CRU information and replacement instructions are shipped with your product and are available from Lenovo at any time upon request You may find a list of CRUs in the publications that ship with your product or at ht...

Страница 120: ...Overall 1 2 3 6 7 11 10 12 13 15 16 18 19 20 21 22 23 24 25 26 28 27 14 17 4 5 8 9 114 ThinkPad X220 Tablet and X220i Tablet Hardware Maintenance Manual ...

Страница 121: ...x 35x 36x 37x 39x 3Ax 55Y3717 5 System board assembly with Intel Core i5 2520M processor AMT TPM AES 4294 23x 24x 4296 22x 2Ax 2Bx 2Kx 2Lx 2Mx 2Wx 2Xx 32x 33x 36x 4297 23x 4298 27x 28x 2Ax 2Dx 2Gx 2Hx 2Jx 2Kx 2Lx 2Mx 2Nx 2Px 2Qx 2Rx 2Vx 2Xx 2Zx 34x 37x 38x 39x 3Ax 3Bx 3Cx 3Dx 3Ex 3Jx 3Mx 3Px 3Qx 3Rx 3Sx 3Vx 3Wx 3Zx 42x 4299 27x 28x 2Ax 2Fx 2Hx 2Jx 2Kx 2Px 2Qx 2Tx 2Ux 2Vx 2Wx 2Xx 2Yx 35x 36x 04W212...

Страница 122: ...ES 4294 2Bx 2Cx 4296 2Qx 2Rx 2Sx 2Tx 4297 22x 4298 36x 04W2135 N 6 Integrated Mobile Broadband Gobi 3000 3G with GPS 4294 CTO 4296 CTO 4297 CTO 4298 CTO 4299 CTO 60Y3257 6 Integrated Mobile Broadband Gobi 3000 Malaysia 4294 CTO 4296 CTO 4297 CTO 4298 CTO 4299 CTO 60Y3283 6 Integrated Mobile Broadband Ericsson F5521gw 4296 22x 4298 29x 2Bx 2Cx 2Gx 2Hx 2Jx 2Kx 2Lx 2Mx 2Wx 32x 47x 48x 4299 2Bx 2Px 2Q...

Страница 123: ... 2Qx 2Rx 2Sx 2Tx 2Ux 2Vx 2Wx 2Xx 2Yx 2Zx 32x 33x 34x 35x 37x 38x 39x 3Ax 3Bx 3Cx 3Dx 3Ex 3Fx 3Gx 3Hx 3Jx 3Kx 3Lx 3Mx 3Px 3Qx 3Rx 3Sx 3Tx 3Ux 3Vx 3Wx 3Xx 3Yx 3Zx 42x 43x 44x 47x 48x 4299 27x 28x 29x 2Ax 2Bx 2Cx 2Ex 2Fx 2Gx 2Hx 2Jx 2Kx 2Lx 2Nx 2Px 2Qx 2Rx 2Sx 2Tx 2Ux 2Vx 2Wx 2Xx 2Yx 2Zx 32x 33x 34x 35x 36x 3Ax 60Y3253 7 Intel Centrino Ultimate N 6300 4298 26x 4299 26x 2Dx 37x 38x 39x 60Y3233 7 Intel...

Страница 124: ...3x 34x 35x 36x 37x 38x 4298 CTO26x 27x 28x 29x 2Ax 2Bx 2Cx 2Dx 2Ex 2Fx 2Gx 2Hx 2Jx 2Kx 2Lx 2Mx 2Nx 2Px 2Qx 2Rx 2Sx 2Tx 2Ux 2Vx 2Wx 2Xx 2Yx 2Zx 32x 33x 34x 35x 3Mx 3Nx 3Px 3Qx 3Rx 3Sx 3Tx 3Ux 3Vx 3Wx 3Xx 3Yx 3Zx 42x 43x 44x 45x 46x 47x 48x 4299 26x 27x 28x 29x 2Ax 2Bx 2Cx 2Dx 2Ex 2Fx 2Gx 2Hx 2Jx 2Lx 2Mx 2Nx 2Px 2Qx 2Rx 2Sx 2Tx 2Ux 2Vx 2Wx 2Xx 2Yx 2Zx 32x 33x 34x 35x 36x 37x 38x 39x 3Ax 42T4881 8 Ba...

Страница 125: ... 2Sx 2Tx 2Ux 2Vx 2Wx 2Xx 2Yx 33x 34x 35x 36x 37x 38x 39x 42T1159 10 SATA hard disk drive 320 GB 7 200 rpm 4294 22x 24x 26x 27x 28x 2Dx 2Ex 4296 22x 24x 25x 26x 27x 28x 2Ax 2Bx 2Cx 2Ex 2Gx 2Hx 2Kx 2Mx 2Nx 2Qx 2Rx 2Sx 2Tx 2Ux 2Wx 2Xx 2Yx 2Zx 32x 33x 36x 37x 39x 4297 23x 4298 26x 27x 2Bx 2Dx 2Ex 2Hx 2Jx 2Nx 2Px 2Qx 2Sx 2Tx 2Yx 2Zx 33x 35x 37x 38x 39x 3Bx 3Ex 3Fx 3Jx 3Px 3Qx 3Rx 3Sx 3Tx 3Ux 3Vx 3Wx 3Z...

Страница 126: ... 26x 27x 28x 29x 2Ax 2Bx 2Cx 2Dx 2Ex 4296 22x 23x 24x 26x 28x 29x 2Ax 2Bx 2Cx 2Dx 2Ex 2Fx 2Gx 2Kx 2Lx 2Nx 2Qx 2Rx 2Sx 2Tx 2Ux 2Wx 2Xx 2Yx 2Zx 32x 33x 34x 35x 39x 4297 22x 23x 4298 26x 27x 28x 29x 2Ax 2Bx 2Cx 2Dx 2Ex 2Fx 2Gx 2Hx 2Jx 2Mx 2Nx 2Px 2Qx 2Rx 2Sx 2Tx 2Ux 2Vx 2Wx 2Xx 2Yx 2Zx 32x 34x 35x 36x 37x 38x 39x 3Ax 3Bx 3Cx 3Gx 3Hx 3Jx 3Kx 3Lx 3Mx 3Nx 3Px 3Qx 3Rx 3Sx 3Tx 3Ux 3Vx 3Wx 3Xx 3Yx 45x 46x ...

Страница 127: ...8 Bluetooth daughter card BDC 2 1 4294 22x 23x 24x 25x 26x 27x 28x 29x 2Ax 2Bx 2Dx 2Ex 4296 22x 23x 24x 25x 26x 27x 28x 29x 2Ax 2Bx 2Cx 2Dx 2Ex 2Fx 2Gx 2Hx 2Jx 2Kx 2Lx 2Mx 2Nx 2Px 2Qx 2Rx 2Sx 2Tx 2Ux 2Wx 2Xx 2Yx 2Zx 32x 33x 34x 35x 36x 37x 38x 39x 4297 22x 23x 4298 26x 27x 28x 29x 2Ax 2Bx 2Cx 2Dx 2Ex 2Fx 2Gx 2Hx 2Jx 2Kx 2Lx 2Mx 2Nx 2Px 2Qx 2Sx 2Tx 2Ux 2Vx 2Wx 2Xx 2Yx 2Zx 32x 33x 34x 35x 36x 37x 38...

Страница 128: ...2Lx 2Mx 2Px 2Qx 2Sx 2Tx 2Ux 2Vx 2Wx 2Xx 2Yx 2Zx 32x 33x 34x 35x 36x 37x 38x 39x 3Ax 3Bx 3Cx 3Dx 3Ex 3Fx 3Gx 3Hx 3Jx 3Kx 3Lx 3Mx 3Nx 3Rx 3Sx 3Tx 3Ux 3Vx 3Wx 3Xx 3Yx 3Zx 42x 43x 44x 45x 46x 47x 48x 4299 26x 27x 28x 29x 2Ax 2Bx 2Cx 2Dx 2Ex 2Fx 2Gx 2Hx 2Jx 2Kx 2Lx 2Mx 2Nx 2Px 2Qx 2Rx 2Sx 2Tx 2Ux 2Xx 2Yx 2Zx 32x 33x 34x 35x 36x 37x 38x 39x 3Ax 04W1548 N 28 Fingerprint reader dummy 4294 25x 2Cx 4296 23x...

Страница 129: ... 12 5 in HD LED backlight LCD Table 32 Parts list 12 5 in HD LED backlight LCD for multi touch panel LCD or outdoor LCD on page 124 1 2 3 4 5 6 7 8 9 10 Chapter 10 Parts list 123 ...

Страница 130: ...3Tx 3Wx 3Xx 3Zx 44x 45x 4299 27x 2Ax 2Bx 2Fx 2Gx 2Jx 2Lx 2Mx 2Nx 2Sx 2Tx 2Wx 2Xx 32x 33x 36x 37x 38x 04W1546 N 2 Integrated camera 4294 22x 23x 24x 25x 26x 27x 28x 29x 2Ax 2Bx 2Cx 2Dx 2Ex 4296 22x 23x 24x 25x 26x 27x 28x 29x 2Ax 2Bx 2Cx 2Dx 2Ex 2Fx 2Gx 2Hx 2Jx 2Kx 2Lx 2Mx 2Nx 2Px 2Qx 2Rx 2Sx 2Tx 2Ux 2Wx 2Xx 2Yx 2Zx 34x 35x 36x 37x 38x 39x 4297 22x 23x 4298 28x 29x 2Ax 2Bx 2Cx 2Dx 2Ex 2Fx 2Gx 2Hx 2...

Страница 131: ...4 22x 23x 24x 25x 26x 27x 28x 29x 2Ax 2Bx 2Cx 2Dx 2Ex 4296 22x 23x 24x 25x 26x 27x 28x 29x 2Ax 2Bx 2Cx 2Dx 2Ex 2Fx 2Gx 2Hx 2Jx 2Kx 2Lx 2Mx 2Nx 2Px 2Qx 2Rx 2Sx 2Tx 2Ux 2Wx 2Xx 2Yx 2Zx 32x 33x 34x 35x 36x 37x 38x 39x 4297 22x 23x 4298 26x 27x 28x 29x 2Ax 2Bx 2Cx 2Dx 2Ex 2Fx 2Gx 2Hx 2Jx 2Kx 2Lx 2Mx 2Nx 2Px 2Qx 2Rx 2Sx 2Tx 2Ux 2Vx 2Wx 2Xx 2Yx 2Zx 32x 33x 34x 35x 36x 37x 38x 39x 3Ax 3Bx 3Cx 3Dx 3Ex 3Fx...

Страница 132: ... 45N2231 45N2091 45N2161 Polish 45N2232 45N2092 45N2162 Portuguese 45N2233 45N2093 45N2163 Russian 45N2234 45N2094 45N2164 Slovak 45N2235 45N2095 45N2165 Slovenian 45N2236 45N2096 45N2166 Swedish Finnish 45N2237 45N2097 45N2167 Spanish 45N2221 45N2081 45N2151 Swiss 45N2238 45N2098 45N2168 Thai 45N2245 45N2105 45N2175 Traditional Chinese 45N2244 45N2104 45N2174 Turkish 45N2239 45N2099 45N2169 Turki...

Страница 133: ...laneous parts kit Screw M2 x 2 1 Screw M2 x 3 5 3 Step screw M1 6 x 3 1 Pen push Pen switch Base cover bracket DC in cable bracket Front rubber foot 2 Rear rubber foot left Rear rubber foot right Battery latch right Battery latch left Battery knob right Battery knob left Battery latch spring 04W1547 N System miscellaneous parts kit EMI touch pad conductive clothes LDB 1 Touch pad mylar EMI gasket ...

Страница 134: ...is usually available only in that country or region Table 36 Parts list 2 pin power cords Country or region FRU no CRU ID Argentina models CTO xxY 42T5020 42T5105 Brazil models CTO xxP 42T5180 42T5183 Canada U S models CTO xxF xxL xxS xxU 42T5008 42T5093 Japan models CTO xxE xxJ 42T5014 42T5099 Table 37 Parts list 3 pin power cords Country or region FRU no CRU ID Australia New Zealand models CTO x...

Страница 135: ...2T5129 Taiwan models CTO xxV 42T5071 42T5156 U K China Hong Kong S A R models CTO xxB xxG xxH 42T5035 42T5120 Recovery discs Windows XP Professional DVDs 4294 CTO 4296 CTO 4297 CTO 4298 CTO 4299 CTO Table 38 Parts list Windows XP Professional 32 bit recovery DVDs Language P N CRU ID Japanese 03W8394 English 03W8395 Windows XP Professional Generic 32bit DVDs 4294 CTO 4296 CTO 4297 CTO 4298 CTO 4299...

Страница 136: ... 03W7492 Portuguese 03W7493 Russian 03W7494 Simplified Chinese 03W7477 Spanish 03W7495 Swedish 03W7496 Traditional Chinese 03W7478 Traditional Chinese Hong Kong S A R 03W7485 Turkish 03W7497 Windows XP Tablet 32 bit DVDs 4294 CTO 4296 CTO 4297 CTO 4298 CTO 4299 CTO Table 40 Parts list Windows XP Tablet 32 bit recovery DVDs Language P N CRU ID English 04X0000 Japanese 03W8396 Windows Vista Business...

Страница 137: ...sic 32 bit recovery DVDs Language P N CRU ID English 03W8399 Windows 7 Professional 32 bit DVDs Windows 7 Professional 32 bit is preinstalled as the operating system in the following models 4297 23x 4298 34x 37x 38x 4299 2Kx Table 43 Parts list Windows 7 Professional 32 bit recovery DVDs Language P N CRU ID English 04X0002 Japanese 04X0001 Simplified Chinese 03W8400 Windows 7 Ultimate 32 bit DVDs ...

Страница 138: ...3Vx 3Wx 3Xx 3Yx 3Zx 42x 43x 44x 45x 46x 47x 4299 26x 27x 28x 29x 2Ax 2Bx 2Cx 2Dx 2Ex 2Fx 2Gx 2Hx 2Jx 2Lx 2Mx 2Nx 2Px 2Qx 2Rx 2Sx 2Tx 2Ux 2Vx 2Wx 2Xx 2Yx 2Zx 32x 33x 34x 35x 36x 3Ax Table 45 Parts list Windows 7 Professional 64 bit recovery DVDs Language P N CRU ID Arabic 04X0004 Brazilian Portuguese 04X0005 Czech 04X0008 English Danish Finnish Swedish and Norwegian 04X0028 English Dutch French Ger...

Страница 139: ...4299 CTO Table 46 Parts list Windows 7 Ultimate 64 bit recovery DVDs Language P N CRU ID English 04X0031 Windows 7 Home Basic 32 bit DVDs 4294 CTO 4296 CTO 4297 CTO 4298 CTO 4299 CTO Table 47 Parts list Windows 7 Home Basic 32 bit DVDs Language P N CRU ID Arabic 04X0032 Brazilian Portuguese 04X0033 English 04X0042 English for India 04X0035 French 04X0036 Portuguese 04X0037 Russian 04X0038 Serbian ...

Страница 140: ... system in the following models 4296 23x 2Sx 33x 4299 37x 38x 39x Table 49 Parts list Windows 7 Home Premium 64 bit recovery DVDs Language P N CRU ID Arabic 04X0046 Brazilian Portuguese 04X0047 Czech 04X0050 English Danish Finnish Swedish and Norwegian 04X0069 English Dutch French German and Italian 04X0070 English Slovenian and Croatian 04X0071 French 04X0051 German 04X0053 Greek 04X0052 Hebrew 0...

Страница 141: ...d the file from the following Web site http www lenovo com spm Notices Lenovo may not offer the products services or features discussed in this document in all countries Consult your local Lenovo representative for information on the products and services currently available in your area Any reference to a Lenovo product program or service is not intended to state or imply that only that Lenovo pr...

Страница 142: ... presented as an illustration The result obtained in other operating environments may vary Lenovo may use or distribute any of the information you supply in any way it believes appropriate without incurring any obligation to you Any references in this publication to non Lenovo Web sites are provided for convenience only and do not in any manner serve as an endorsement of those Web sites The materi...

Страница 143: ...Microsoft Corporation in the United States other countries or both Windows Windows Vista The following are trademarks of Intel Corporation or its subsidiaries in the United States other countries or both Intel Intel Celeron Intel Core 2 Duo Intel Core 2 Solo Other company product or service names may be the trademarks or service marks of others Chapter 10 Parts list 137 ...

Страница 144: ...138 ThinkPad X220 Tablet and X220i Tablet Hardware Maintenance Manual ...

Страница 145: ......

Страница 146: ...Part Number 0A60175_01 Printed in China 1P P N 0A60175_01 0A60175_01 ...

Отзывы: