


108
Chapter 7: Adding and removing adapter cards and drives
access to a section of the system board, reconnect the
cables.
Removing adapter cards
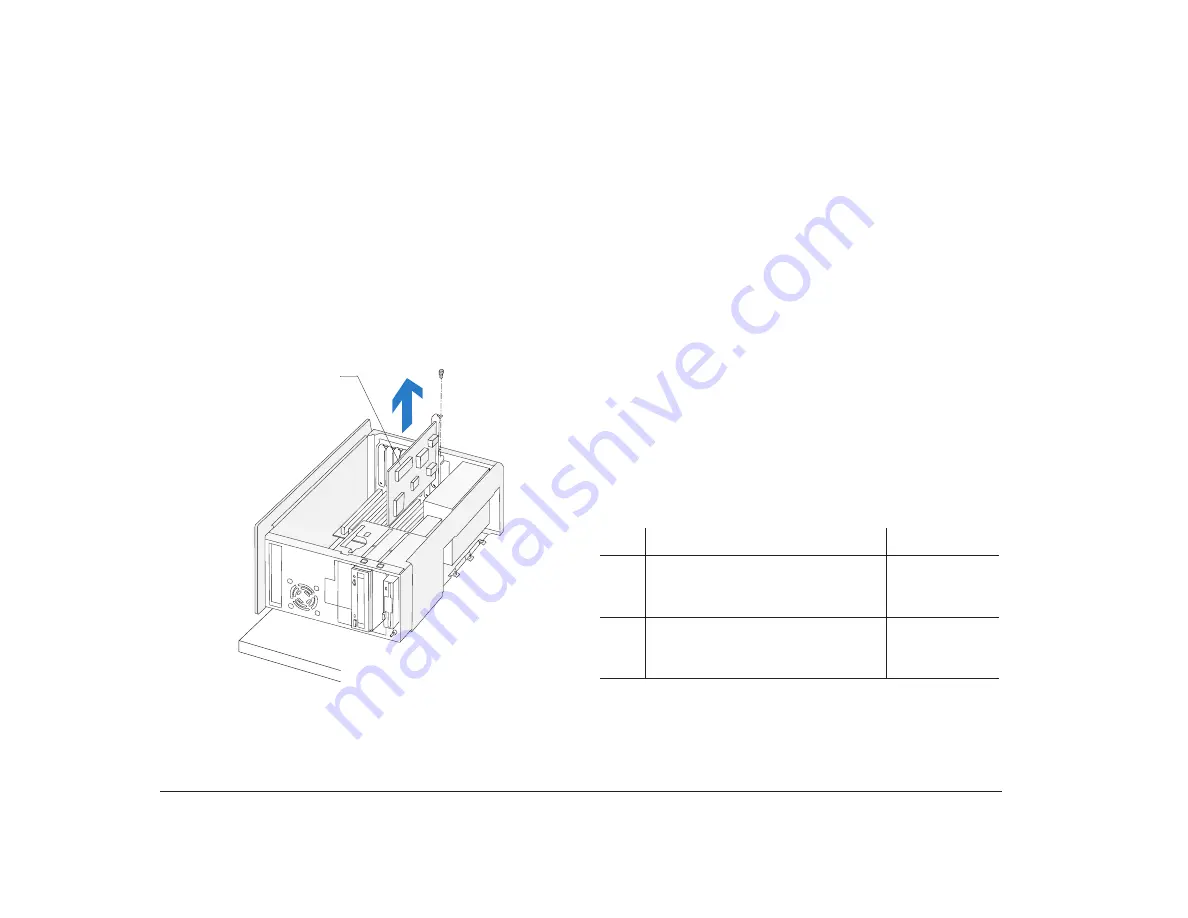
If you need to remove an adapter card, follow the
instructions in step 1 on page 107 to position the system
unit. Remove the adapter card screw. Carefully pull the
adapter card straight out of the slot so that the card’s
components do not bend. If an adapter card has cables,
disconnect them. Be sure to notice where the cables
connect to the cards. You will have to reconnect these
cables if you reinstall the card.
(Front)
(Top)
(Back)
(Bottom)
Adapter
Card
2
1
Adding and removing drives
The minitower system unit has six bays for various
types of drives. Some of these bays already hold drives
that were installed at the factory.
When you purchase a new drive, make sure you also
purchase the appropriate power and signal cables.
Identifying drive bays
The minitower system can accommodate 3.5-inch slim
and 3.5-inch half high drives, such as diskette and tape
drives. The system can also accommodate 5.25-inch half
high drives, such as diskette, hard disk, tape, and CD-
ROM drives. Four of the bays in your system have
external access. Two do not.
You can install a drive in any empty bay that
accommodates the drive’s size. Use the following table
to help you determine where to install your drive.
Bay
Drive Specifications
Bay Capacity
1
Can hold a 3.5-inch slim drive,
such as a diskette or tape drive.
101.6 x 25.4
mm
(4.0 x 1.0 in.)
2
Can hold up to a 5.25-inch half
high drive, such as a diskette, hard
disk, tape, or CD-ROM drive.
149 x 41.3 mm
(5.87 x 1.625
in.)
Note:
Using the appropriate installation hardware, you can install
smaller drives than those listed here.
Содержание Aptiva
Страница 1: ......
Страница 4: ...iv Contents at a glance...
Страница 12: ...xii Table of contents...
Страница 16: ...2 Part 1 Learning about this book...
Страница 22: ...8 Chapter 1 Using this book...
Страница 24: ...10 Part 2 Controlling system settings...
Страница 42: ...28 Chapter 3 Understanding the Rapid Resume features...
Страница 62: ...48 Chapter 4 Viewing and changing Aptiva configuration...
Страница 64: ...50 Part 3 Upgrading and replacing hardware...
Страница 136: ...122 Part 4 Troubleshooting...
Страница 164: ...150 Part 5 Technical reference...
Страница 174: ...160 Appendix A Specification tables...
Страница 194: ...180 Appendix C Modem information...
Страница 196: ...182 Appendix D Monitor terminology...


