184
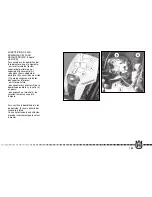
SOSTITUZIONE LAMPADA
FANALE POSTERIORE
(WR)
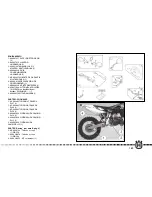
Rimuovere le due viti (1) all’interno
del parafango posteriore e la lente
(2). Spingere la lampadina
(3) verso l’interno, ruotarla in
senso antiorario e rimuoverla dal
portalampada.
Effettuata la sostituzione,
procedere inversamente per il
rimontaggio.
NOTA:
fare attenzione a non
serrare eccessivamente le viti.
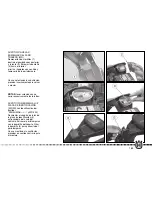
SOSTITUZIONE LAMPADA
LUCE TARGA
(escluso WR 250 con
identificazione telaio
“ZKH3H01AB--------”)
Rimuovere il supporto della luce
targa (4) sfilandolo dalla coda del
veicolo. Estrarre il portalampada
con la lampadina dal
supporto. Ruotare la lampadina (5)
per sfilarla dal portalampada.
Effettuata la sostituzione,
procedere inversamente per il
rimontaggio
REAR TAIL LIGHT BULB
REPLACEMENT (WR)
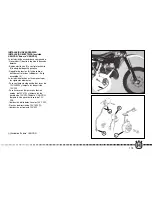
Remove the two fastening screws
(1) in the inner side of the rear
fender and the lens (2). Pull the
lamp (3) inside, turn it
counterclockwise then remove it
from the lamp holder.
After replacement, reverse
operations for reassembly.
NOTES:
make sure not to tighten
the screws excessively.
REPLACING THE
NUMBER PLATE LAMP
(excluding WR 250 with frame
identification “ZKH3H01AB--------”)
Pull out the number plate
lampholder (4) from the back of
the vehicle. Pull out the
lampholder and the bulb. Rotate
the bulb
(5) to remove from the lampholder.
Once the bulb has been replaced,
reverse the above procedure.
REMPLACEMENT DES
AMPOULES DU PHARE
ARRIÈRE (WR)
Enlever les deux vis (1) à
l’intérieur de le garde boue arrière
et la lentille (2). Pousser l’ampoule
(3) vers l’intérieur, la tourner en
sens inverse aux aiguilles d’une
montre et l’enlever du
porteampoule.
Le remplacement effectué,
inverser l’opération pour
réassembler.
NOTE:
faire attention à ne pas
serrer les vignes excessivement.
REMPLACEMENT DE
L’AMPOULE D’ECLAIRAGE
DE LA PLAQUE
D’IMMATRICULATION
(exclu WR 250 avec identification
du cadre “ZKH3H01AB--------”)
Enlever le support de l’éclairage
de la plaque d’immatriculation (4)
en l’extrayant de la queue du
véhicule. Extraire la
douille avec l’ampoule du support.
Tourner l’ampoule (5) pour
l’extraire de la douille. Après le
remplacement, procéder en sens
inverse pour le remontage.
AUSTAUSCH DES HINTEREN
SCHEIN-WERFERLAMPEN (WR)
Die zwei Schrauben (1) im
Inneren vom Hinter Kotflügel und
der Linse (2) entfernen. Die
Glühbirne (3) nach dem Inneren
schieben, im Kreise sie entgegen
der Uhrzeigerrichtung schwingen
und sie vom Lampensockel
entfernen.
Nach dem Austasch ist für das
Aufmontieren in umgekehrter
Reihenfolge zu verfahren.
ZUR BEACHTUNG:
aufpassen,
zu nicht übertrieben die schrauben
verschließen.
WECHSELN DER LAMPE IN DER
NUMMERNSCHILDBELEUCHTUNG
(ohne WR 250 mit Rahmen
Identifizierung
“ZKH3H01AB ————”)
Die Halterung der
Nummernschildbeleuchtung (4)
zum Ausbau aus dem Fahrzeug-
Heckteil herausziehen. Die
Lampenfassung
zusammen mit der Lampe aus der
Halterung herausziehen. Die
Lampe (5) drehen und aus der
Lampenfassung herausziehen.
Die Lampe wechseln und beim
Einbau in umgekehrter
Reihenfolge wie beim Ausbau
vorgehen.
IMP. 10-250-300-2009 16-06-2008 11:47 Pagina 184
Содержание 2009 WR 250
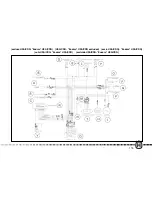
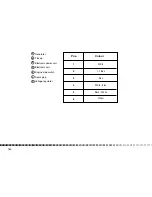
Страница 181: ...181 USA CDN B 3 4 5 1 C F D E 2 6 A G IMP 10 250 300 2009 16 06 2008 11 47 Pagina 181 ...
Страница 198: ...198 NOTES FOR USA CDN MODEL IMP 11 250 300 2009 16 06 2008 12 00 Pagina 198 ...
Страница 236: ...MEMORANDUM 236 IMP 13 250 300 2009 13 06 2008 11 26 Pagina 236 ...
Страница 237: ...237 MEMORANDUM IMP 13 250 300 2009 13 06 2008 11 26 Pagina 237 ...
Страница 238: ...MEMORANDUM 238 IMP 13 250 300 2009 13 06 2008 11 26 Pagina 238 ...
Страница 239: ...239 MEMORANDUM IMP 13 250 300 2009 13 06 2008 11 26 Pagina 239 ...
Страница 240: ...240 MEMORANDUM IMP 13 250 300 2009 13 06 2008 11 26 Pagina 240 ...
Страница 241: ...241 MEMORANDUM IMP 13 250 300 2009 13 06 2008 11 26 Pagina 241 ...
Страница 242: ...242 MEMORANDUM IMP 13 250 300 2009 13 06 2008 11 26 Pagina 242 ...

