INSTALLATION
— Outside Mount
8
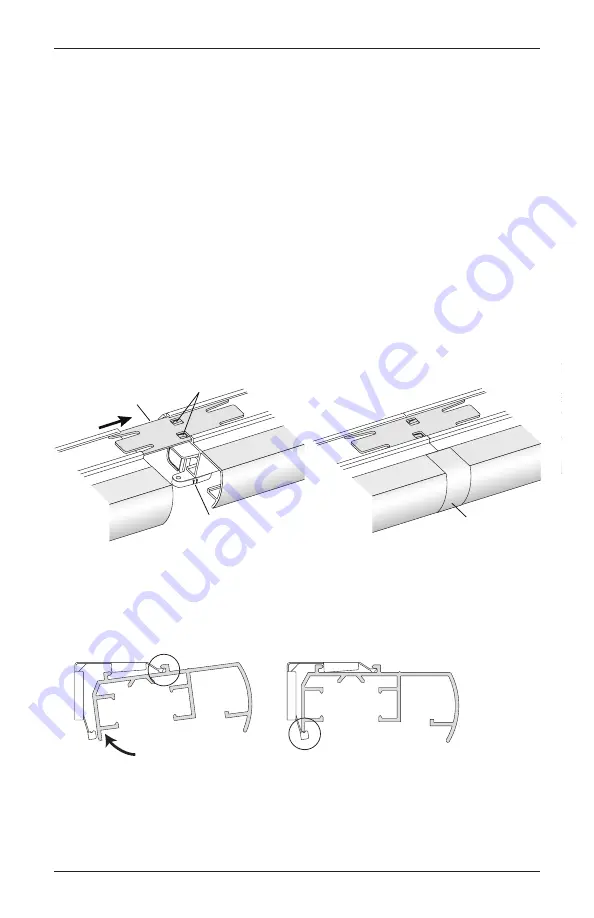
Joining Plate
Stop Plate
Tabs Angled
Down Toward
Headrail
Fabric Tab
Install the Headrail
■
Split stack only:
Headrails may arrive in two separate pieces depending on ordered width.
If so, connect the two pieces with a joining plate and center the stop plate over the seam.
➤
Insert the joining plate into the top back channel of one of the headrail pieces. The tabs
on the joining plate are slightly angled. Place the joining plate so that the tabs angle
down toward the headrail in order to secure each rail piece.
➤
Slide the second rail piece onto the joining plate and stop plate.
➤
Position the split stack stop plate so it is centered on the joint between the headrails.
Tighten the stop plate screws using the provided Allen wrench.
➤
Peel back the protective plastic covering from the front of the headrail about an inch on
either side of the joint.
➤
Attach the fabric tab. Remove the adhesive backing from the tab and press it in place
over the split on the front of the headrail.
■
Slip the headrail onto the installation brackets, until the front of each bracket fits under the
groove of the headrail.
■
Rotate the back of the headrail up and push back to snap it into the bracket.
Headrail
The front of the installation
bracket fits under the groove.
The back of the headrail
snaps into the bracket.


