1
2
3
4
1
5
6
4
4
1
iLO
PS2
PS1
D1
D2
IOM A
IOM B
IOM A
IOM B
P2
P1
P2
P1
P2
P1
P2
P1
P1
P2
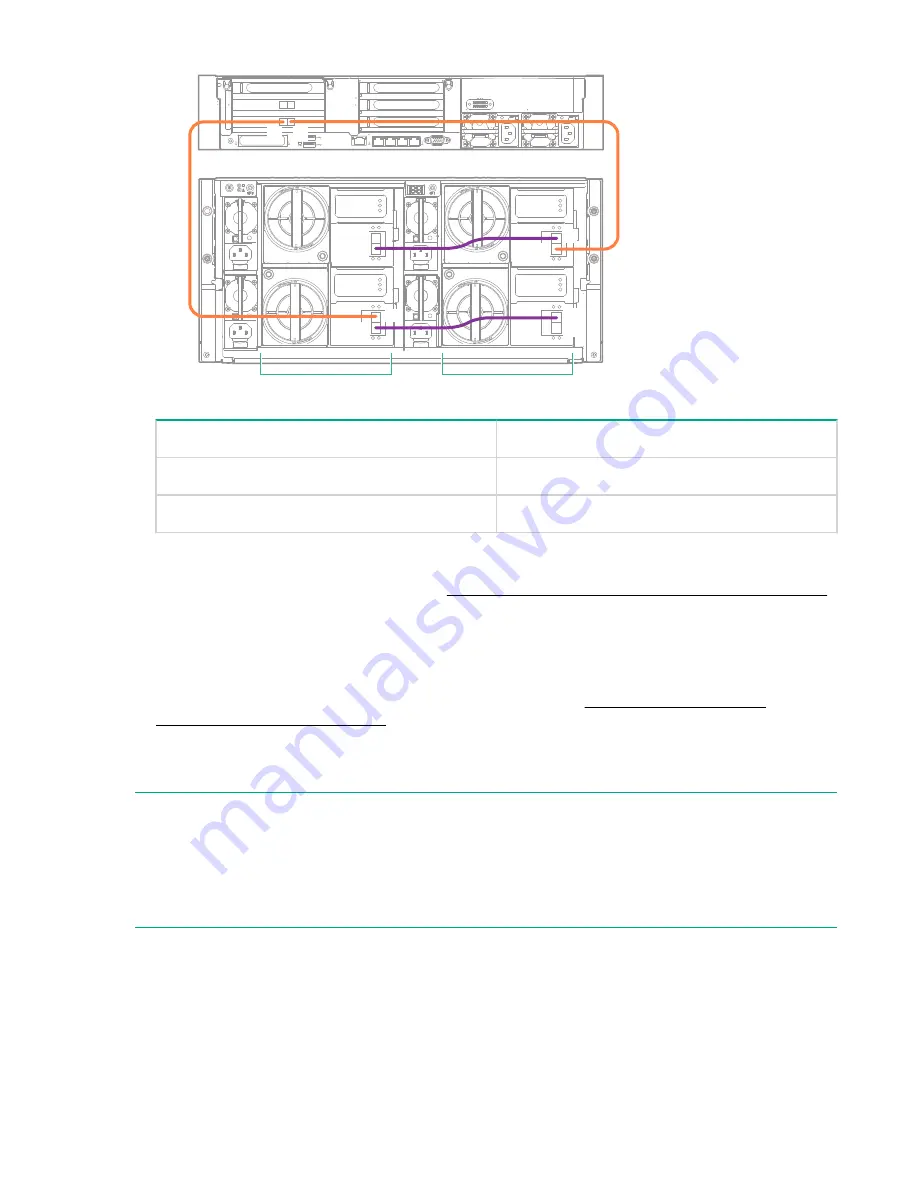
From
To
RAID card in PCIe slot 2, port 1
Drawer 1, I/O module A, port 1
RAID card in PCIe slot 2, port 2
Drawer 2, I/O module B, port 2
4.
If you purchased additional HPE StoreOnce 44TB Capacity Expansion kits for the second enclosure at
the same time as the HPE StoreOnce 60TB Capacity Expansion kit, install the sets of 11 disks in
exactly the same sequence as described in
Installing the Capacity Expansion Disk Pack, BB941A
on page 9.
5.
If Remote Support via STaTS is configured, use the following StoreOnce CLI command to disable
remote event suppression:
system disable remoteeventsuppression “2nd JBOD Capacity Upgrade”
6.
If you are adding no more enclosures at this point, continue with
on page 41.
Connecting the second Capacity Expansion Kit (JBOD 3)
NOTE:
For ease of illustration we have called the existing storage enclosure, Enclosure #1 and the daisy-chained
enclosure Enclosure #3. This numbering convention relates solely to the sequence in which the
enclosures are cabled. Within the StoreOnce software this enclosure is added to Storage Cluster 1 and
volume and pool names have C2 as part of their naming convention, for example: Pool C2_P7 to Pool
C2_P12.
• For new installations before the StoreOnce 5500 System has been powered up for the first time, the
only requirement is to connect the enclosures according to the JBOD sequence identified on the label.
• For existing installations where the StoreOnce 5500 System is powered on, follow the step-by-step
sequence described in this section. It is necessary to disconnect existing SAS cabling to daisy chain
Enclosure #3 to Enclosure #1.
Connecting the second Capacity Expansion Kit (JBOD 3)
25


