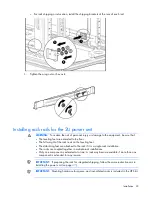
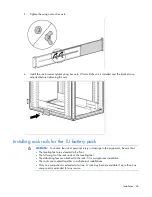
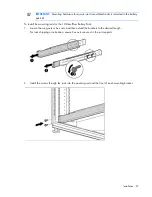
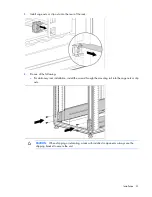
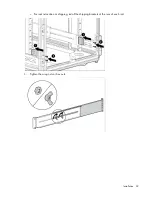
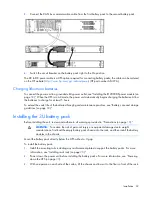


Installation 37
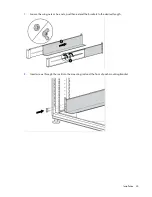
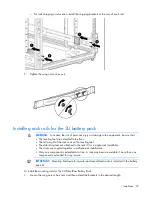
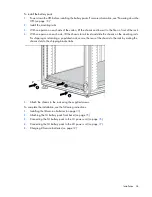
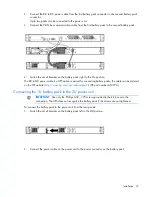
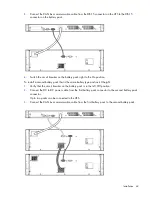
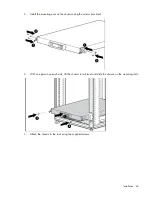
2.
Connect the DC to DC power cable from the first battery pack connector to the second battery pack
connector.
Up to two packs can be connected to the power unit.
3.
Connect the CAN bus communication cable from the first battery pack to the second battery pack.
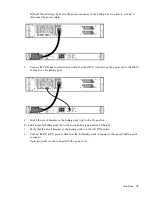
4.
Switch the circuit breaker on the battery pack right to the On position.
The DC to DC power cable is a UPS option required for connecting battery packs; the cable can be ordered
on the HP website (
http://www.hp.com/go/rackandpower
) (HP part number AF497A).
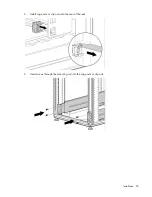
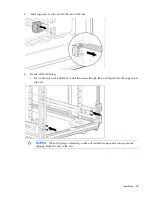
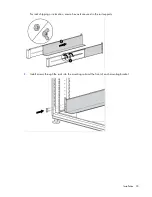
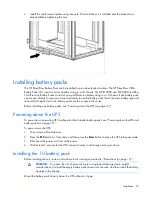
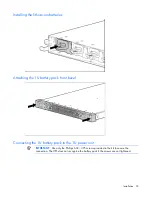
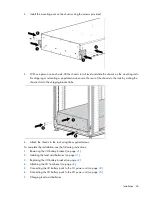
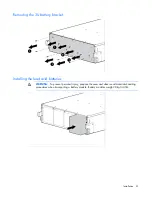
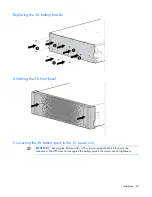
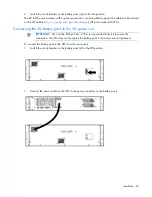
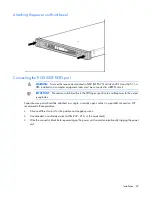
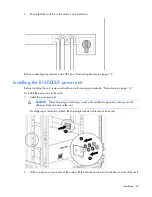
Connecting the 1U battery pack to the 2U power unit
IMPORTANT:
Use only the Phillips 6-32, .375 screws provided in the kit to secure the
connection. The UPS does not recognize the battery pack if the screws are not tightened.
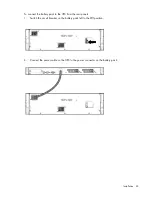
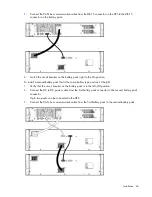
To connect the battery pack to the power unit from the rear panels:
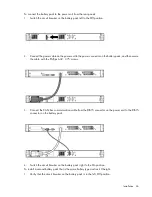
1.
Switch the circuit breaker on the battery pack left to the Off position.
2.
Connect the power cable on the power unit to the power connector on the battery pack.
Содержание R12000 XR
Страница 17: ...Overview 17 o Two 3U DirectFlow Battery Packs o Two 1U DirectFlow Battery Packs ...
Страница 98: ...Troubleshooting 98 ...
Страница 99: ...Troubleshooting 99 ...
Страница 100: ...Troubleshooting 100 ...
Страница 101: ...Troubleshooting 101 ...
Страница 102: ...Troubleshooting 102 ...
Страница 103: ...Troubleshooting 103 ...
Страница 104: ...Troubleshooting 104 ...
Страница 105: ...Troubleshooting 105 ...
Страница 106: ...Troubleshooting 106 ...
Страница 107: ...Troubleshooting 107 ...
Страница 108: ...Troubleshooting 108 ...
Страница 109: ...Troubleshooting 109 ...
Страница 110: ...Troubleshooting 110 ...
Страница 111: ...Troubleshooting 111 ...


