2-14
Removal and Replacement
HP OmniBook 2100/3000/3100
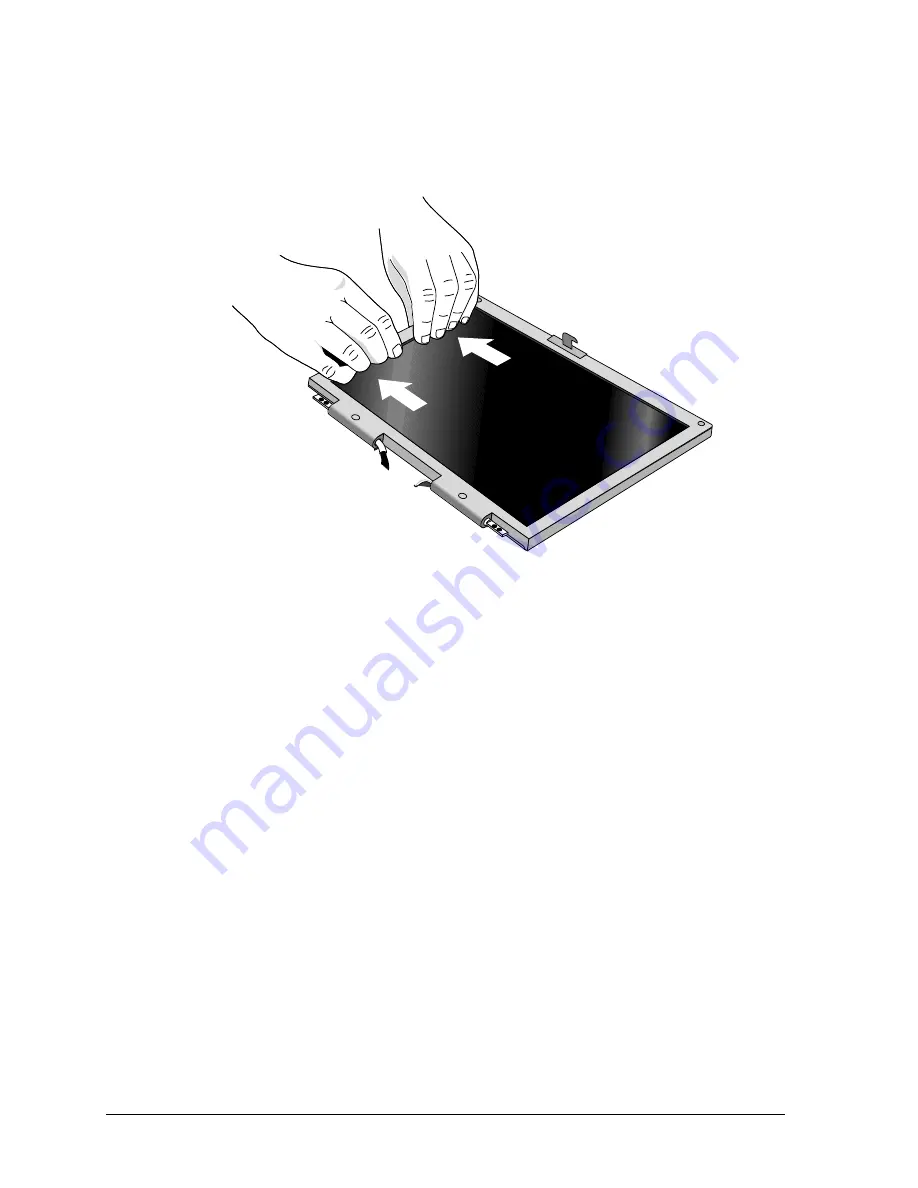
7. Starting at the left side of the display, use your fingers to gently pull the display bezel toward the
edge of the display case until the snaps release. As the snaps release, work your way up the left
side, across the top, and down the right side—until only the bottom edge is attached.
Figure 2-10. Removing the Display Bezel
8. Now use your fingers to gently lift up the inner, lower edge of the bezel away from the LCD until
the lower snaps release.
9. Remove the four screws from the corners of the LCD module.
10. For a 12-inch display (not shown), unplug the two-wire cable from the top of the inverter PCA.
For a 13-inch display (shown), lift the front edge the LCD module and move it to the left until you
can unplug the two-wire cable at the inverter PCA.
11. Tip up the top of the LCD module and gently unplug the connector from the back of the LCD
module. You have to remove a piece of Kapton tape to do this.
12. Lift out the LCD module. You may have to remove a piece of conductive tape to do this.


