2-6
Removal and Replacement
HP OmniBook 2100/3000/3100
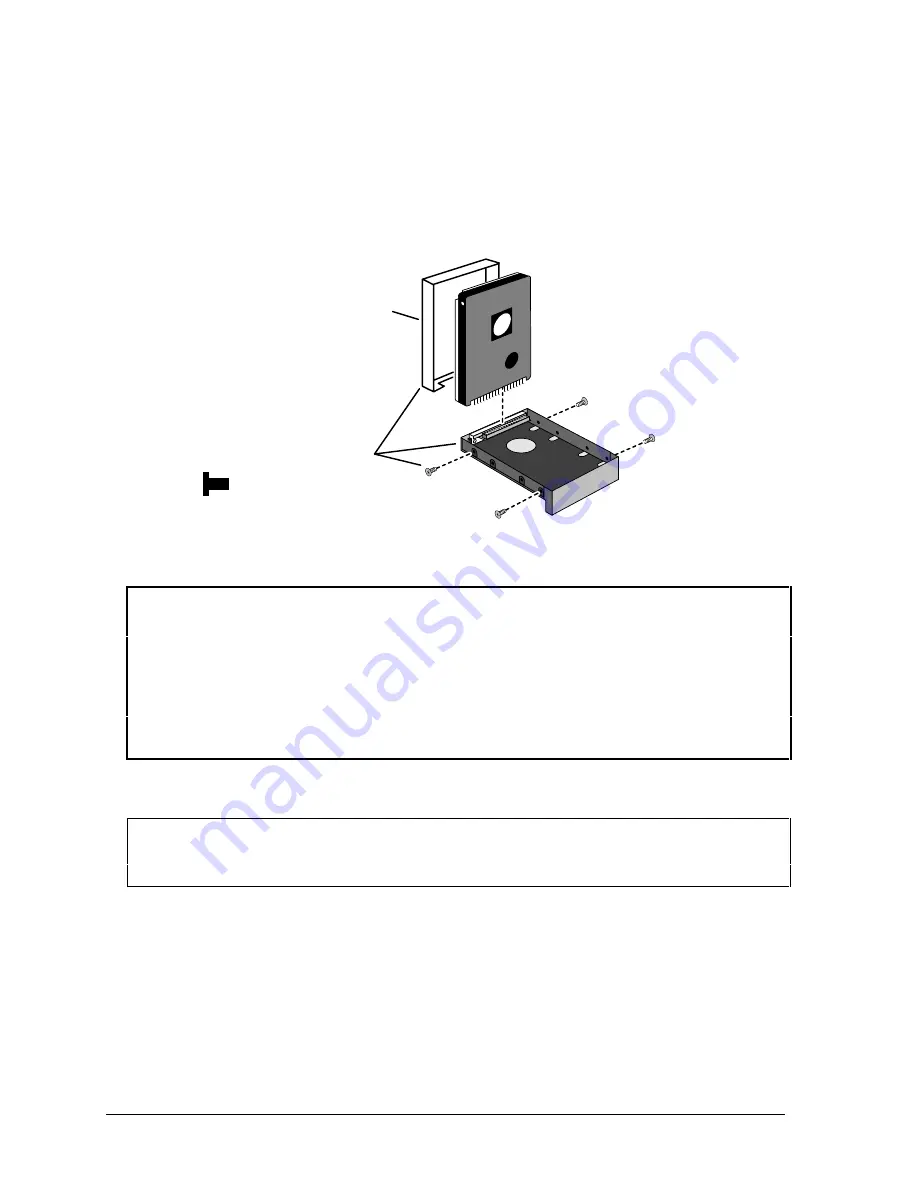
4. If you are installing a new hard drive that does not have a plastic case, you can remove the case
from the old hard drive:
•
Remove the four screws from the sides of the case.
•
Remove the top shield from the drive and swing out the free end of the hard drive about 90°,
then gently pry off the connector from the hard drive. The OmniBook 3000 may not have a
top shield.
Figure 2-4. Installing a Hard Drive in the Case
Reassembly Notes
Caution
•
Use a HDD case kit that is compatible with the thickness of the drive, 9.5 mm or 12.7 mm.
The 9.5-mm drive requires spacers inside the top shield.
•
Install the metal top shield that is included with the HDD case. If an older HDD case does not
have a top shield, you must install a newer HDD case if the drive is a Toshiba drive—
otherwise, drive performance may be reduced by magnetic interference.
•
Do not cover the vent hole in the top surface of the hard drive or in the case. If you cover the
hole, the hard drive could fail prematurely.
•
Depending on the manufacturer of the replacement drive, the hole placement for the four screws
may vary.
Important
If you are installing a new hard drive, you should create a Hibernate partition on the drive before
loading any software—see the steps below.
Creating a Hibernate Partition
1. If you do not have an OmniBook Recovery CD and internal CD-ROM module for the computer
model you are repairing, create a Support Utility floppy disk now.
After inserting a formatted floppy disk in the floppy drive, do one of the following:
¨
On a factory software installation, click Start, Programs, OmniBook, Create Support Utility
Disk.
HDD Case (Kit)
(includes M3×5mm screws)
Caution:
For a Toshiba drive, make sure
the HDD case has a metal top
shield.
Caution:
The top shield for a 9.5-mm drive
has spacers.


